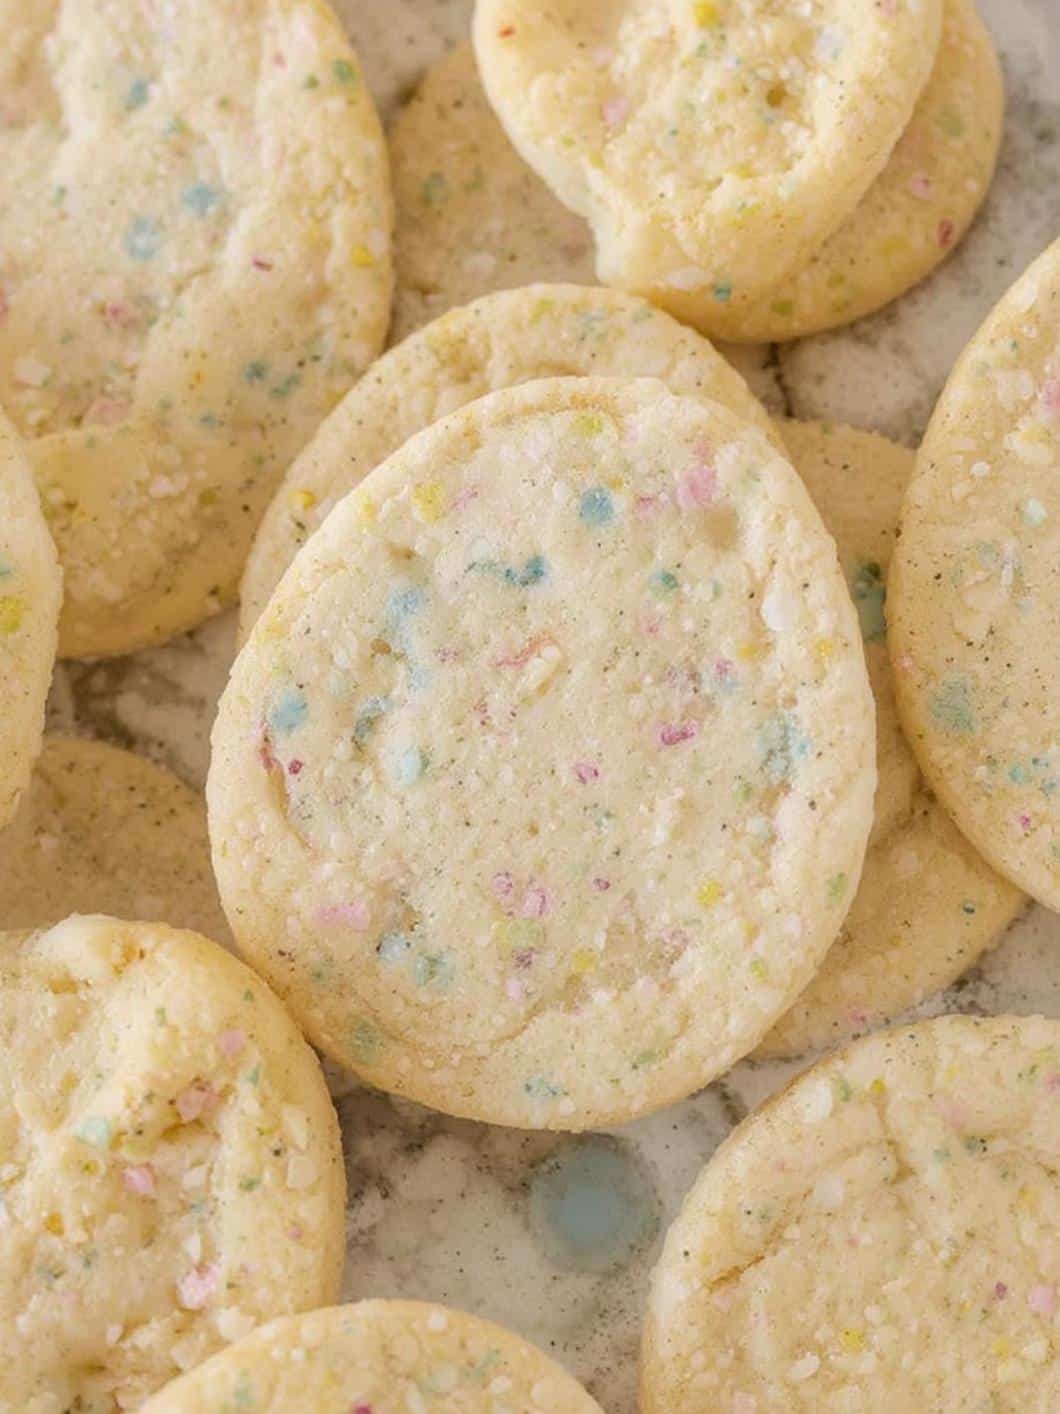
Get ready to elevate your Easter baking with these stunning and delicious Speckled Easter Egg Sugar Cookies! This recipe is more than just a sweet treat; it’s a festive activity perfect for sharing with family and friends. Furthermore, the classic, buttery flavor of a perfect cut-out sugar cookie combined with a simple yet elegant decorating technique makes these cookies the star of any spring celebration. Whether you are an experienced baker or just starting out, this guide will walk you through every step to ensure your cookies are both beautiful and incredibly tasty. Consequently, you’ll have a new favorite tradition to look forward to each year.
Why You’ll Love These Speckled Easter Egg Sugar Cookies
There are countless reasons to fall in love with this recipe for Speckled Easter Egg Sugar Cookies. First and foremost, they are visually stunning. The speckled effect mimics real bird eggs, creating a beautiful, rustic, and natural look that is surprisingly easy to achieve. In addition, the soft, buttery sugar cookie base holds its shape perfectly during baking, providing the ideal canvas for your edible art. This means no frustrating spread and no distorted egg shapes, just clean, professional-looking results every time.
Moreover, the process of decorating these cookies is incredibly fun and creative. It’s a wonderful project to do with kids or as a relaxing solo baking session. The simple flicking technique for the speckles is forgiving and doesn’t require intricate piping skills, yet the outcome is truly impressive. These cookies also make fantastic gifts or additions to an Easter basket. Imagine the delight on someone’s face when they receive a beautifully packaged box of these homemade treats. Ultimately, they offer the perfect combination of classic flavor, creative fun, and festive charm that is sure to brighten up your holiday.
Print
Speckled Easter Egg Sugar Cookies
Create stunning and delicious Speckled Easter Egg Sugar Cookies with this festive recipe. A classic, buttery cut-out sugar cookie is decorated with a simple yet elegant speckling technique, perfect for any spring celebration.
- Total Time: 8 hours
- Yield: 24 cookies
Ingredients
All-Purpose Flour
1 cup Unsalted Butter, cold and cubed
1 cup Granulated Sugar
1 Large Egg
1 tsp Vanilla Extract
1/2 tsp Baking Powder
1/4 tsp Salt
2 cups Powdered Sugar, sifted
2 tbsp Meringue Powder
4-6 tbsp Warm Water
Pastel Gel Food Coloring (blue, pink, yellow, green)
1 tsp Vanilla Extract or Vodka
1 tsp Unsweetened Cocoa Powder or Brown Gel Food Coloring
Instructions
1. In a stand mixer, cream the cold butter and granulated sugar for 2-3 minutes until light and fluffy.
2. Add the egg and vanilla extract, mixing until just combined.
3. In a separate bowl, whisk together flour, baking powder, and salt.
4. Gradually add the dry ingredients to the wet mixture on low speed until the dough comes together.
5. Form the dough into two discs, wrap in plastic, and chill in the refrigerator for at least one hour.
6. Preheat oven to 350°F (175°C) and line baking sheets with parchment paper.
7. Roll one disc of dough to 1/4-inch thickness and cut out egg shapes.
8. Place cookies on the prepared baking sheets and bake for 10-12 minutes until edges are lightly golden.
9. Let cookies cool on the baking sheet for a few minutes before transferring to a wire rack to cool completely.
10. To make the icing, combine powdered sugar and meringue powder, then slowly add warm water while mixing on low.
11. Increase mixer speed to medium-high and beat for 5-7 minutes until the icing is glossy with stiff peaks.
12. Divide icing into bowls, add desired pastel food coloring, and thin with drops of water to a flood consistency.
13. Transfer icing to piping bags, then outline and fill each cooled cookie.
14. Let the flooded cookies dry completely until hard, which can take 6-8 hours or overnight.
15. In a small bowl, mix vanilla extract or vodka with cocoa powder or brown food coloring to create a thin liquid.
16. Dip a clean paintbrush or toothbrush into the brown mixture and flick the bristles to speckle the iced cookies.
17. Allow the speckles to dry completely, about 30 minutes, before serving or storing.
Notes
To prevent cookies from spreading, use very cold butter and chill the cut-out shapes in the freezer for 10 minutes before baking. The royal icing should be a flood consistency; a drizzled ribbon should disappear back into the icing in about 15 seconds. Store decorated cookies in an airtight container at room temperature for up to one week.
- Prep Time: 30 minutes
- Cook Time: 12 minutes
- Category: Dessert
- Method: Baking
- Cuisine: American
Nutrition
- Serving Size: 1 cookie
- Calories: 185
- Sugar: 22g
- Sodium: 55mg
- Fat: 7g
- Saturated Fat: 4g
- Unsaturated Fat: 3g
- Trans Fat: 0g
- Carbohydrates: 29g
- Fiber: 0.5g
- Protein: 2g
- Cholesterol: 25mg
Essential Ingredients and Tools
To begin your baking adventure, you’ll need to gather a few key ingredients and tools. Fortunately, most of these are common pantry staples. Having everything ready before you start ensures the process goes smoothly and enjoyably. Therefore, it’s best to measure everything out in advance.
For the Sugar Cookies
The foundation of this recipe is a reliable, no-spread sugar cookie dough. This recipe is designed to be both delicious and easy to work with. You will need:
- All-Purpose Flour: Provides the structure for the cookies. Be sure to measure it correctly by spooning it into the measuring cup and leveling it off.
- Unsalted Butter: Use cold, cubed butter. The temperature is crucial for preventing the cookies from spreading.
- Granulated Sugar: For sweetness and a tender texture. While sugar is essential for baking, it’s always wise to be mindful of its role in a balanced diet, as noted by health resources like Healthline.
- Large Egg: This acts as a binder, holding all the ingredients together.
- Vanilla Extract: For a classic, warm flavor. Pure vanilla extract is always recommended for the best taste.
- Baking Powder: Provides just a tiny bit of lift without causing the cookies to spread.
- Salt: A small amount enhances all the other flavors.
For the Royal Icing and Speckle Effect
Royal icing is the key to a smooth, hard surface perfect for decorating. The speckle effect is created with a simple, clever trick.
- Powdered Sugar: The base for the royal icing. Sift it to avoid any lumps.
- Meringue Powder: This helps the icing dry hard and adds stability. It’s a safer alternative to raw egg whites.
- Warm Water: To thin the icing to the correct consistency.
- Gel Food Coloring: For coloring the icing base. Gel colors are more concentrated and won’t water down your icing. Pastel shades like blue, pink, yellow, and green work beautifully.
- Vanilla Extract or Vodka: This is mixed with the color for the speckling. The alcohol evaporates quickly, leaving just the color behind.
- Unsweetened Cocoa Powder or Brown Gel Food Coloring: To create the signature brown speckles.
Necessary Kitchen Tools
Having the right equipment makes all the difference. Here are the tools you’ll need:
- Stand Mixer or Hand Mixer with a paddle attachment
- Mixing Bowls
- Rolling Pin
- Egg-Shaped Cookie Cutter
- Baking Sheets
- Parchment Paper
- Piping Bags with small round tips (or zip-top bags with the corner snipped)
- Small bowl for the speckle mixture
- A clean, food-safe paintbrush or a new, clean toothbrush
Step-by-Step Instructions
Now that you have your ingredients and tools, it’s time to start creating your Speckled Easter Egg Sugar Cookies. Follow these steps carefully for the best results. The process can be broken down into a few main stages: making the dough, baking the cookies, and finally, the fun part of decorating.
Making the Perfect Cut-Out Sugar Cookie Dough
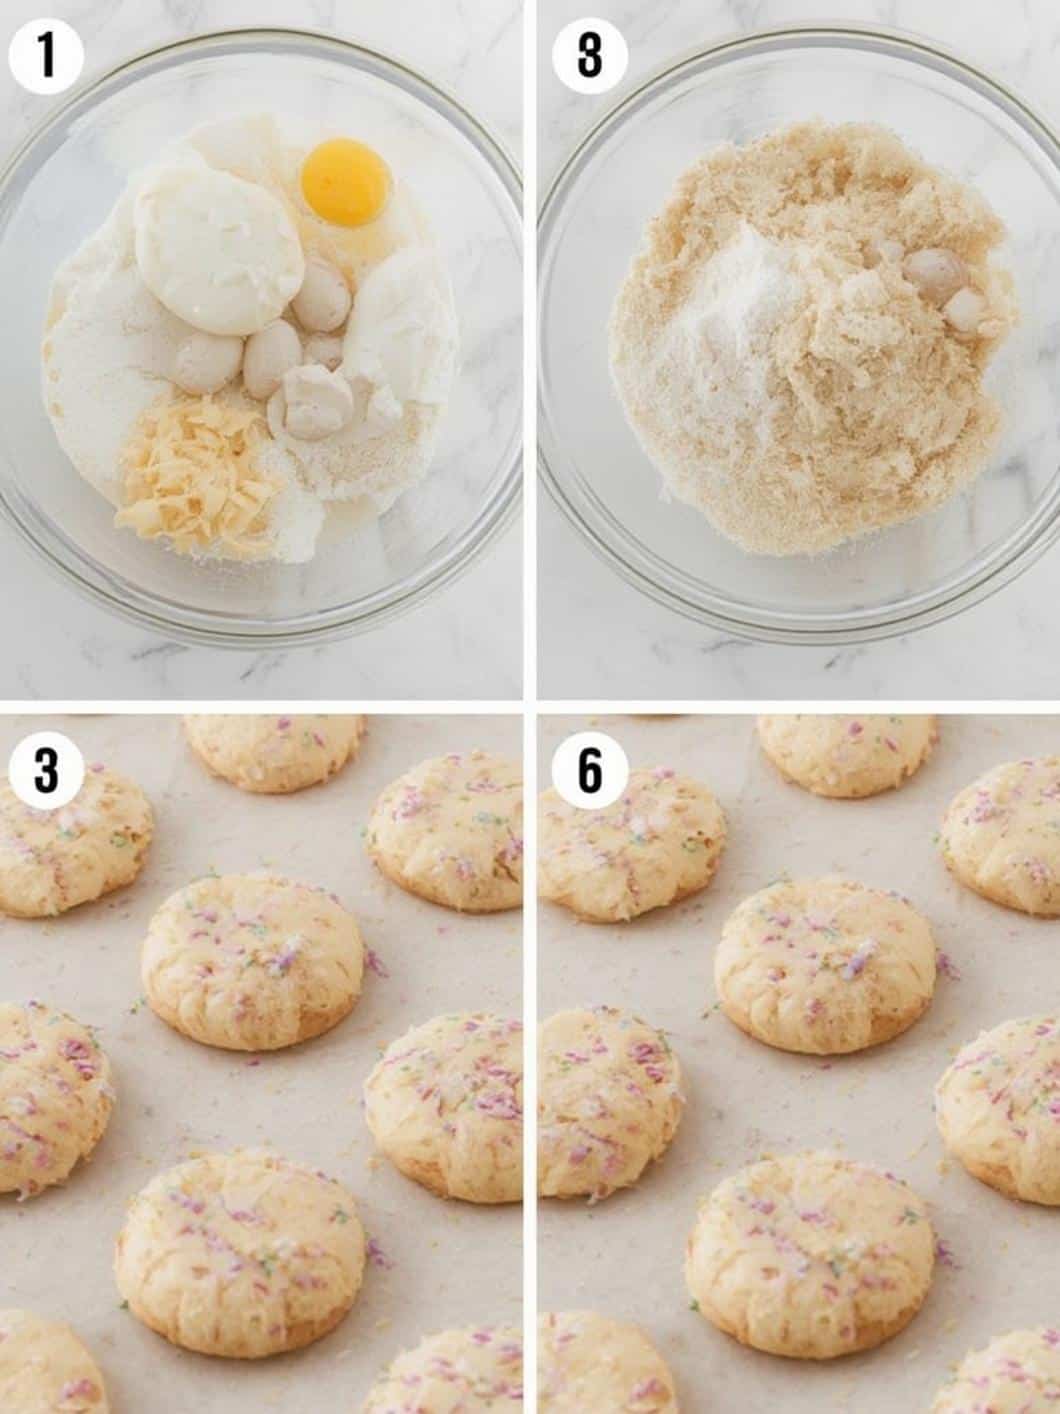
First, in the bowl of your stand mixer, cream together the cold, cubed butter and granulated sugar on medium speed until the mixture is light and fluffy. This usually takes about 2-3 minutes. Next, add the egg and vanilla extract and mix until they are just combined. Be careful not to overmix at this stage.
In a separate bowl, whisk together the all-purpose flour, baking powder, and salt. Then, with the mixer on low speed, gradually add the dry ingredients to the wet ingredients. Mix only until the dough starts to come together. Subsequently, turn the dough out onto a lightly floured surface and gently knead it a couple of times to form a cohesive ball. Divide the dough in half, wrap each half in plastic wrap, and flatten them into discs. For best results, chill the dough in the refrigerator for at least one hour.
Rolling, Cutting, and Baking
Once the dough is thoroughly chilled, preheat your oven to 350°F (175°C) and line your baking sheets with parchment paper. On a lightly floured surface, roll out one disc of dough to about 1/4-inch thickness. Using your egg-shaped cookie cutter, cut out as many cookies as you can and place them on the prepared baking sheets, leaving about an inch of space between them. For extra insurance against spreading, you can place the baking sheet with the cut-out cookies into the freezer for 10 minutes before baking. Following this, bake for 10-12 minutes, or until the edges are lightly golden. Let the cookies cool on the baking sheet for a few minutes before transferring them to a wire rack to cool completely.
Preparing the Royal Icing
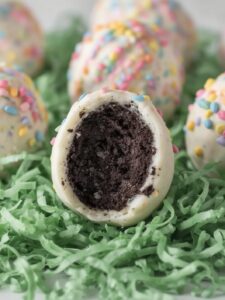
While the cookies cool, you can prepare the royal icing. In a clean mixing bowl, combine the sifted powdered sugar and meringue powder. Then, slowly add the warm water, mixing on low speed until combined. Increase the speed to medium-high and beat for about 5-7 minutes, until the icing is glossy and forms stiff peaks. At this point, you will divide the icing into smaller bowls for coloring. Add a drop or two of your desired pastel gel food coloring to each bowl and stir until you reach a uniform color. For another fun Easter treat, you could also try these no-bake Easter Egg Oreo Balls.
To achieve the right consistency for “flooding” the cookies, add a tiny bit of water at a time to your colored icing, stirring gently. You’re looking for a consistency that resembles honey; a ribbon of icing drizzled back into the bowl should disappear in about 10-15 seconds. Transfer this thinned icing to your piping bags.
Decorating and Creating the Speckle Effect
Now for the most creative part! First, outline each cookie with the icing, then immediately “flood” or fill in the center. Use a toothpick or scribe tool to guide the icing into corners and pop any air bubbles. Let the flooded cookies dry completely. This is a critical step; they need to be completely hard to the touch, which can take anywhere from 6 to 8 hours, or even overnight.
Once the icing is fully set, it’s time to speckle. In a small bowl, mix a teaspoon of vanilla extract or vodka with a little bit of unsweetened cocoa powder or brown gel food coloring to create a thin, paint-like liquid. Lay your cookies on a surface you don’t mind getting messy (like newspaper or a large piece of parchment). Dip the bristles of your clean paintbrush or toothbrush into the brown mixture. Pointing the brush towards the cookies, run your thumb across the bristles to flick tiny droplets onto the iced surface. Continue this process until you are happy with the speckled look. Allow the speckles to dry completely, which should only take about 30 minutes.
Tips and Tricks for Cookie Perfection
Achieving bakery-quality Speckled Easter Egg Sugar Cookies at home is easier than you think with a few expert tips. These suggestions will help you troubleshoot common issues and customize your creations.
Achieving the No-Spread Sugar Cookie
The most common frustration with cut-out cookies is spreading. To prevent this, always start with cold butter. Additionally, do not overmix the dough after adding the flour, as this develops gluten which can lead to tough, misshapen cookies. Most importantly, chilling the dough is non-negotiable. Chilling the cut-out shapes on the baking sheet for 10-15 minutes in the freezer right before baking is another surefire way to help them keep their perfect egg shape.
Royal Icing Consistency is Key
The success of your decorating depends heavily on the icing’s consistency. If it’s too thick, it will be difficult to flood the cookie smoothly. Conversely, if it’s too thin, it will run over the edges. Remember the 15-second rule: a line of icing drizzled into the bowl should take about 15 seconds to melt back into the surface. Adjust by adding powdered sugar to thicken or tiny drops of water to thin.
Customizing Your Easter Eggs
Don’t be afraid to get creative! While pastels are classic for Easter, you can use any colors you like. For example, you could create a beautiful robin’s egg blue or a soft lavender. You can even try layering colors. For a different but equally festive treat, consider making these Strawberry Shortcake Easter Egg Bombs, which are another fun, egg-shaped dessert.
Storage and Make-Ahead Tips
Proper storage is important to keep your cookies fresh. Once completely dry, store the decorated cookies in a single layer in an airtight container at room temperature for up to a week. To prevent the delicate decorations from being damaged, you can place a sheet of parchment paper between layers if you need to stack them. It’s also important to follow general food safety guidelines for storing baked goods, which you can learn more about from sources like WebMD. You can make the cookie dough up to 3 days in advance and store it in the refrigerator, or freeze it for up to 3 months.
The Nutritional Aspect of Homemade Cookies
Homemade treats like these Speckled Easter Egg Sugar Cookies offer a wonderful opportunity to enjoy a special dessert made with love and simple ingredients. While they are certainly an indulgence, baking at home gives you full control over what goes into your food. You can choose high-quality butter, pure vanilla, and fresh eggs. It is important, of course, to enjoy these cookies as part of a balanced lifestyle. Indulgent desserts are a joyful part of celebrations and traditions. For more information on creating a healthy eating plan, reputable sources like the Mayo Clinic offer comprehensive guides and tips. Making and sharing these cookies is as much about the experience and connection as it is about the sweet result.
Conclusion
In conclusion, creating beautiful Speckled Easter Egg Sugar Cookies is a rewarding and festive activity that is perfect for the spring season. With a reliable no-spread cookie recipe and a simple yet impressive decorating technique, anyone can achieve stunning results. This guide has provided all the necessary steps, from making the dough to creating the artistic speckle effect. Furthermore, the tips and tricks included will help ensure your baking project is a complete success. Ultimately, these delicious and charming Speckled Easter Egg Sugar Cookies are sure to become a cherished part of your Easter celebrations for years to come.
Frequently Asked Questions
Can I use a different kind of icing?
Yes, you can. While royal icing is recommended because it dries hard and creates a perfect canvas for the speckles, a simple buttercream or a basic powdered sugar glaze would also be delicious. However, keep in mind that these softer icings may not hold the speckle design as crisply and will need to be stored more carefully.
Why did my sugar cookies spread?
Cookie spread is typically caused by a few factors. The most common reasons are using butter that is too soft, not chilling the dough long enough, or over-mixing the dough. Ensure your butter is cold, chill the dough for at least an hour, and also chill the cut-out shapes before they go into the oven for the best results.
How long do these Speckled Easter Egg Sugar Cookies last?
When stored properly in an airtight container at room temperature, these cookies will stay fresh for up to one week. Be sure the icing is completely dry before you store them to prevent them from sticking together.
Can I make the dough ahead of time?
Absolutely! The sugar cookie dough can be made up to three days in advance and kept well-wrapped in the refrigerator. You can also freeze the dough for up to three months. Just be sure to let it thaw in the refrigerator before rolling it out.