Valentine’s Day is just around the corner, and what better way to show your love than with a classic treat made with a heartfelt twist? Forget the store-bought chocolates this year. Instead, let’s bake something truly special. This guide will walk you through creating the most delicious and adorable heart shaped chocolate chip cookies for Valentine’s Day. These cookies combine the timeless comfort of a chewy chocolate chip cookie with the festive charm of the season of love. Consequently, they are the perfect homemade gift for your significant other, family, friends, or even as a fun baking project with the kids.
Moreover, this recipe is designed for bakers of all skill levels. Even if you’re a beginner, you can achieve beautiful, perfectly shaped cookies that taste as good as they look. We will cover everything from the essential ingredients to the step-by-step process, including valuable tips to ensure your baking adventure is a sweet success. So, preheat your oven and get ready to spread some love, one cookie at a time. These heart shaped chocolate chip cookies are bound to become a new Valentine’s Day tradition in your home.
Why You’ll Love These Heart Shaped Chocolate Chip Cookies for Valentine’s Day
There are countless reasons to fall in love with this particular recipe. First and foremost, it starts with a classic, no-fail chocolate chip cookie dough. This isn’t just any dough; it’s a carefully balanced recipe that results in cookies that are perfectly soft and chewy on the inside with slightly crisp edges. In addition, the flavor is rich with buttery vanilla notes and packed with gooey, melted chocolate chips in every single bite. The familiar taste is something everyone adores, making it a guaranteed crowd-pleaser.
Beyond the amazing taste, the heart shape obviously makes these cookies an ideal treat for Valentine’s Day. It’s a simple yet incredibly effective way to make a classic cookie feel extra special and festive. Furthermore, they are wonderfully versatile. You can gift them in a decorative box, serve them as a dessert after a romantic dinner, or pack them in your children’s lunchboxes for a sweet surprise. Baking them is also a joyful activity in itself. The process of mixing, rolling, and cutting the dough can be a relaxing and rewarding experience. Ultimately, these heart shaped chocolate chip cookies for Valentine’s Day are more than just a dessert; they are a delicious expression of affection.
Print
Heart Shaped Chocolate Chip Cookies for Valentine’s Day: The 15 Ultimate Steps for a Perfect Batch
Celebrate love with these festive heart-shaped chocolate chip cookies — soft, chewy, and full of gooey chocolate, they’re a perfect homemade treat for Valentine’s Day.
- Total Time: 2 hours 45 minutes
- Yield: 24 cookies 1x
Ingredients
2 1/4 cups all-purpose flour
1 teaspoon baking soda
1/2 teaspoon salt
1 cup unsalted butter, softened
3/4 cup granulated sugar
3/4 cup packed brown sugar
2 large eggs
1 teaspoon vanilla extract
2 cups semi-sweet chocolate chips
Optional: Valentine’s sprinkles, sea salt flakes, melted chocolate or icing for decorating
Instructions
1. In a medium bowl, whisk together the flour, baking soda, and salt. Set aside.
2. In a large bowl, cream together softened butter, granulated sugar, and brown sugar until light and fluffy, about 2–3 minutes.
3. Beat in eggs one at a time, then add vanilla extract and mix until fully combined.
4. Gradually add dry ingredients to the wet mixture, mixing on low speed until just combined.
5. Fold in the chocolate chips using a spatula until evenly distributed.
6. Divide dough in half, shape into disks, wrap in plastic wrap, and refrigerate for at least 2 hours or overnight.
7. Preheat oven to 375°F (190°C) and line baking sheets with parchment paper.
8. Roll out one disk of chilled dough on a lightly floured surface to about 1/4 inch thick.
9. Use a heart-shaped cookie cutter to cut cookies and place 2 inches apart on baking sheets.
10. Reroll dough scraps and repeat cutting until all dough is used.
11. Optional: Chill shaped cookies on baking sheet for 10–15 minutes before baking for cleaner edges.
12. Bake for 9–11 minutes until edges are lightly golden and centers still appear slightly soft.
13. Cool on baking sheet for 5 minutes before transferring to a wire rack to cool completely.
14. Once cooled, optionally decorate with melted chocolate, icing, or sprinkles.
15. Store cookies in an airtight container at room temperature for up to 5 days or freeze for longer storage.
Notes
For sharp cookie edges, chill cut-out cookies before baking. Use a combination of brown and white sugar for a chewy center. Be careful not to overbake — cookies will continue baking on the pan after removal. Dough can be made ahead and refrigerated for up to 3 days or frozen for 3 months. Don’t have a heart-shaped cutter? Shape dough into hearts by hand or decorate round cookies with heart-themed designs.
- Prep Time: 30 minutes
- Cook Time: 10 minutes
- Category: Dessert
- Method: Baking
- Cuisine: American
- Diet: Vegetarian
Nutrition
- Serving Size: 1 cookie
- Calories: 190
- Sugar: 15g
- Sodium: 105mg
- Fat: 9g
- Saturated Fat: 5g
- Unsaturated Fat: 3g
- Trans Fat: 0g
- Carbohydrates: 25g
- Fiber: 1g
- Protein: 2g
- Cholesterol: 25mg
Essential Ingredients for the Perfect Batch
To create the best cookies, you need to start with high-quality ingredients. The good news is that this recipe uses simple pantry staples you likely already have on hand. As a result, you can whip up a batch whenever the mood strikes. Here’s what you’ll need:
For the Cookie Dough
- All-Purpose Flour: This provides the main structure for our cookies. Be sure to measure it correctly by spooning it into your measuring cup and leveling it off.
- Baking Soda: This is our leavening agent, which helps the cookies rise and become soft.
- Salt: A crucial ingredient that balances the sweetness and enhances the overall flavor.
- Unsalted Butter: Use softened, room temperature butter. This allows it to cream properly with the sugars, creating a light and airy texture.
- Granulated Sugar: Provides sweetness and helps the cookies spread.
- Brown Sugar: Adds moisture and a hint of caramel flavor, which is key for a chewy cookie.
- Eggs: These act as a binder, holding the dough together. Use large, room-temperature eggs for the best results.
- Vanilla Extract: Pure vanilla extract adds a wonderful depth of flavor that complements the chocolate.
- Semi-Sweet Chocolate Chips: The star of the show! Use good quality chocolate chips for the best melted, gooey texture. Using dark chocolate can also offer some health benefits, as noted by sources like Healthline.
Optional Add-ins and Decorations
- Valentine’s Sprinkles: For an extra festive touch, you can mix sprinkles into the dough or add them on top before baking.
- Sea Salt Flakes: A light sprinkle on top of the cookies before baking can create a delightful sweet and salty combination.
- Melted Chocolate or Icing: After the cookies have cooled, you can drizzle them with melted white, milk, or dark chocolate for a professional look.
Tools and Equipment Needed
Having the right tools makes the baking process smoother and more enjoyable. Fortunately, you don’t need any fancy or professional-grade equipment for this recipe. Here is a list of the basic kitchen tools you’ll want to have ready before you begin.
- Mixing Bowls: You will need at least one large bowl for creaming the butter and sugars and a medium bowl for mixing the dry ingredients.
- Electric Mixer: A stand mixer or a hand mixer will make creaming the butter and sugar much easier and more effective. However, you can also do this by hand with a whisk and some determination.
- Measuring Cups and Spoons: For accurate measurements, which are crucial in baking.
- Whisk and Spatula: A whisk is for combining the dry ingredients, and a spatula is for scraping the bowl and folding in the chocolate chips.
- Heart-Shaped Cookie Cutter: This is the key tool for getting that perfect Valentine’s shape. A 3-inch cutter is a great size.
- Rolling Pin: To roll out the cookie dough to an even thickness.
- Baking Sheets: Two large baking sheets are ideal, so one can be in the oven while you prepare the next batch.
- Parchment Paper: Lining your baking sheets with parchment paper prevents the cookies from sticking and makes cleanup a breeze.
- Wire Cooling Rack: This allows air to circulate around the cookies as they cool, preventing them from becoming soggy on the bottom.
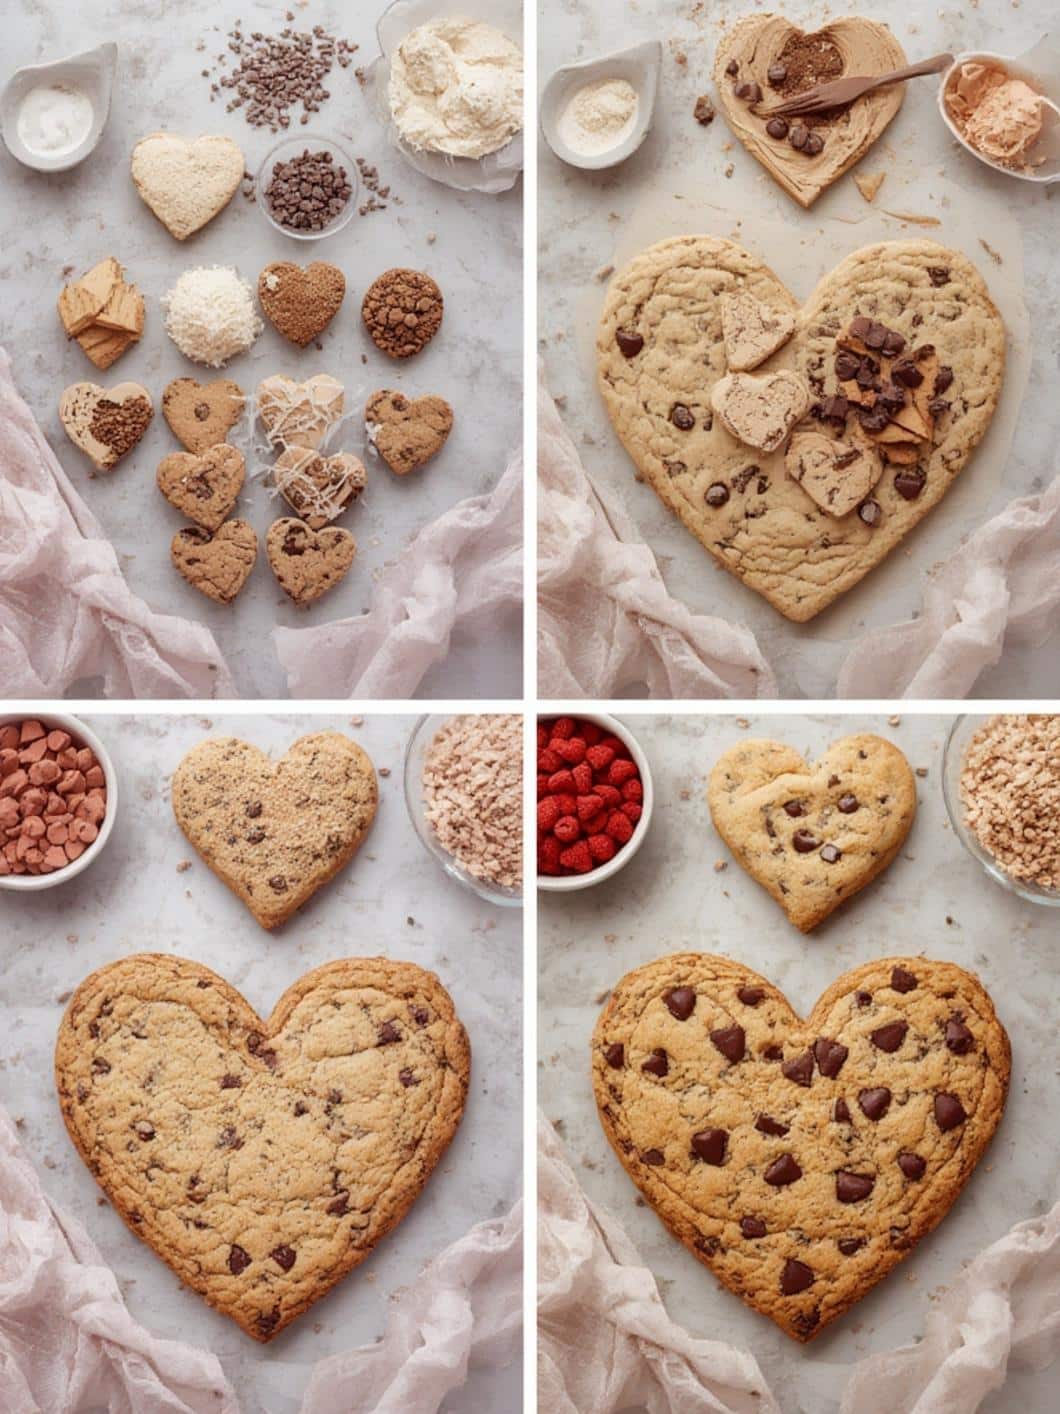
Step-by-Step Instructions
Now for the fun part! Follow these simple steps to create your beautiful and delicious heart shaped chocolate chip cookies. Remember to take your time and enjoy the process.
- Combine Dry Ingredients: First, in a medium bowl, whisk together the all-purpose flour, baking soda, and salt. Set this mixture aside for later.
- Cream Butter and Sugars: Next, in a large bowl using an electric mixer, beat the softened butter, granulated sugar, and brown sugar together on medium speed until the mixture is light and fluffy. This usually takes about 2-3 minutes.
- Add Wet Ingredients: Add the eggs one at a time, beating well after each addition. Then, mix in the vanilla extract.
- Combine Wet and Dry Mixtures: Gradually add the dry ingredient mixture to the wet ingredients, mixing on low speed until just combined. Be careful not to overmix the dough.
- Fold in Chocolate Chips: Using a spatula, gently fold in the semi-sweet chocolate chips until they are evenly distributed throughout the dough.
- Chill the Dough: This is a critical step. Divide the dough in half, flatten each half into a disk, and wrap them in plastic wrap. Refrigerate the dough for at least 2 hours, or preferably overnight. Chilling prevents the cookies from spreading too much and makes the dough much easier to handle.
- Preheat Oven and Prepare Pans: When you’re ready to bake, preheat your oven to 375°F (190°C). Then, line two baking sheets with parchment paper.
- Roll Out the Dough: On a lightly floured surface, take one disk of chilled dough and roll it out to about 1/4-inch thickness.
- Cut Out the Hearts: Using your heart-shaped cookie cutter, cut out shapes from the rolled dough. Subsequently, place them about 2 inches apart on the prepared baking sheets.
- Reroll Scraps: Gather the dough scraps, gently press them together, and reroll to cut out more cookies. Try not to overwork the dough.
- Bake the Cookies: Bake for 9-11 minutes, or until the edges are lightly golden brown. The centers should still look slightly soft.
- Cool the Cookies: Let the cookies cool on the baking sheet for 5 minutes before transferring them to a wire rack to cool completely. This helps them set up properly.
- Decorate (Optional): Once the cookies are completely cool, you can decorate them with melted chocolate, icing, or extra sprinkles if you wish.
Tips and Tricks for Cookie Perfection
Achieving bakery-quality cookies at home is easy with a few expert tips. Following these suggestions will help you master the art of making perfect heart shaped chocolate chip cookies every time.
Achieving the Perfect Shape
The most common issue with cutout cookies is losing their shape in the oven. The number one trick, as mentioned, is to chill the dough thoroughly. In addition, you can place the cut-out cookies on the baking sheet back into the freezer for 10-15 minutes right before baking. This extra chill helps the butter solidify again, which significantly reduces spreading and keeps those heart edges sharp and defined.
Ensuring Chewy Cookies
For a perfectly chewy texture, be careful not to overbake your cookies. You should pull them from the oven when the edges are just starting to turn golden and the centers still look a little underdone. They will continue to bake on the hot pan for a few minutes after you take them out. Using more brown sugar than white sugar also contributes to a chewier, more moist cookie.
Storing Your Cookies
To keep your heart shaped cookies fresh, store them in an airtight container at room temperature for up to 5 days. For long-term storage, you can freeze the baked cookies or the unbaked dough. To freeze the dough, wrap the disks tightly in plastic wrap and then place them in a freezer bag. They can be frozen for up to 3 months. For other festive Valentine’s ideas, you might also enjoy making some delicious heart-shaped brownies.
Creative Decoration Ideas
While these cookies are delicious on their own, decorating them can be a lot of fun. You can dip half of each cookie in melted white or dark chocolate for an elegant look. Similarly, adding a simple drizzle of pink or red icing can make them pop. For a different flavor profile, consider trying another festive recipe like these Valentine strawberry white chocolate cookies. No matter how you decorate, the effort will surely be appreciated. Proper food handling and storage are important, and you can find reliable information at reputable sources like the Mayo Clinic.
Conclusion
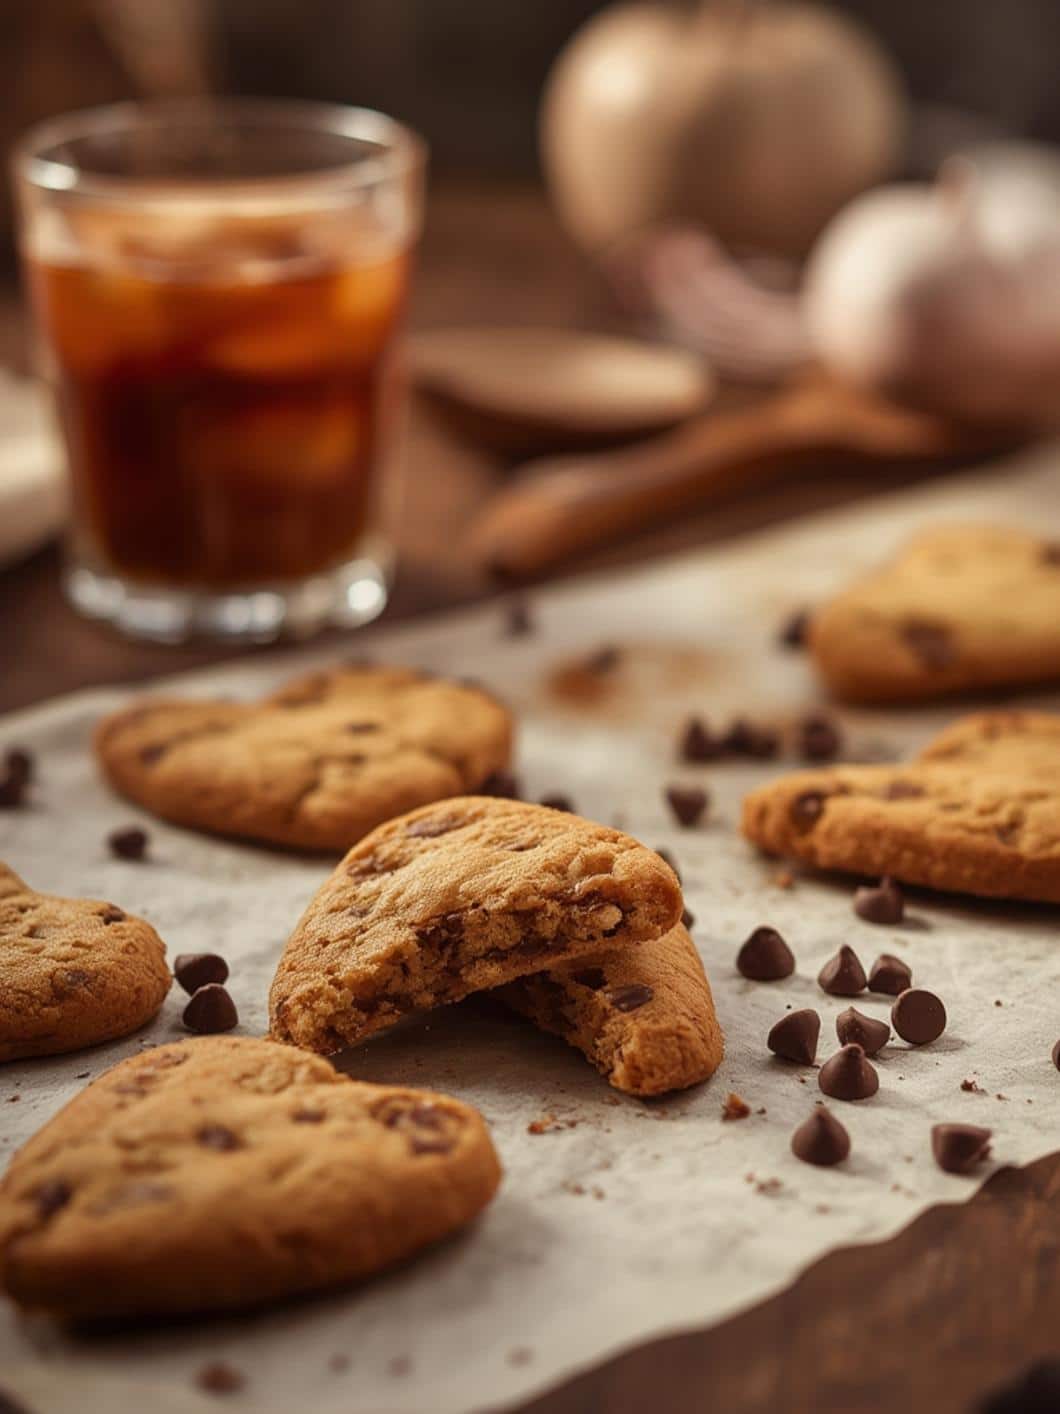
Baking a batch of these heart shaped chocolate chip cookies for Valentine’s Day is a wonderful way to celebrate the occasion with a personal, homemade touch. This recipe provides a classic, beloved flavor in a festive and charming shape that is perfect for sharing with those you love. By following the detailed steps and tips provided, you are well on your way to creating beautiful cookies that are both chewy and delicious. Whether you are baking for a partner, your family, or just for fun, these cookies are a sweet gesture that will surely be remembered. So, embrace the joy of baking and create some heartfelt memories this Valentine’s Day.
Frequently Asked Questions
Can I make the cookie dough ahead of time?
Absolutely! The cookie dough can be made up to 3 days in advance and stored in the refrigerator. In fact, chilling the dough for an extended period can even enhance the flavor. Just be sure to wrap it tightly in plastic wrap to prevent it from drying out.
What if I don’t have a heart-shaped cookie cutter?
No problem at all. You can still make festive cookies. One way is to roll the dough into balls, press them down slightly, and then gently pinch and shape the dough into a heart shape with your fingers before baking. Alternatively, you can bake regular round cookies and decorate them with heart-shaped sprinkles or icing.
How do I prevent my cookies from spreading too much?
The key to preventing spread is cold dough and a hot oven. Chilling the dough for at least two hours is essential. Also, ensure your oven is fully preheated before putting the cookies in. If your kitchen is warm, work with only half the dough at a time while keeping the other half refrigerated.