Have you ever wanted to bake a dessert that truly stops people in their tracks? Something beyond the standard chocolate chip cookie or classic fudge brownie? If so, then you are in for an incredible treat. Today, we are diving into the vibrant and delicious world of Green Velvet Brownies. This eye-catching dessert is a fantastic twist on the beloved red velvet cake, offering a unique flavor and a stunning appearance that’s perfect for holidays like St. Patrick’s Day, springtime gatherings, or any occasion that calls for a pop of color.
Essentially, these brownies boast that signature “velvet” texture, which is incredibly soft, moist, and tender. They have a subtle hint of chocolate and a slight tang, which is then perfectly complemented by a rich and creamy cream cheese frosting. Consequently, every bite is a delightful experience. Get ready to learn how to create these show-stopping Green Velvet Brownies from scratch, a recipe that is sure to become a new favorite in your baking collection.
What Makes Green Velvet Brownies So Special?
Before we jump into the recipe, it is helpful to understand what makes a “velvet” dessert, well, velvet. The magic lies in a simple chemical reaction. Specifically, the combination of acidic ingredients like buttermilk and vinegar with a small amount of cocoa powder creates an exceptionally fine and tender crumb. This reaction not only produces a soft texture but also enhances the flavor profile, giving it a subtle complexity that is hard to resist.
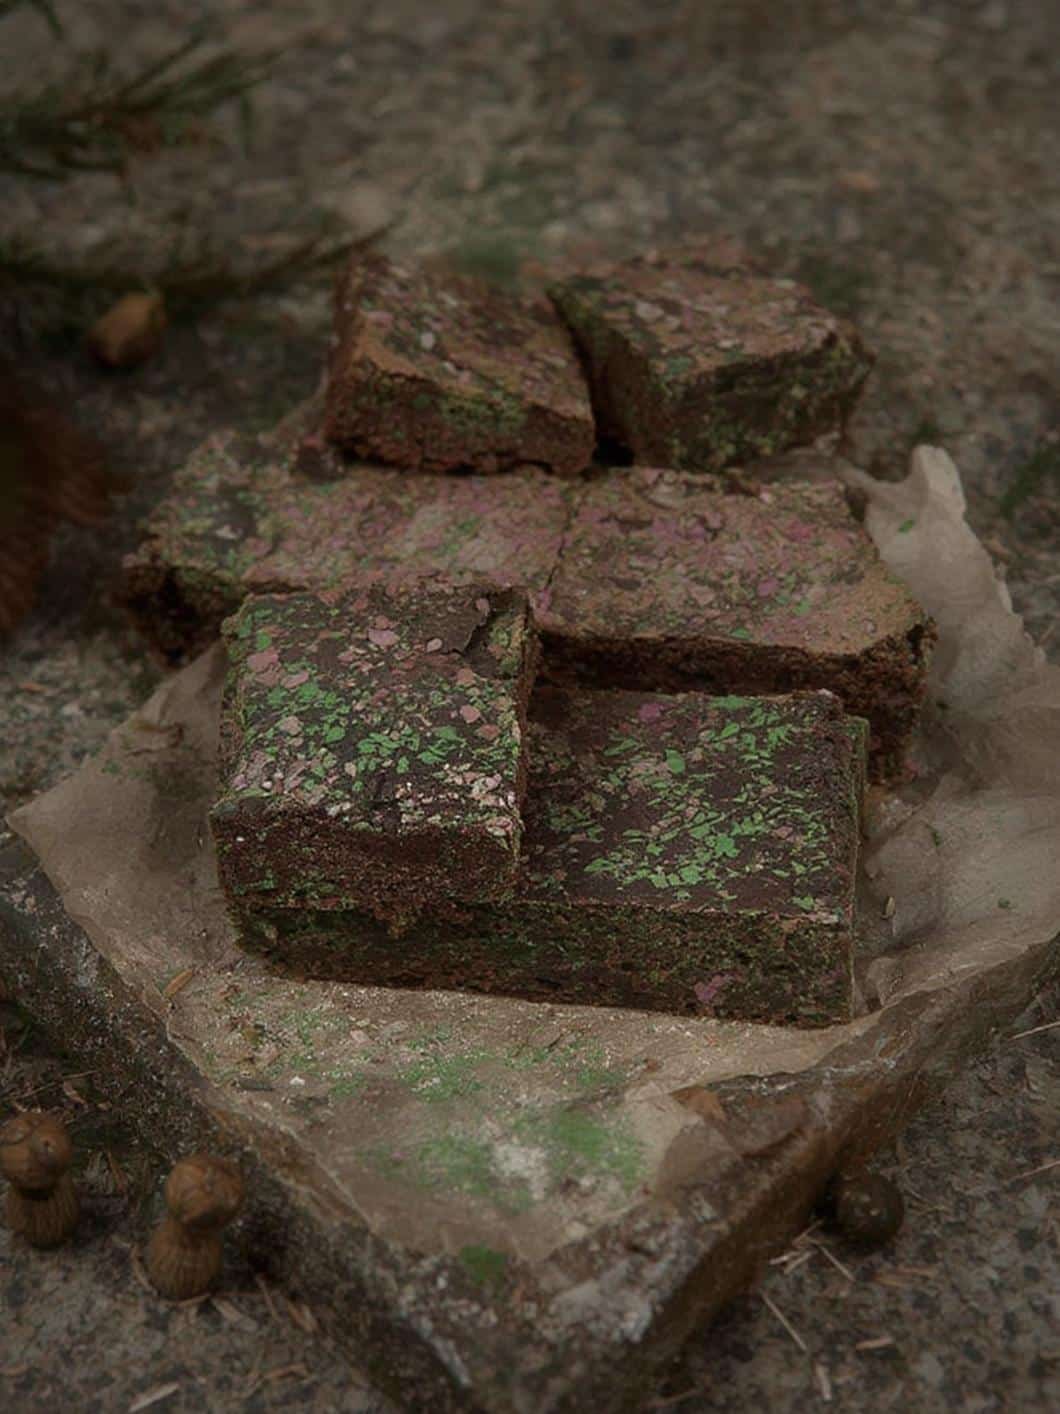
Furthermore, the most obvious characteristic of these brownies is their stunning green color. Unlike their red velvet counterparts, these treats offer a festive and cheerful hue that is perfect for a variety of celebrations. The vibrant green makes them a standout dessert on any table. For example, they are an absolute must-have for a St. Patrick’s Day party, but they also fit beautifully with Easter spreads and spring-themed events. This visual appeal is a huge part of their charm.
In addition to texture and color, the flavor of Green Velvet Brownies is uniquely balanced. They are not intensely chocolatey; instead, the cocoa powder provides just a whisper of chocolate flavor. The unsweetened cocoa powder provides not only flavor but also potential health benefits, as noted by sources like Healthline. This mildness allows the tangy notes from the buttermilk and the rich sweetness of the cream cheese frosting to shine through, creating a harmonious and sophisticated taste that is less overwhelming than a traditional fudge brownie.
Print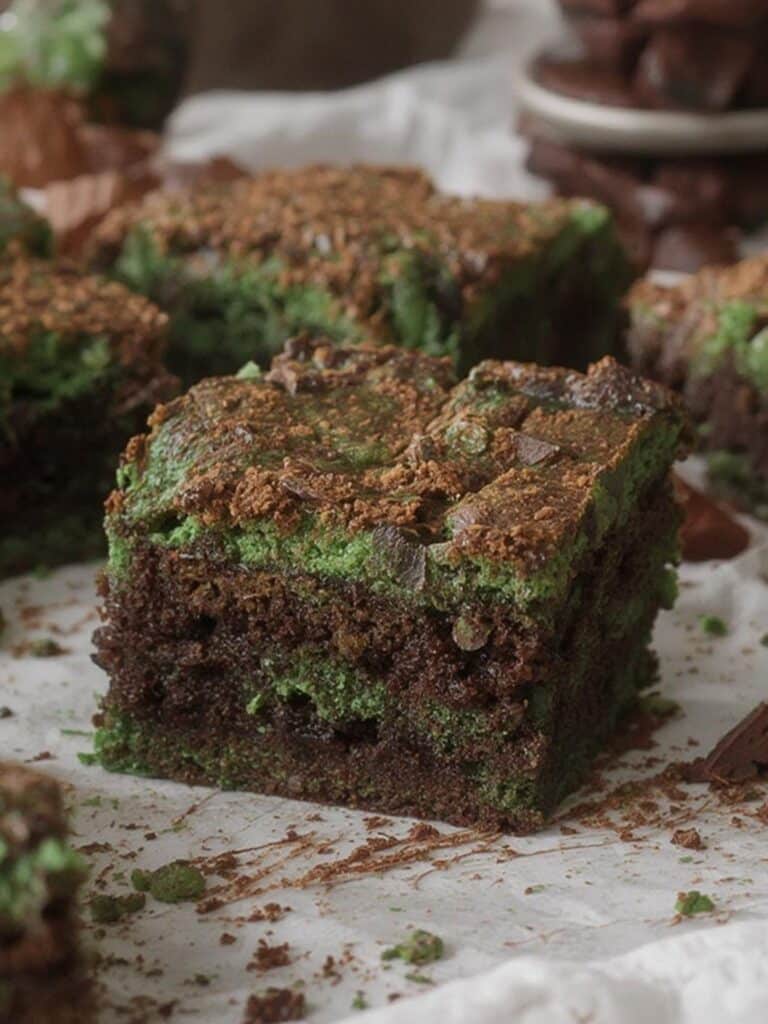
Green Velvet Brownies: The 15 Ultimate Steps for the Most Irresistible Treat
Soft, moist Green Velvet Brownies with a subtle cocoa flavor and vibrant color, topped with rich cream cheese frosting for an irresistible festive treat.
- Total Time: 1 hour 30 minutes
- Yield: 16 brownies 1x
Ingredients
1 1/4 cups all-purpose flour
2 tablespoons unsweetened cocoa powder
1/2 teaspoon baking soda
1/4 teaspoon salt
1/2 cup unsalted butter, softened
1 cup granulated sugar
2 large eggs, room temperature
1/2 cup buttermilk, room temperature
1 teaspoon white vinegar
1 teaspoon vanilla extract
Green gel food coloring
8 ounces full-fat cream cheese, softened
1/4 cup unsalted butter, softened
2 1/2 cups powdered sugar, sifted
1 teaspoon vanilla extract (for frosting)
Instructions
1. Preheat oven to 350°F (175°C) and grease or line an 8×8-inch baking pan with parchment paper.
2. In a medium bowl, whisk together flour, cocoa powder, baking soda, and salt.
3. In a large bowl, cream softened butter and sugar until light and fluffy.
4. Beat in eggs one at a time, then mix in vanilla extract and white vinegar.
5. Alternate adding dry ingredients and buttermilk to the wet mixture, beginning and ending with dry ingredients, mixing until just combined.
6. Add green gel food coloring gradually until desired shade is achieved.
7. Pour batter into prepared pan and spread evenly.
8. Bake for 25–30 minutes, or until a toothpick inserted in the center comes out with moist crumbs.
9. Cool completely in the pan on a wire rack.
10. For frosting, beat cream cheese and butter until smooth and creamy.
11. Gradually mix in powdered sugar, then stir in vanilla extract.
12. Spread frosting evenly over completely cooled brownies.
13. Chill briefly for cleaner slices, then cut and serve.
Notes
Use room temperature ingredients for a smooth batter and even texture.
Do not overmix once flour is added to keep brownies tender.
Gel food coloring provides vibrant color without thinning the batter.
Store frosted brownies in an airtight container in the refrigerator for up to 5 days.
Freeze unfrosted brownies for up to 3 months, then thaw and frost before serving.
- Prep Time: 20 minutes
- Cook Time: 30 minutes
- Category: Dessert
- Method: Baking
- Cuisine: American
- Diet: Vegetarian
Nutrition
- Serving Size: 1 brownie
- Calories: 320
- Sugar: 28g
- Sodium: 180mg
- Fat: 16g
- Saturated Fat: 9g
- Unsaturated Fat: 6g
- Trans Fat: 0g
- Carbohydrates: 38g
- Fiber: 1g
- Protein: 4g
- Cholesterol: 65mg
Essential Ingredients for Perfect Green Velvet Brownies
Gathering the right ingredients is the first and most crucial step to baking success. For this recipe, using fresh, high-quality components will undoubtedly make a significant difference in the final product. Here is what you will need to create these amazing brownies and their decadent frosting.
For the Brownies
- All-Purpose Flour: This provides the main structure for the brownies.
- Unsweetened Cocoa Powder: Just a small amount is needed for that subtle chocolate flavor.
- Baking Soda: This reacts with the acid to help the brownies rise.
- Salt: A pinch of salt enhances all the other flavors.
- Unsalted Butter: Use room temperature butter for easy creaming.
- Granulated Sugar: This provides the necessary sweetness.
- Large Eggs: Also at room temperature to help them mix evenly into the batter.
- Buttermilk: The key acidic ingredient for that classic velvet texture.
- White Vinegar: Another acid that ensures a tender crumb.
- Vanilla Extract: For a touch of warm, aromatic flavor.
- Green Gel Food Coloring: Gel coloring provides a deep, vibrant color without adding extra liquid. Most food colorings are considered safe for consumption by the FDA, a topic often covered by health resources like WebMD.
For the Cream Cheese Frosting
- Cream Cheese: Make sure it’s the full-fat, block-style variety and fully softened.
- Unsalted Butter: Softened to room temperature for a smooth, creamy texture.
- Powdered Sugar: Sift it to avoid any lumps in your frosting.
- Vanilla Extract: A dash of vanilla perfectly complements the tangy cream cheese.
Step-by-Step Instructions for Green Velvet Brownies
Now that you have your ingredients ready, it is time to start baking. Following these steps carefully will ensure your Green Velvet Brownies turn out perfectly moist, chewy, and delicious every single time. Let’s begin!
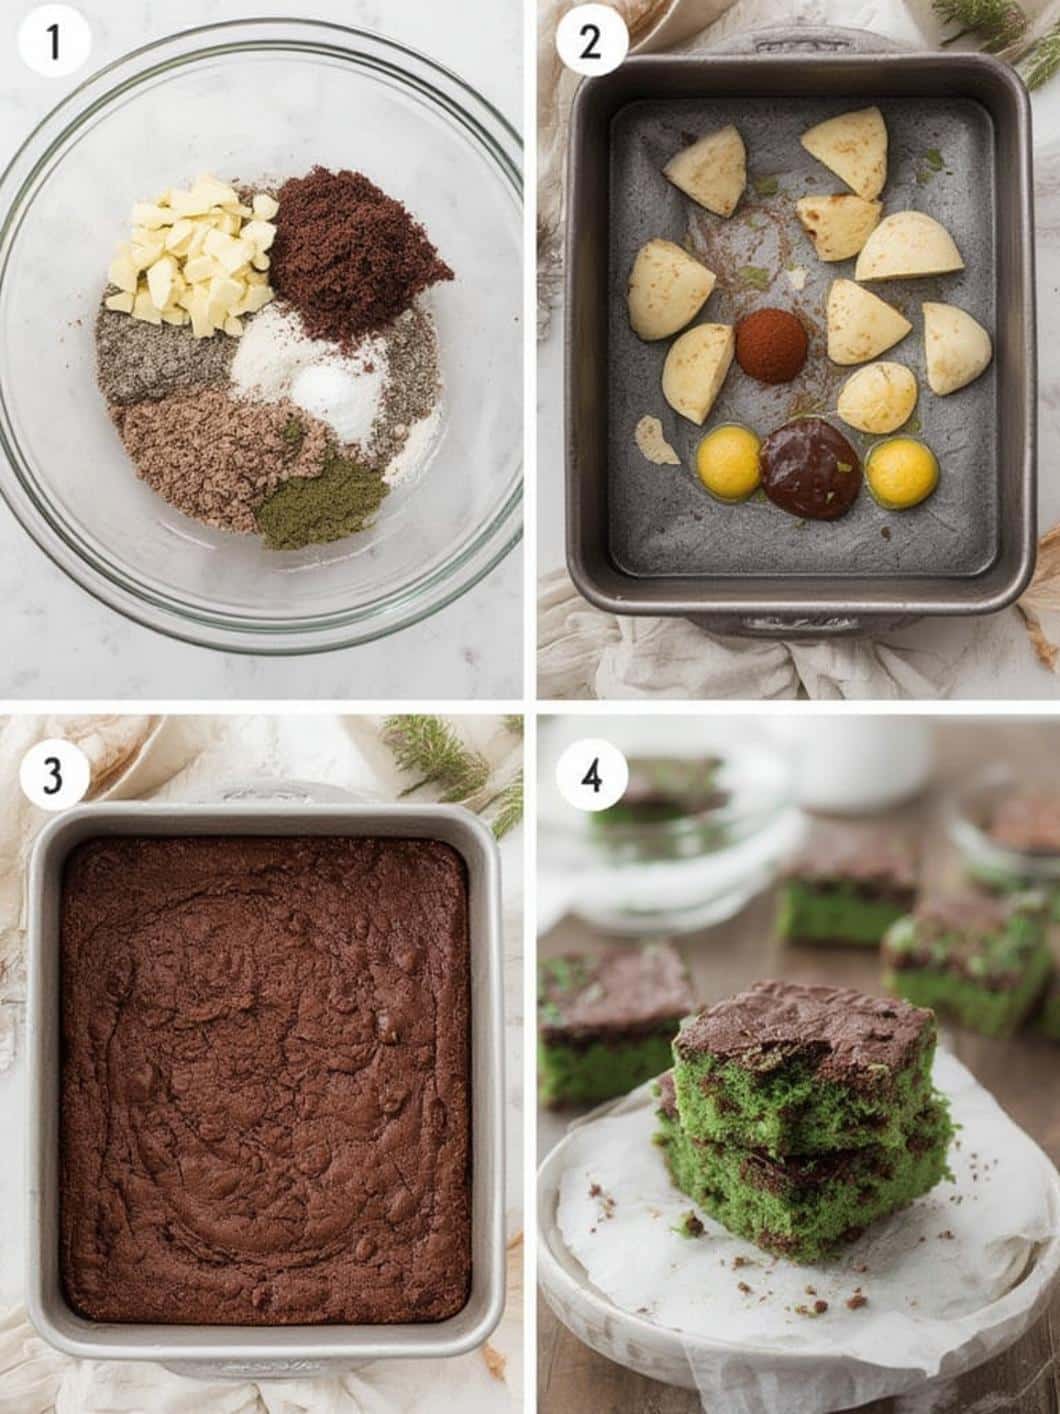
First, you need to prepare your oven and pan. To begin, preheat your oven to 350°F (175°C). Next, grease and flour an 8×8 inch baking pan, or line it with parchment paper, leaving an overhang on the sides to easily lift the brownies out later. In a medium bowl, whisk together the all-purpose flour, unsweetened cocoa powder, baking soda, and salt. Then, set this dry mixture aside for later use.
In a large bowl, using a hand mixer or a stand mixer, cream the softened unsalted butter and granulated sugar together until the mixture is light and fluffy. This process usually takes about 2-3 minutes. Following this, beat in the large eggs one at a time, making sure each egg is fully incorporated before adding the next. Afterward, mix in the vanilla extract and white vinegar.
Next, it is time to combine the wet and dry ingredients. Begin to alternate adding the dry ingredient mixture and the buttermilk to the wet ingredients, starting and ending with the dry mixture. Mix on low speed until just combined; be careful not to overmix the batter. Subsequently, add the green gel food coloring, a few drops at a time, until you achieve your desired shade of green.
Once the batter is ready, pour it evenly into your prepared baking pan and smooth the top with a spatula. Bake for 25-30 minutes, or until a toothpick inserted into the center comes out with a few moist crumbs attached. It is incredibly important to let the brownies cool completely in the pan on a wire rack before you even think about frosting them. Hot brownies will melt the frosting instantly.
Finally, while the brownies are cooling, you can prepare the cream cheese frosting. In a large bowl, beat the softened cream cheese and unsalted butter together until smooth and creamy. Gradually add the sifted powdered sugar and continue to beat until well combined. Lastly, stir in the vanilla extract. Once the brownies are completely cool, spread the frosting evenly over the top. You can then cut them into squares and serve.
Tips and Tricks for Flawless Brownies
Even with a great recipe, a few extra tips can elevate your baking from good to absolutely perfect. Here are some professional tricks to ensure your Green Velvet Brownies are the best they can be.
- Do Not Overmix: As soon as the flour is incorporated, stop mixing. Overmixing develops the gluten in the flour, which can result in tough, dense brownies instead of soft, tender ones.
- Use Room Temperature Ingredients: Ingredients like butter, eggs, and buttermilk incorporate much more easily when they are at room temperature, leading to a smoother, more uniform batter.
- Cool Completely: This tip cannot be stressed enough. Attempting to frost warm brownies will result in a soupy, melted mess. Patience is key for a beautifully frosted dessert.
- The Toothpick Test: For the perfect fudgy texture, you want the toothpick to come out with moist crumbs, not completely clean. If it’s clean, the brownies might be slightly overbaked.
- Achieve the Perfect Green: Gel food coloring is highly recommended for a deep, rich color. Start with a small amount and add more until you reach the vibrant green you are looking for.
Storing and Freezing
Because of the cream cheese frosting, these brownies must be stored in the refrigerator. Place them in an airtight container, where they will stay fresh for up to 5 days. For longer storage, you can also freeze them. You can freeze the entire uncut slab or individual squares. For best results, freeze them unfrosted on a baking sheet before wrapping them tightly in plastic wrap and then aluminum foil. They can be frozen for up to 3 months. Simply thaw them in the refrigerator before frosting and serving.
Fun Variations and Topping Ideas
While this classic recipe is fantastic on its own, there are many ways to customize your Green Velvet Brownies to make them uniquely yours. Feel free to get creative and experiment with different flavors and textures!
Mix-Ins and Additions
For an extra layer of flavor and texture, consider folding in some mix-ins to the batter right before baking. For instance, a cup of white chocolate chips can add a sweet, creamy contrast to the tangy brownie. Similarly, chopped pecans or walnuts can provide a delightful crunch. For a different flavor profile altogether, you could add a teaspoon of mint extract along with the vanilla for a festive mint-chocolate treat. If you love festive, colorful treats, you might find inspiration from our Springtime Crinkle Cookies.
Frosting and Toppings
The classic cream cheese frosting is a perfect match, but you don’t have to stop there. A simple vanilla buttercream or even a rich chocolate ganache would also be delicious. For toppings, the possibilities are endless. Festive sprinkles are an easy way to add a celebratory touch. In addition, you could add a drizzle of melted white or dark chocolate over the frosting. Shaved chocolate or a light dusting of cocoa powder can also create an elegant finish. If you enjoy the signature velvet flavor, you should also try these incredible Red Velvet Cookies for another occasion.
Conclusion
In conclusion, baking a batch of homemade Green Velvet Brownies is a rewarding experience that yields a truly special dessert. With their tender, velvety texture, subtle chocolate flavor, and rich cream cheese frosting, they are a definite crowd-pleaser. Furthermore, their beautiful green color makes them perfect for any festive occasion, from holidays to simple spring gatherings. By following this detailed guide, you have all the information needed to create this show-stopping treat in your own kitchen. Ultimately, this recipe is more than just a dessert; it’s an opportunity to create a delicious memory. So, go ahead and give these delightful Green Velvet Brownies a try!
Frequently Asked Questions (FAQ)
Can I make these brownies without food coloring?
Yes, you absolutely can. If you omit the food coloring, you will have what is often called “vanilla velvet” or “white velvet” brownies. They will have a light brownish color from the cocoa powder but will still have the same delicious taste and wonderfully soft texture.
Why did my batter look curdled?
Batter can sometimes look curdled or separated when cold ingredients are mixed together. This often happens if the eggs or buttermilk are too cold when added to the creamed butter and sugar. Using room temperature ingredients is the best way to prevent this and ensure a smooth, cohesive batter.
Can I use regular milk instead of buttermilk?
You can, but the texture won’t be quite the same. Buttermilk is essential for the classic “velvet” texture due to its acidity. If you’re in a pinch, you can make a substitute by adding one tablespoon of white vinegar or lemon juice to one cup of regular milk and letting it sit for 5-10 minutes before using.
How do I get clean cuts on my brownies?
For perfectly clean squares, first make sure the brownies are completely chilled; refrigerating them for at least an hour helps firm them up. Use a large, sharp knife. After each cut, wipe the knife clean with a damp paper towel. This prevents the frosting and crumbs from smearing onto the next piece.