Spring is in the air, and that means Easter is just around the corner, bringing with it a wonderful opportunity for festive baking and family fun. If you’re searching for a delightful, crowd-pleasing treat that perfectly captures the spirit of the season, look no further than these incredible Easter Egg Brownie Bites with Drizzled Icing. These bite-sized morsels of rich, fudgy brownie are shaped like miniature Easter eggs and adorned with beautiful pastel icing, making them as charming to look at as they are delicious to eat. Furthermore, this recipe is wonderfully simple, providing a fantastic activity for bakers of all skill levels, including little helpers eager to get their hands dusty with flour and cocoa.
Why You’ll Absolutely Adore This Recipe
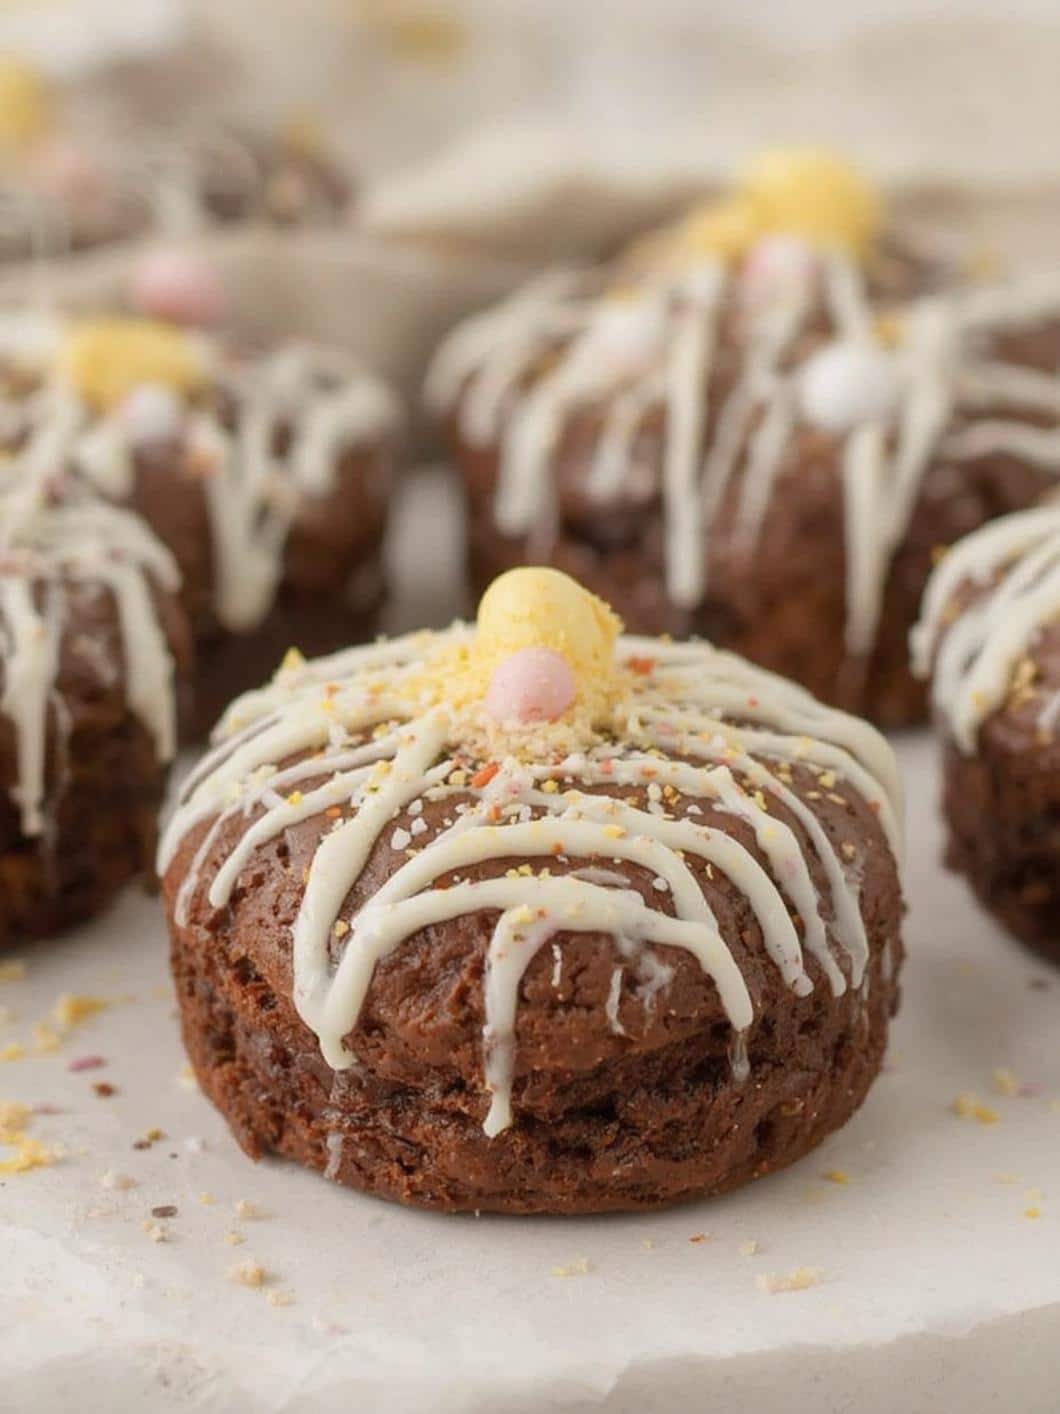
There are countless reasons to fall in love with these festive brownie bites. First and foremost, they offer the perfect combination of textures and flavors. Each bite starts with a deeply chocolatey, chewy brownie that practically melts in your mouth. Consequently, this richness is perfectly balanced by a simple, sweet vanilla icing that provides a light, crisp finish. The small, two-bite size makes them an ideal treat for parties and gatherings, as guests can easily enjoy one (or several) without needing a plate and fork. In addition to being delicious, these Easter egg brownie bites are incredibly versatile and serve as a beautiful centerpiece for any dessert table.
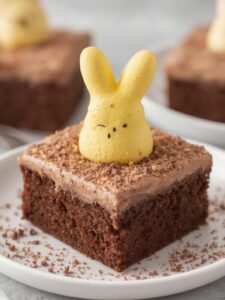
Beyond their taste, these treats are a joy to create. The process is straightforward, making it an excellent project to share with children who will undoubtedly love helping mix the batter and, most importantly, drizzle the colorful icing. They are also highly customizable; for instance, you can use a variety of pastel colors for the icing or add festive sprinkles for extra flair. Whether you’re making them for an Easter brunch, a school party, or as a sweet homemade gift, these brownie bites are guaranteed to bring smiles and springtime cheer. If you enjoy making themed Easter desserts, you might also love these festive Marshmallow Peep Nest Brownies.
Print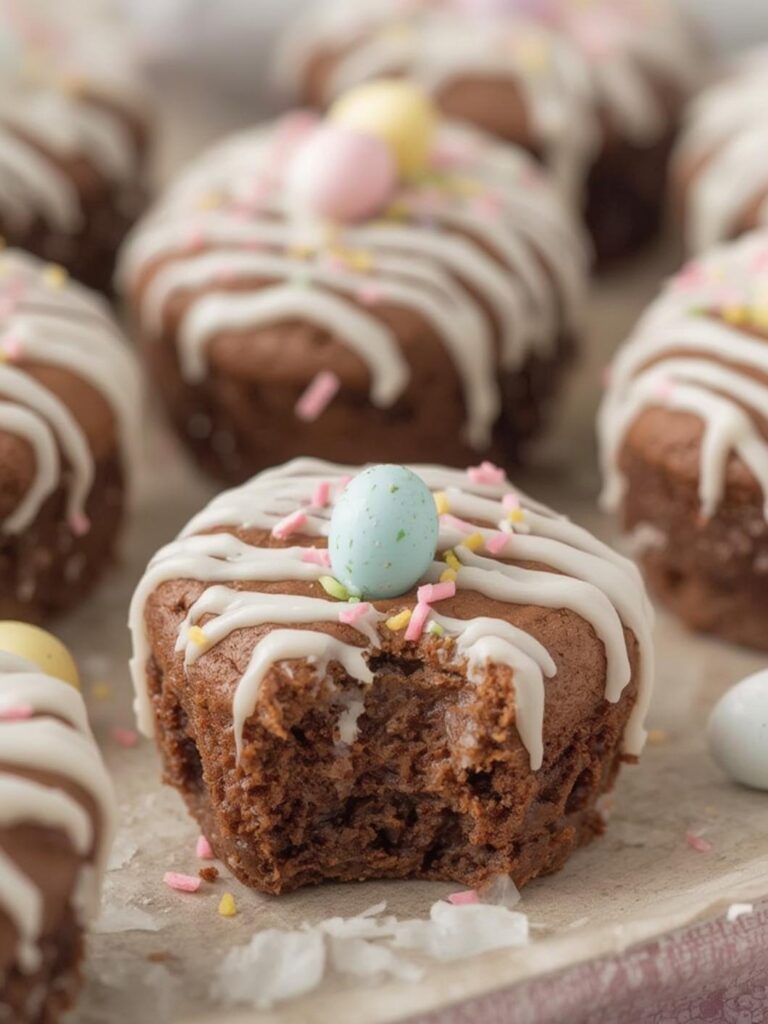
Easter Egg Brownie Bites with Drizzled Icing
Rich, fudgy brownie bites shaped like miniature Easter eggs and adorned with beautiful pastel icing. A simple and festive treat that’s perfect for bakers of all skill levels.
- Total Time: 1 hour 30 minutes
- Yield: 24 brownie bites
Ingredients
Unsalted Butter, melted
Granulated Sugar
Large Eggs
Pure Vanilla Extract
All-Purpose Flour
Unsweetened Cocoa Powder
Salt
Chocolate Chips (Optional)
Powdered Sugar
Milk or Heavy Cream
Vanilla Extract
Pastel Gel Food Coloring
Instructions
1. Preheat oven to 350°F (175°C) and grease an egg-shaped silicone mold or mini muffin tin.
2. In a large bowl, whisk together melted butter and granulated sugar, then mix in eggs one at a time, and stir in vanilla.
3. In a separate bowl, sift together the flour, cocoa powder, and salt.
4. Gradually add the dry ingredients to the wet ingredients, mixing just until combined, then fold in optional chocolate chips.
5. Spoon batter into the prepared mold, filling each cavity about two-thirds full, and bake for 15-20 minutes.
6. Let the brownies cool in the mold for 10-15 minutes before transferring them to a wire rack to cool completely.
7. Make the icing by whisking together powdered sugar, a tablespoon of milk, and vanilla extract, adding more milk until a smooth, drizzlable consistency is reached.
8. Divide the icing into separate bowls, add food coloring to each, and drizzle over the completely cooled brownie bites.
Notes
A boxed brownie mix can be used as a shortcut. Store decorated brownie bites in a single layer in an airtight container at room temperature for up to 4 days.
- Prep Time: 20 minutes
- Cook Time: 20 minutes
- Category: Dessert
- Method: Baking
- Cuisine: American
Nutrition
- Serving Size: 1 brownie bite
- Calories: 120
- Sugar: 15g
- Sodium: 40mg
- Fat: 7g
- Saturated Fat: 4g
- Unsaturated Fat: 3g
- Trans Fat: 0g
- Carbohydrates: 18g
- Fiber: 1g
- Protein: 2g
- Cholesterol: 25mg
Essential Ingredients for Your Brownie Bites
To get started on your delicious Easter egg brownie bites, you’ll first need to gather a few simple, high-quality ingredients. The recipe is broken down into two main components: the fudgy brownie base and the colorful drizzled icing. Using fresh ingredients will ensure the best possible flavor and texture in your final product.
For the Fudgy Brownie Bites
The foundation of this treat is a rich, classic brownie. This recipe avoids being overly cakey, instead focusing on a dense, chewy result that holds its shape well. Here are the key ingredients you will need:
- Unsalted Butter: This provides richness and a tender crumb. Melting the butter is crucial for achieving that signature fudgy texture.
- Granulated Sugar: For sweetness and to help create the classic crackly top on the brownies.
- Large Eggs: Eggs act as a binder, adding structure and moisture to the batter.
- Pure Vanilla Extract: A splash of vanilla enhances the deep chocolate flavor beautifully.
- All-Purpose Flour: This provides the main structure. Be careful not to overmix once the flour is added to keep the brownies from becoming tough.
- Unsweetened Cocoa Powder: The star of the show! Use a good quality cocoa powder for the richest, most intense chocolate flavor.
- Salt: A small amount of salt is essential for balancing the sweetness and elevating the chocolate notes.
- Chocolate Chips (Optional): For an extra layer of chocolatey goodness, you can fold in some semi-sweet or milk chocolate chips.
For the Sweet Drizzled Icing
The icing is what transforms these delicious brownies into festive Easter eggs. This simple glaze is easy to whip up and perfect for decorating. Moreover, it hardens slightly upon drying, which makes the brownie bites easy to stack and transport.
- Powdered Sugar: Also known as confectioners’ sugar, this dissolves easily to create a smooth, lump-free icing.
- Milk or Heavy Cream: This is used to thin the icing to the perfect drizzling consistency. You can add it one teaspoon at a time to get it just right.
- Vanilla Extract: A small amount adds a lovely flavor that complements the chocolate brownies.
- Pastel Gel Food Coloring: To achieve those beautiful spring colors, gel food coloring is recommended as it’s more concentrated than liquid and won’t thin out your icing too much. Pinks, blues, yellows, and greens work perfectly.
Step-by-Step Instructions for Perfect Easter Egg Brownie Bites with Drizzled Icing
Now that you have your ingredients ready, it’s time to start baking. Following these steps carefully will ensure you get perfectly shaped and decorated Easter egg brownie bites every time. Let’s begin!
1. Preparation: First, preheat your oven to 350°F (175°C). Next, thoroughly grease an egg-shaped silicone mold or a mini muffin tin. If you don’t have a shaped mold, you can bake the brownies in an 8×8 inch pan and cut out egg shapes with a cookie cutter once cooled.
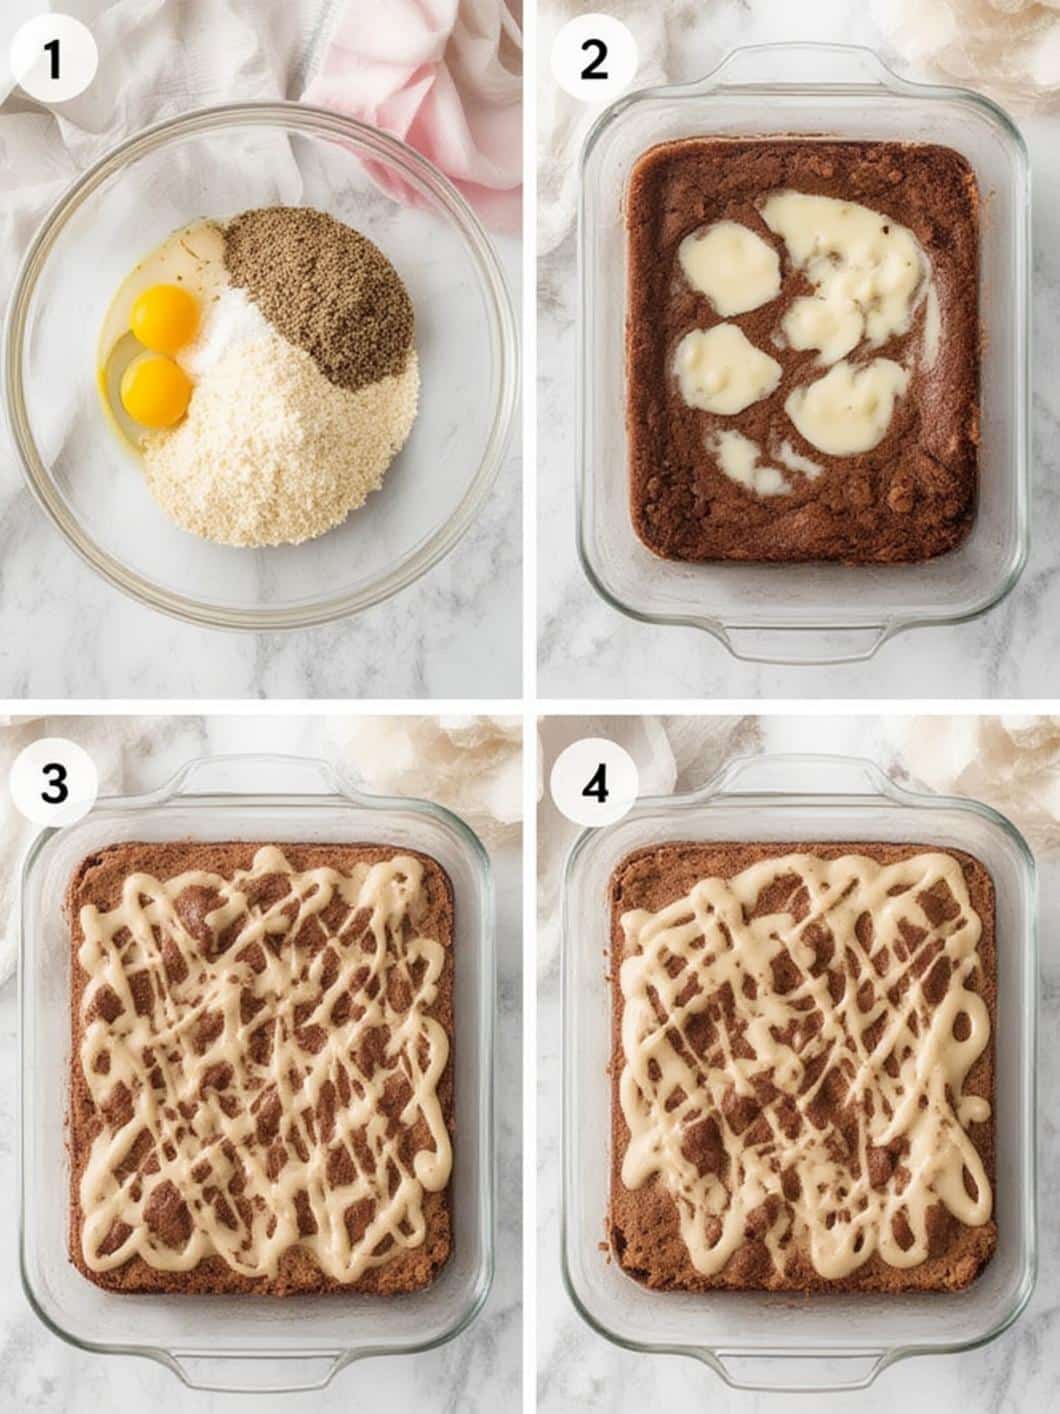
2. Mix Wet Ingredients: In a large mixing bowl, whisk together the melted butter and granulated sugar until well combined. Subsequently, add the eggs one at a time, mixing well after each addition. Finally, stir in the vanilla extract.
3. Combine Dry Ingredients: In a separate, medium-sized bowl, sift together the all-purpose flour, unsweetened cocoa powder, and salt. Sifting is an important step because it helps remove any lumps and aerates the dry ingredients, resulting in a smoother batter.
4. Make the Brownie Batter: Gradually add the dry ingredient mixture to the wet ingredients. Mix on low speed or by hand with a spatula just until the flour is no longer visible. It is very important not to overmix the batter at this stage. If you are using chocolate chips, gently fold them in now.
5. Fill and Bake: Carefully spoon the brownie batter into your prepared egg-shaped mold or pan, filling each cavity about two-thirds full. Bake for 15-20 minutes, or until a toothpick inserted into the center comes out with moist crumbs attached, but not wet batter. The exact time will depend on the size of your mold.
6. Cool Completely: Once baked, remove the brownies from the oven and allow them to cool in the mold for about 10-15 minutes before carefully transferring them to a wire rack. It is crucial that the brownie bites are completely cool before you attempt to ice them; otherwise, the icing will melt and slide right off.
7. Prepare the Icing: While the brownies cool, prepare the drizzled icing. In a small bowl, whisk together the powdered sugar, a tablespoon of milk, and the vanilla extract. Continue to add milk, one teaspoon at a time, until you reach a smooth, pourable consistency that is thick enough to coat the back of a spoon.
8. Color and Decorate: Divide the icing into separate small bowls, one for each color you plan to use. Add a tiny drop of gel food coloring to each bowl and stir until the color is uniform. To decorate, you can use a spoon, a fork, or a small piping bag to drizzle the colored icing back and forth over the cooled Easter egg brownie bites. Have fun creating different patterns and color combinations!
Tips and Tricks for Bakery-Quality Results
Achieving professional-looking results at home is easier than you think with a few simple tips. These suggestions will help you perfect your technique and customize your Easter egg brownie bites to your liking.
Getting the Perfect Egg Shape
The most straightforward method for achieving a consistent egg shape is to use a silicone egg-shaped baking mold. These are widely available online or in baking supply stores, especially around Easter. Alternatively, you can use a mini muffin tin for perfectly round brownie bites. If you don’t have either, simply bake the batter in a standard square pan, let it cool completely, and then use an egg-shaped cookie cutter to cut out the bites. You can even use the leftover brownie scraps for a delicious snack or to make cake pops, similar to these fun Cracked Easter Egg Cake Pops.
Decorating and Customization Ideas
This is where you can truly let your creativity shine! For a classic pastel Easter look, stick to soft pinks, blues, greens, and yellows. You can also get more adventurous by layering colors or creating a marbled effect. Before the icing sets, consider adding some festive sprinkles, nonpareils, or edible glitter for an extra pop of color and texture. For an even quicker version, a boxed brownie mix can be used in place of the from-scratch recipe. Simply prepare the mix according to the package directions and follow the same baking and decorating steps.
Storage and Make-Ahead Advice
These Easter egg brownie bites can be made ahead of time, which is perfect for busy holiday schedules. You can bake the brownies up to two days in advance and store them in an airtight container at room temperature. For best results, wait to apply the icing until the day you plan to serve them. Once decorated, the brownie bites should be stored in a single layer in an airtight container. They will stay fresh at room temperature for up to 3-4 days. You can also refrigerate them to help the icing set faster, but let them come to room temperature before serving for the best flavor and texture.
Nutritional Information and Healthier Swaps
While these Easter egg brownie bites are certainly a decadent treat, it’s always helpful to be mindful of what we’re consuming. Indulgent desserts like this are meant to be enjoyed in moderation as part of a balanced diet. For comprehensive information on maintaining a healthy eating pattern, resources like the Mayo Clinic provide excellent guidance on creating a diet that works for you.
If you’re looking to make some slight adjustments for a healthier version, there are several simple swaps you can try. For instance, you could substitute up to half of the butter with unsweetened applesauce to reduce fat and calories. Another option is to use a sugar substitute designed for baking. There are many varieties available, and websites like Healthline offer detailed comparisons of natural sweeteners that can help you make an informed choice. Additionally, using dark chocolate with a high cocoa percentage can add antioxidants. These small changes can make a difference without sacrificing the delicious, fudgy quality of these Easter egg brownie bites.
Conclusion
In conclusion, creating these beautiful and delicious Easter Egg Brownie Bites with Drizzled Icing is a surefire way to add a special touch to your holiday celebration. This recipe is not only simple and fun to make but also results in a wonderfully festive treat that everyone will love. From their rich, fudgy texture to their charming, colorful appearance, these brownie bites perfectly embody the joy and sweetness of the Easter season. Therefore, we encourage you to gather your ingredients, perhaps invite a little helper into the kitchen, and whip up a batch. These delightful bites are destined to become a new favorite Easter tradition in your home for years to come.
Frequently Asked Questions
Can I use a boxed brownie mix for this recipe?
Absolutely! Using a boxed brownie mix is a fantastic shortcut. Simply prepare the batter according to the instructions on the box and then follow this recipe’s instructions for baking in a shaped mold and for decorating with the drizzled icing. It saves time without sacrificing the fun and festive final result.
How do I get a neat, clean drizzle with the icing?
The key to a clean drizzle is getting the icing consistency just right. It should be thin enough to flow easily but thick enough not to be watery. A great technique is to put the icing in a small zip-top bag, snip off a tiny corner, and use that as a makeshift piping bag. This gives you much more control than using a spoon or fork.
Can these brownie bites be made gluten-free?
Yes, you can adapt this recipe to be gluten-free. Simply substitute the all-purpose flour with a high-quality, one-to-one gluten-free baking flour blend. Also, ensure that your cocoa powder and any other additions are certified gluten-free. The baking time and texture may vary slightly, so keep a close eye on them in the oven.
How long will these Easter egg brownie bites stay fresh?
When stored properly in an airtight container at room temperature, these brownie bites will remain fresh and delicious for about 3 to 4 days. If you store them in the refrigerator, they may last up to a week, but their texture might become a bit denser. It’s best to let them come to room temperature before serving.