There is something truly magical about the aroma of freshly baked cookies filling the kitchen, especially during the holidays. Consequently, creating beautiful and delicious cutout sugar cookies is a cherished tradition for many families. However, it can sometimes be frustrating when your carefully cut shapes spread into unrecognizable blobs in the oven. For this reason, we have created the ultimate guide to help you bake perfect, no-spread cutout sugar cookies every single time. This recipe ensures a cookie that is not only soft and flavorful but also holds its shape flawlessly, providing the perfect canvas for your decorating creativity.
In this article, you will learn the secrets to the best dough, the essential tools you need, and step-by-step instructions from mixing to baking. Furthermore, we will cover decorating tips and proper storage to keep your treats fresh. Whether you’re a seasoned baker or a complete beginner, this guide will give you the confidence to create stunning cutout sugar cookies for any occasion.
Why This Is the Best Recipe for Cutout Sugar Cookies
Many recipes for cutout sugar cookies promise perfect results but often fall short. The most common issues bakers face are dough that is too sticky to roll, cookies that spread during baking, and a final texture that is either too hard or too crumbly. This recipe, however, has been tested and perfected to eliminate those problems. The key lies in the precise ratio of ingredients and, most importantly, the chilling process.
Unlike other recipes, this one uses slightly less leavening, which is a crucial factor in preventing spread. Additionally, the dough is designed to be firm yet pliable after chilling, making it a dream to roll out and cut. The result is a wonderfully buttery cookie with a soft bite and crisp edges. Ultimately, these cookies are sturdy enough to handle detailed icing and decorating, making them as beautiful as they are delicious. This method ensures your snowmen, stars, and Christmas trees look just as sharp coming out of the oven as they did going in.
Print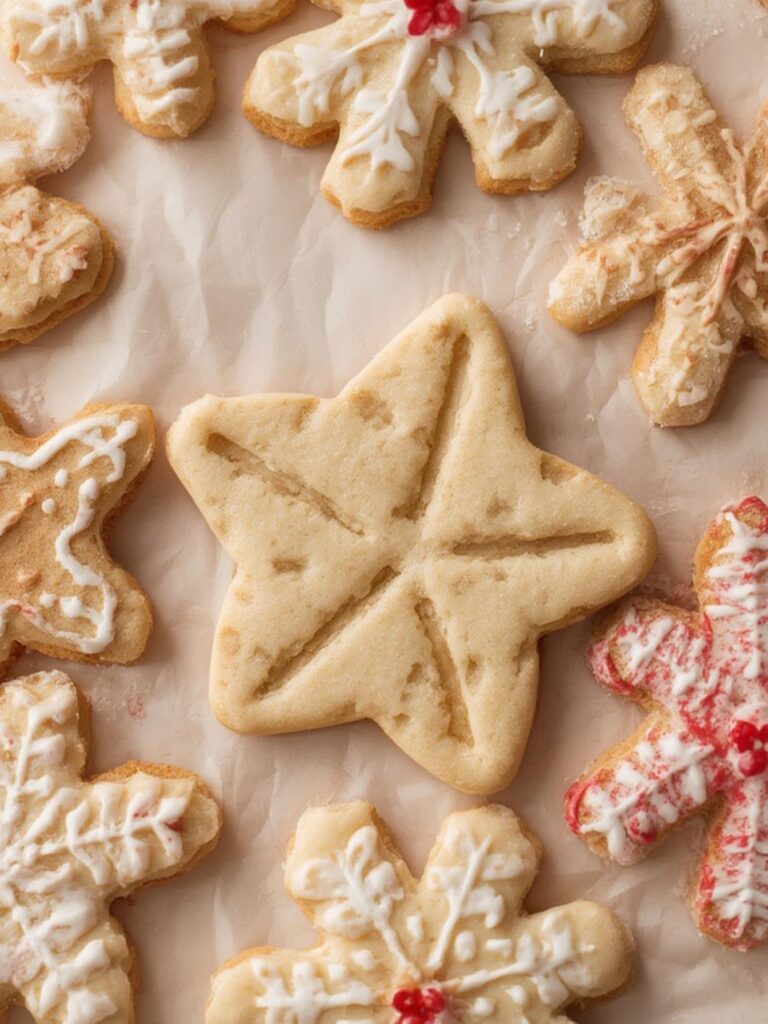
Cutout Sugar Cookies: The 15 Ultimate Tips for Flawless Holiday Treats
Soft, buttery cutout sugar cookies that hold their shape perfectly—ideal for holiday decorating and gifting.
- Total Time: 40 minutes (+chilling)
- Yield: 24 cookies 1x
Ingredients
2 3/4 cups all-purpose flour
1 teaspoon baking powder
1/2 teaspoon salt
1 cup unsalted butter, softened
1 cup granulated sugar
1 large egg, room temperature
2 teaspoons vanilla extract
Extra flour for rolling
Parchment paper for lining
Royal icing or buttercream for decorating (optional)
Instructions
1. In a medium bowl, whisk together flour, baking powder, and salt. Set aside.
2. In a large mixing bowl, beat softened butter and granulated sugar on medium-high speed for 3–4 minutes until light and fluffy.
3. Add the egg and vanilla extract. Mix on low speed until just combined. Scrape the sides of the bowl.
4. Gradually add the dry ingredients to the wet mixture in three parts, mixing until a soft dough forms. Do not overmix.
5. Divide dough in half and form into two disks. Wrap in plastic wrap and chill for at least 2 hours or overnight.
6. Preheat oven to 375°F (190°C). Line baking sheets with parchment paper.
7. On a floured surface, roll out one disk of dough to 1/4-inch thickness. Use cookie cutters to cut out desired shapes.
8. Transfer cutouts to baking sheet and chill again for 15 minutes before baking.
9. Bake for 8–10 minutes, or until the edges are lightly golden. Do not overbake.
10. Cool on baking sheet for 5 minutes, then transfer to a wire rack to cool completely.
11. Repeat rolling and cutting with remaining dough. Re-roll scraps as needed.
12. Once completely cool, decorate with royal icing, buttercream, or sprinkles as desired.
13. Store in an airtight container at room temperature for up to 1 week, or freeze undecorated cookies for longer storage.
Notes
Chilling the dough twice is key to preventing spreading and preserving cookie shape.
Roll dough between parchment paper to avoid sticking and prevent adding too much flour.
Use light-colored baking sheets for even baking.
Royal icing works best for detailed decorations and stacking, while buttercream is softer and richer.
Freeze wrapped dough for up to 3 months; thaw overnight in the fridge before use.
- Prep Time: 30 minutes
- Cook Time: 10 minutes
- Category: Dessert
- Method: Baking
- Cuisine: American
- Diet: Vegetarian
Nutrition
- Serving Size: 1 cookie
- Calories: 145
- Sugar: 10g
- Sodium: 55mg
- Fat: 7g
- Saturated Fat: 4g
- Unsaturated Fat: 3g
- Trans Fat: 0g
- Carbohydrates: 18g
- Fiber: 0g
- Protein: 1g
- Cholesterol: 25mg
Essential Ingredients and Tools
Before you begin your baking adventure, gathering the right ingredients and tools is the first step toward success. In fact, using high-quality components and the proper equipment can make a significant difference in the final product. Below is a complete breakdown of everything you will need.
Key Ingredients for Success
- All-Purpose Flour: This is the structural foundation of your cookies. It is important to measure your flour correctly; spoon it into your measuring cup and level it off rather than scooping directly from the bag. This prevents the dough from becoming too dense and dry.
- Unsalted Butter: The quality of your butter directly impacts the flavor. Be sure to use unsalted butter that is softened to room temperature, but not melted. Properly softened butter will cream with the sugar to create a light, airy texture.
- Granulated Sugar: This provides the sweetness and helps create a tender crumb. While some recipes use powdered sugar in the dough, granulated sugar yields a slightly crisper edge which is ideal for cutout cookies. According to health experts, understanding how different sugars work in baking can elevate your skills.
- Large Egg: One large egg acts as a binder, holding all the ingredients together. For the best results, ensure your egg is at room temperature so it incorporates smoothly into the butter and sugar mixture.
- Vanilla Extract: Pure vanilla extract provides that classic, warm sugar cookie flavor. You can also experiment with other extracts, such as almond or lemon, to add a unique twist to your cookies.
- Baking Powder: A small amount of baking powder gives the cookies a slight lift, preventing them from being too dense. However, using too much is a common cause of spreading, so this recipe uses just enough for the perfect texture.
- Salt: A pinch of salt is essential for balancing the sweetness and enhancing the overall flavor of the cookies.
Must-Have Baking Tools
- Stand Mixer or Hand Mixer: This is crucial for properly creaming the butter and sugar together, which is a step you should not skip.
- Rolling Pin: An adjustable rolling pin with thickness guides is a fantastic tool for ensuring your dough is an even 1/4-inch thick.
- Parchment Paper: Using parchment paper prevents the dough from sticking to your counter and baking sheets, making cleanup much easier.
- Baking Sheets: Light-colored, heavy-duty baking sheets are recommended because they conduct heat more evenly.
- Cookie Cutters: Choose your favorite shapes! Metal cutters tend to provide a cleaner cut than plastic ones.
- Spatula: A thin metal spatula is perfect for transferring your delicate cutouts to the baking sheet.
- Wire Cooling Rack: This allows air to circulate around the cookies, helping them cool evenly and preventing them from becoming soggy.
Step-by-Step Instructions
Now that you have your ingredients and tools ready, it is time to start making the dough. Follow these steps carefully for perfect cutout sugar cookies every time. The process is straightforward, but each step is important for the final outcome.
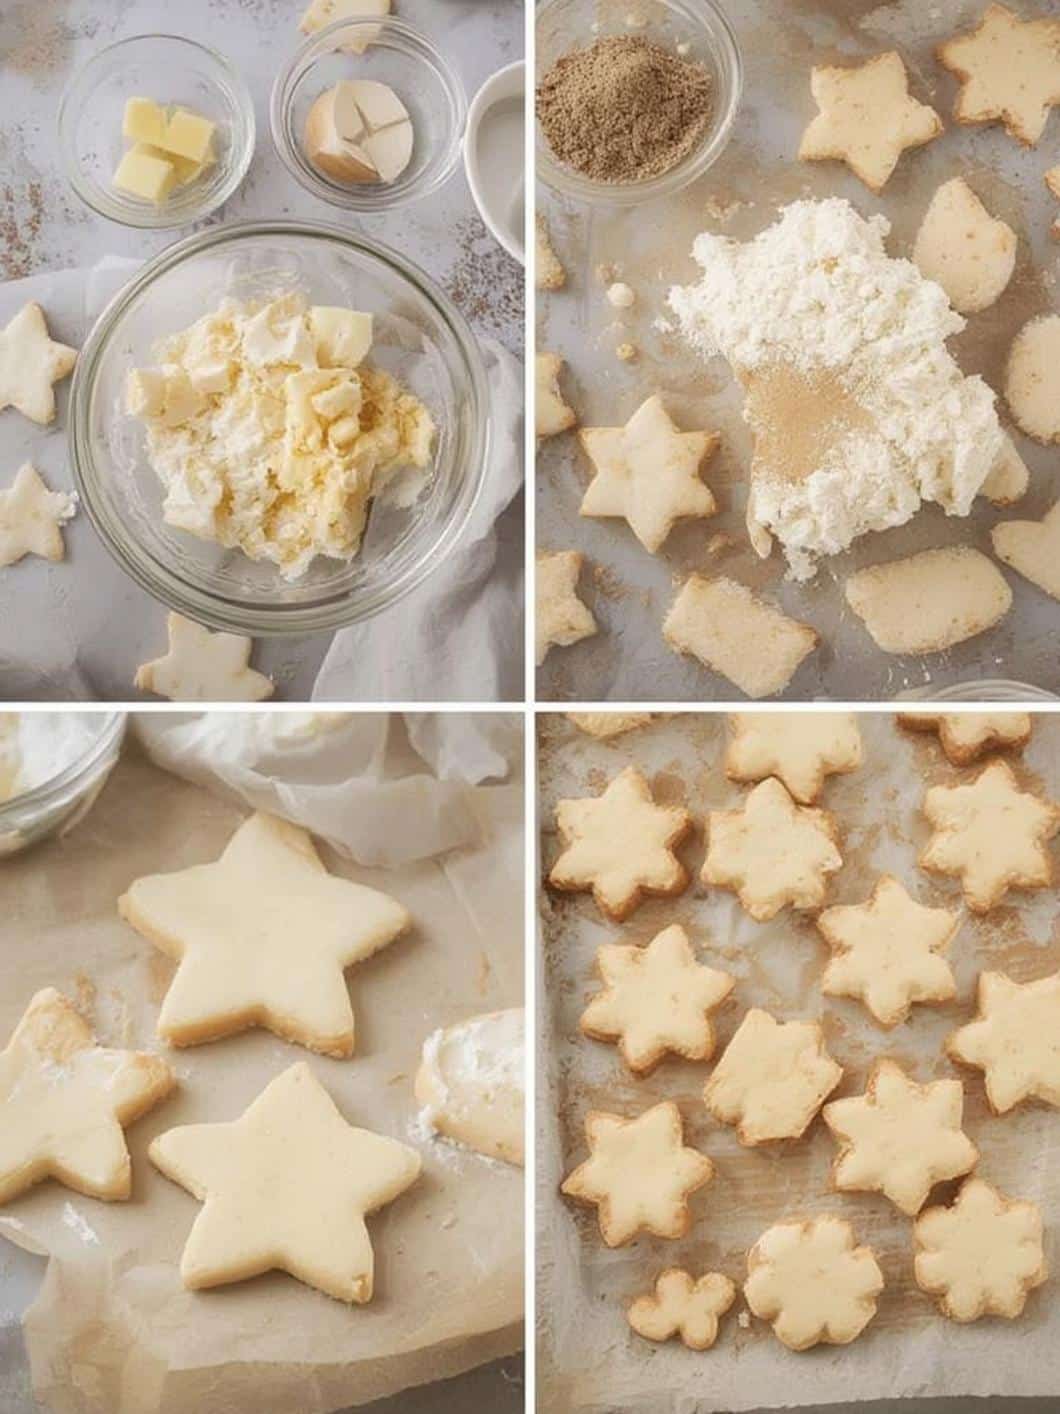
Creaming Butter and Sugar
First, in the bowl of your stand mixer fitted with the paddle attachment, beat the softened unsalted butter and granulated sugar together on medium-high speed. Continue mixing for about 3-4 minutes, or until the mixture is light, pale, and fluffy. This step incorporates air into the dough, which is essential for a soft texture.
Adding the Wet Ingredients
Next, reduce the mixer speed to low and add the room-temperature egg and vanilla extract. Mix until they are just combined, scraping down the sides of the bowl as needed to ensure everything is evenly incorporated. It is important not to overmix at this stage. Food safety is paramount, so always handle raw eggs with care, a topic often covered by sources like WebMD.
Combining the Dry Ingredients
In a separate medium bowl, whisk together the all-purpose flour, baking powder, and salt. Whisking these ingredients first ensures that the baking powder and salt are distributed evenly throughout the flour, which leads to a more consistent cookie.
Bringing the Dough Together
With the mixer on its lowest speed, gradually add the dry ingredients to the wet ingredients in three batches. Mix only until the flour is just incorporated and a soft dough forms. Overworking the dough can develop the gluten in the flour, resulting in tough cookies.
The Crucial Chilling Step
Subsequently, divide the dough in half and form each half into a flat disk about 1-inch thick. Wrap each disk tightly in plastic wrap. Refrigerate the dough for at least two hours, or even overnight. This step is non-negotiable! Chilling the dough solidifies the butter, which prevents the cookies from spreading in the oven. It also allows the flour to fully hydrate, which enhances the flavor and texture of your cutout sugar cookies.
Rolling, Cutting, and Baking
After the dough has thoroughly chilled, you are ready for the fun part: creating your shapes. This phase requires a bit of patience, but the beautiful results are well worth the effort. Follow these tips to make the process smooth and successful.
Rolling Out the Dough
Begin by lightly flouring your work surface and rolling pin. Take one disk of dough from the refrigerator and let it sit at room temperature for about 5 minutes to become slightly more pliable. Then, roll the dough out to an even thickness of 1/4 inch. For an even easier time and less mess, try rolling the dough between two sheets of parchment paper. This trick prevents sticking without adding extra flour, which can make the cookies tough.
Cutting and Chilling Again
Next, dip your cookie cutters into a small bowl of flour before each cut to prevent the dough from sticking. Arrange your cutters as close together as possible to get the most shapes from each roll. Place the cutouts onto a parchment-lined baking sheet. After you have filled a sheet, place the entire baking sheet into the refrigerator for another 15 minutes. This second chill ensures the dough is firm and cold when it hits the hot oven, which is the ultimate secret to sharp, defined edges on your cutout sugar cookies.
Baking to Perfection
While the cookies are chilling, preheat your oven to 375°F (190°C). Bake one sheet at a time for 8-10 minutes. The cookies are done when the edges are lightly golden brown. Be careful not to overbake them, as they will continue to bake slightly on the hot pan after you remove them from the oven. Let the cookies cool on the baking sheet for 5 minutes before transferring them to a wire rack to cool completely.
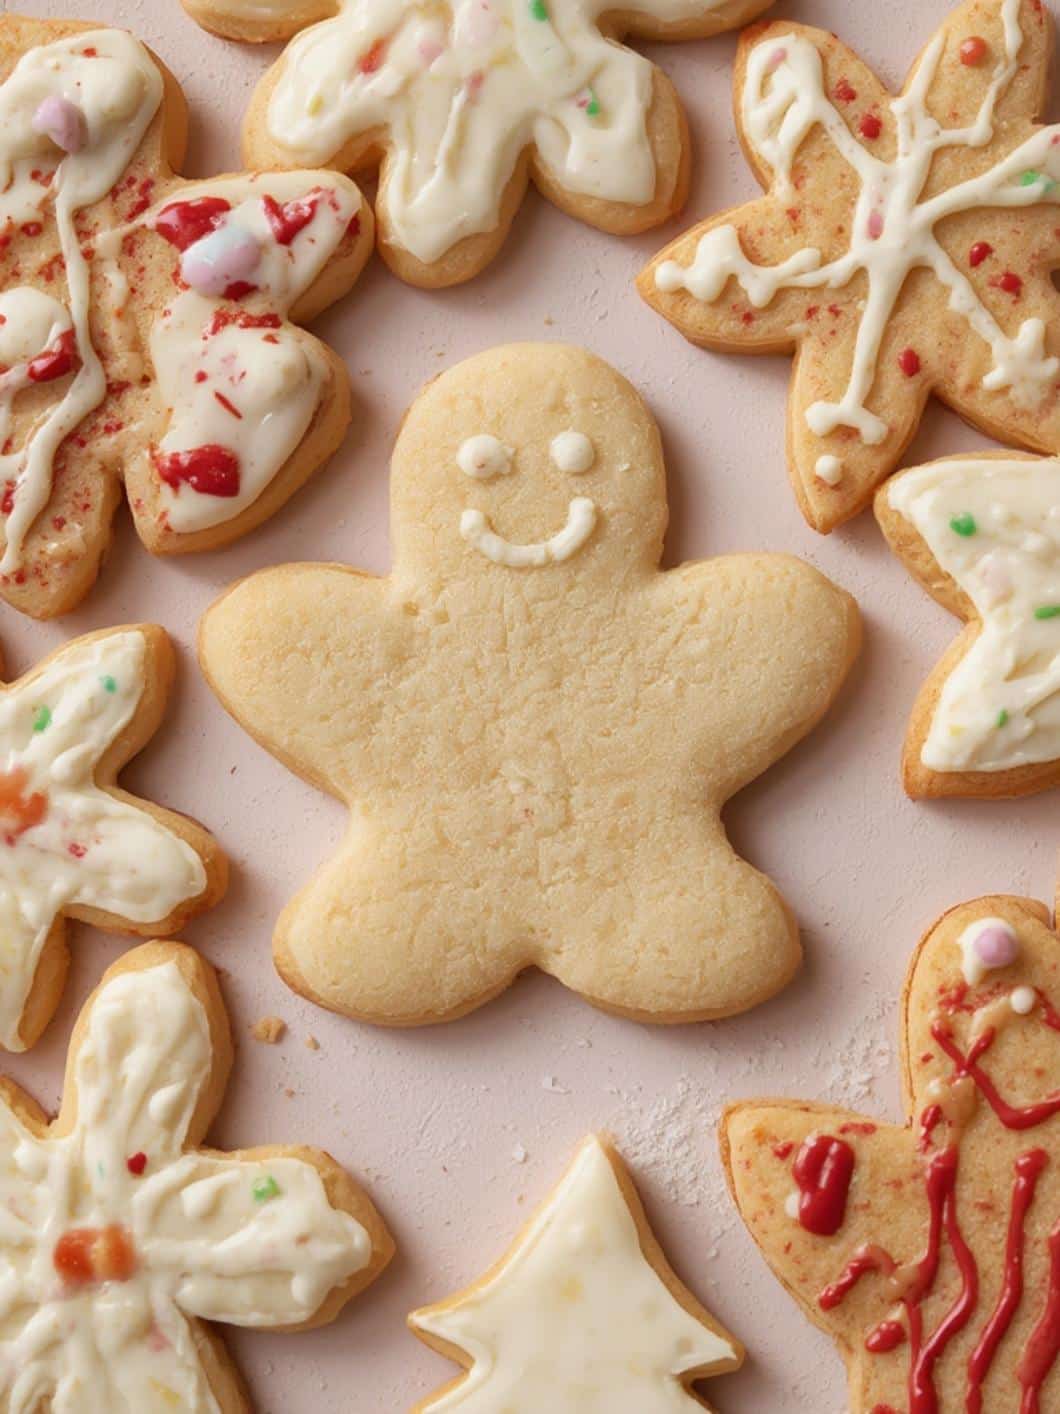
Decorating Your Masterpieces
Once your cutout sugar cookies have cooled completely, it is time to decorate. This is where you can truly let your creativity shine. Whether you prefer simple and rustic or intricate and colorful, the possibilities are endless.
Choosing Your Icing
For decorating, you generally have two main choices: royal icing or buttercream frosting. Royal icing is made with powdered sugar and either egg whites or meringue powder. It dries hard with a smooth, matte finish, making it perfect for detailed designs and for stacking or packaging cookies as gifts. Buttercream, on the other hand, is softer, richer, and remains soft. It is easier to make and is delicious, but it is not ideal if you need to stack the cookies. For festive fun, you could even try a green icing similar to these Grinch cookies.
Simple Decorating Techniques
- Outlining and Flooding: This is a classic royal icing technique. Use a thicker consistency icing to pipe an outline around the edge of the cookie. Then, use a thinner consistency icing to “flood” or fill in the outlined area.
- Sprinkles and Sugars: The easiest way to decorate is to add sprinkles, nonpareils, or colored sanding sugar. You can add these to wet icing or brush the cookies with a light corn syrup wash before sprinkling.
- Wet-on-Wet Technique: While your flooded base is still wet, you can drop dots or lines of another color on top and drag a toothpick through them to create hearts, swirls, or marbled patterns.
Conclusion
Baking perfect cutout sugar cookies is an achievable and rewarding experience that brings joy to any celebration. By following this detailed guide, you can confidently create cookies that hold their shape, taste delicious, and look absolutely stunning. Remember that the key to success lies in using quality ingredients, following the chilling steps diligently, and allowing the cookies to cool completely before decorating. Ultimately, this recipe provides a reliable foundation for all your creative cookie projects. If you’re looking for other holiday treats, you might also enjoy making some classic candy cane cookies. So, embrace the process, have fun decorating, and share your beautiful cutout sugar cookies with friends and family.
Frequently Asked Questions
Why did my sugar cookies spread?
Cookies typically spread for a few reasons. The most common cause is that the dough was not chilled long enough. Chilling solidifies the butter, which prevents it from melting too quickly in the oven. Another reason could be using too much baking powder or butter that was too soft or melted.
Can I freeze sugar cookie dough?
Yes, this dough freezes wonderfully. After mixing, form the dough into two flat disks, wrap them tightly in plastic wrap, and then place them in a freezer-safe bag. The dough can be frozen for up to 3 months. To use, thaw it in the refrigerator overnight before rolling and baking.
How far in advance can I make these cookies?
You can bake the undecorated cookies up to a week in advance and store them in an airtight container at room temperature. If decorated with royal icing, they will last for about two weeks. The flavor and texture are best within the first few days.