Easter is a time for celebration, family, and of course, delightful sweet treats that brighten up the dessert table. While classic cakes and cookies are always a hit, there’s something truly special about a treat that is both delicious and a work of art. Consequently, if you’re looking to create something memorable this spring, look no further than these stunning Cracked Easter Egg Cake Pops. These bite-sized delights feature a moist cake center, are shaped like perfect little eggs, and are decorated with a unique crackle effect that mimics a hatching chick. Not only are they incredibly tasty, but they also serve as a beautiful centerpiece for your Easter festivities. This comprehensive guide will walk you through everything you need to know, ensuring your cake pops are an absolute triumph.
What Exactly Are Cracked Easter Egg Cake Pops?
At their core, Cracked Easter Egg Cake Pops are a creative twist on the classic cake pop. They begin with a familiar base: a mixture of fully-baked cake crumbles and creamy frosting, which is then molded into a charming egg shape. However, what truly sets them apart is the decorative outer shell. This is achieved through a clever candy-coating technique. First, the cake eggs are dipped in a smooth base coat of white candy melts. After this layer sets, they are then dipped into a second, colorful layer of candy melts that has a darker food coloring swirled through it. This second dip creates a beautiful, marbled crackle pattern across the surface, giving each pop a unique and artistic finish. The final result is a treat that looks just like a tiny, speckled bird’s egg, making it a perfect addition to any spring-themed celebration.
Furthermore, the appeal of these cake pops goes beyond their looks. They offer a perfect single-serving dessert, which is ideal for parties and gatherings, eliminating the need for cutting and plating. They are also incredibly versatile; in fact, you can customize the cake flavor, frosting, and colors to suit any preference. Whether you’re filling an Easter basket, setting up a dessert buffet, or looking for a fun baking project to do with the kids, these eye-catching treats are sure to be a crowd-pleaser. Their unique design is guaranteed to draw compliments and add a touch of whimsy to your holiday.
Print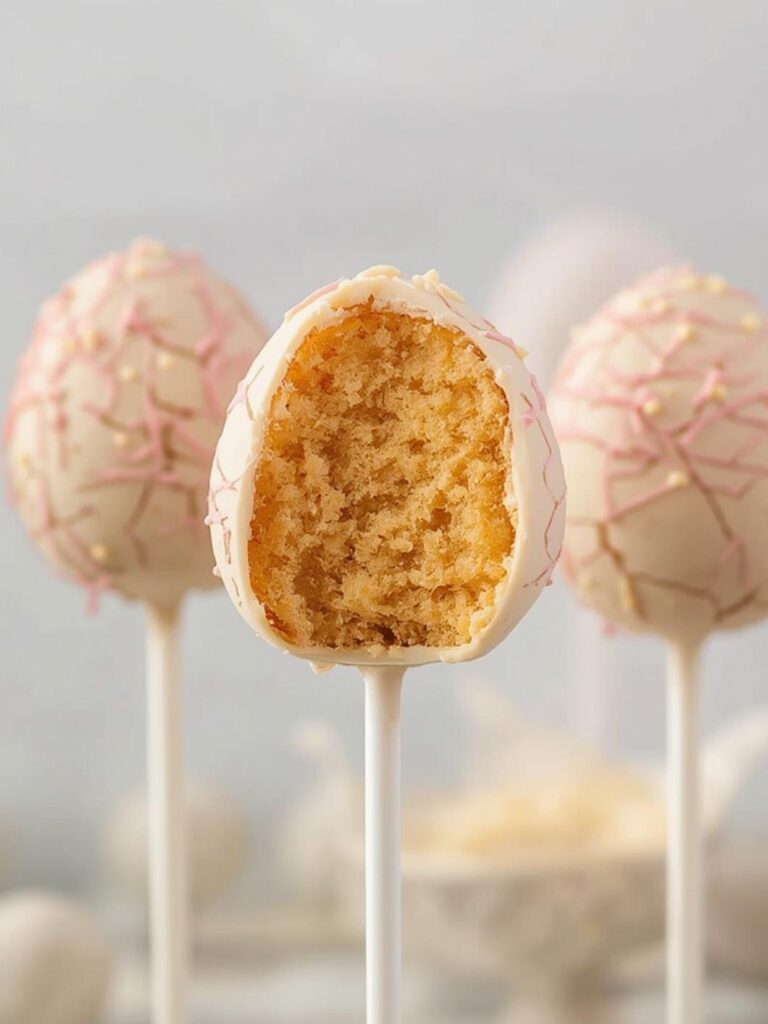
Cracked Easter Egg Cake Pops
Create stunning, bite-sized Easter treats with a moist cake center, shaped like eggs, and decorated with a unique crackle effect. These cake pops are a delicious and beautiful centerpiece for any spring celebration.
- Total Time: 3 hours
- Yield: 36 cake pops
Ingredients
One standard-sized box of cake mix (vanilla, white, or funfetti), baked and cooled
1/2 to 3/4 cup vanilla buttercream frosting
1 (12-ounce) bag of white candy melts
Several bags of pastel-colored candy melts (e.g., light pink, baby blue, mint green)
Oil-based or gel food coloring in a contrasting color (e.g., gold, brown, or black)
1 to 2 tablespoons vegetable shortening or coconut oil, as needed
Lollipop sticks (6-inch)
Instructions
1. Crumble the completely cooled cake into a large mixing bowl until it resembles fine crumbs.
2. Add frosting to the crumbs, starting with 1/2 cup, and mix until a dough-like consistency forms.
3. Scoop and roll the mixture into balls, then gently taper one end to create an egg shape.
4. Place shaped eggs on a parchment-lined baking sheet and chill in the refrigerator for 30-60 minutes or freezer for 15-20 minutes until firm.
5. Melt the white candy melts in the microwave, adding shortening to thin if necessary.
6. Dip the tip of a lollipop stick into the melted white candy, then insert it halfway into a chilled cake egg.
7. Submerge the entire cake pop into the white candy melts to coat it fully, tap off excess, and place in a stand to dry completely.
8. In a separate bowl, melt a pastel-colored candy melt.
9. Add a tiny drop of contrasting gel food coloring to the pastel candy and swirl once or twice with a toothpick.
10. Quickly dip a white-coated cake pop into the swirled color, twisting as you pull it out to create a crackle effect.
11. Return the finished cake pop to the stand to dry completely before serving.
Notes
Ensure your cake mixture is not too moist, as this can cause the pops to fall off the sticks. For a smooth coating, thin candy melts with shortening, not water. Store finished cake pops in an airtight container at room temperature for up to 3 days.
- Prep Time: 45 minutes
- Cook Time: 35 minutes
- Category: Dessert
- Method: Baking
- Cuisine: American
Nutrition
- Serving Size: 1 cake pop
- Calories: 185
- Sugar: 22g
- Sodium: 90mg
- Fat: 10g
- Saturated Fat: 5g
- Unsaturated Fat: 5g
- Trans Fat: 0g
- Carbohydrates: 24g
- Fiber: 0.5g
- Protein: 1.5g
- Cholesterol: 20mg
Essential Ingredients and Tools for Your Project
Before you begin your baking adventure, it’s important to gather all the necessary supplies. Having everything ready will make the process much smoother and more enjoyable. Therefore, we’ve broken down what you’ll need into two simple lists: ingredients and tools.
Ingredients You’ll Need
The beauty of this recipe is its flexibility. You can use a boxed cake mix for convenience or your favorite from-scratch recipe. Similarly, store-bought frosting works just as well as homemade. Here is a list of the basic components:
- Cake: One standard-sized box of cake mix (vanilla, white, or funfetti work beautifully for a classic taste) or a fully baked 9×13 inch homemade cake.
- Frosting: About 1/2 to 3/4 cup of canned or homemade vanilla buttercream frosting. You’ll use this as a binder for the cake crumbs.
- White Candy Melts: A 12-ounce bag of white candy melts will serve as the base coat for your eggs.
- Colored Candy Melts: Several bags of pastel-colored candy melts, such as light pink, baby blue, mint green, and pale yellow.
- Oil-Based or Gel Food Coloring: A small amount of a contrasting color, like gold, brown, or even black, is essential for creating the crackle effect. It’s crucial to use oil-based or gel coloring, as water-based coloring will cause the candy melts to seize.
- Vegetable Shortening or Coconut Oil: One to two tablespoons, to be used as needed for thinning the candy melts to the perfect dipping consistency.
- Lollipop Sticks: Standard 6-inch cake pop sticks are perfect for this project.
Tools for Success
You don’t need any highly specialized equipment to make these cake pops, but a few key tools will make the process significantly easier. Most of these are likely already in your kitchen.
- Large Mixing Bowl: For crumbling the cake and mixing it with frosting.
- Baking Sheet: A standard cookie sheet lined with parchment paper is necessary for chilling the shaped cake eggs.
- Microwave-Safe Bowls: You will need several deep, microwave-safe bowls or mugs for melting the different colors of candy melts.
- Spatula: For mixing and scraping the bowls.
- Cake Pop Stand: A stand is the best way to allow the cake pops to dry without smudging. Alternatively, a block of styrofoam or even a cardboard box with holes poked in it will work.
- Toothpicks: Useful for swirling the food coloring into the candy melts and for popping any air bubbles in the coating.
Step-by-Step Instructions for Perfect Cracked Easter Egg Cake Pops
Now that you have your ingredients and tools, it’s time for the fun part. Just follow these steps carefully for a flawless result. Remember, patience is key, especially during the chilling and dipping stages.
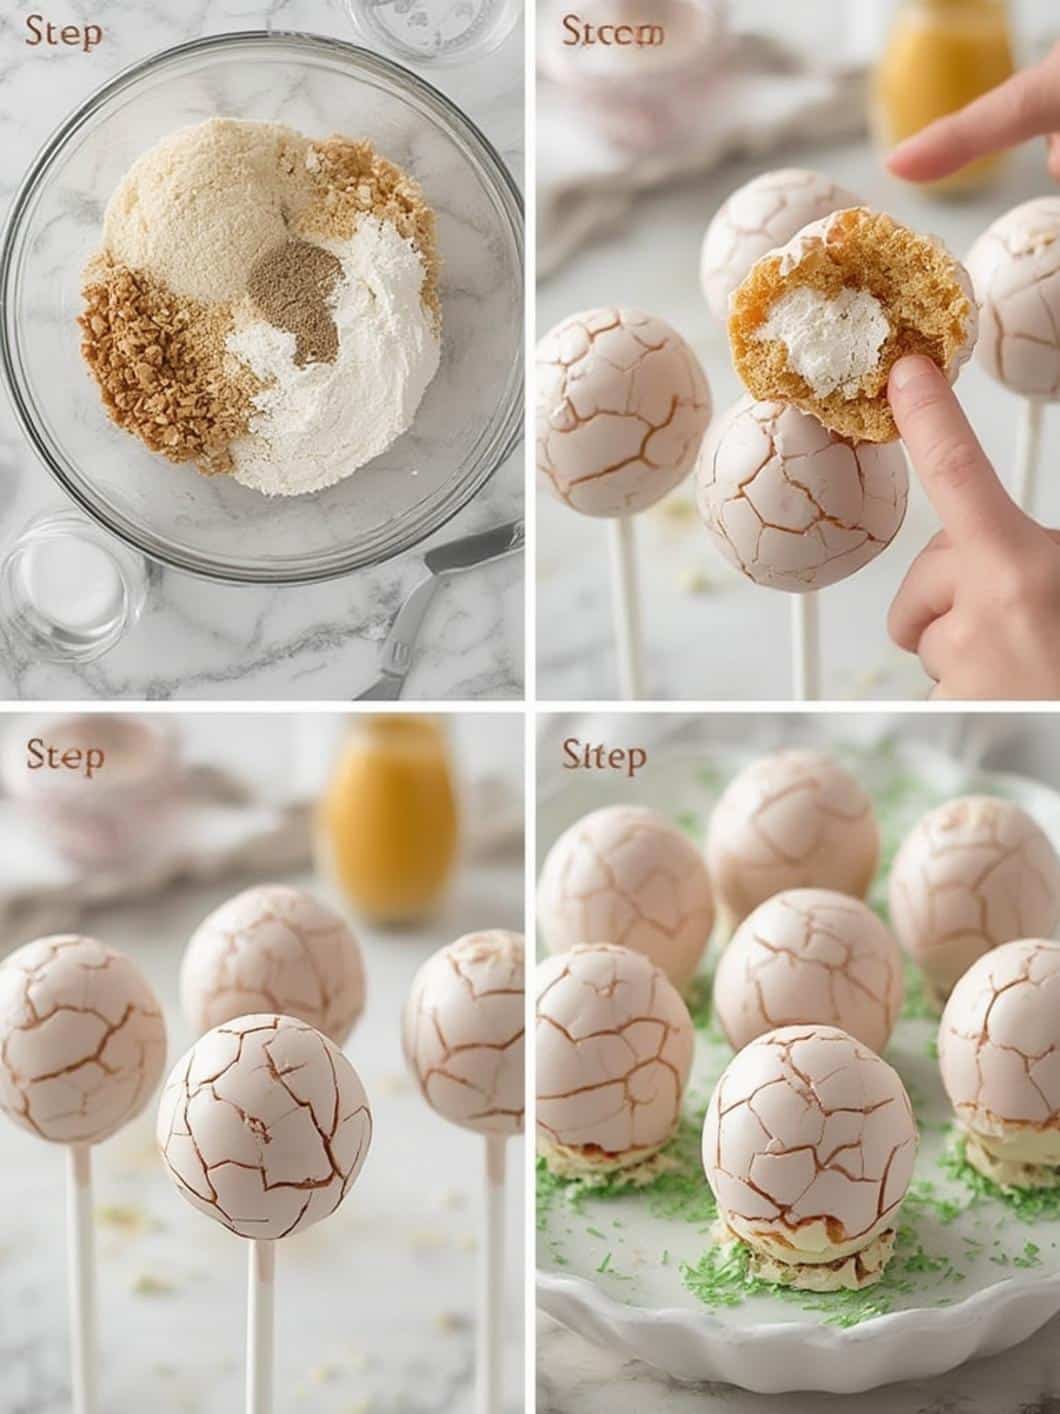
Step 1: Prepare the Cake Mixture
First and foremost, you need to prepare your cake base. Bake your chosen cake according to the recipe or package directions. Once it’s finished baking, you must let it cool completely on a wire rack. Subsequently, once cooled, crumble the entire cake into your large mixing bowl until it resembles fine crumbs. You can do this with your hands or a fork. Next, begin adding the frosting. Start with about half a cup and mix it thoroughly into the crumbs. The goal is to achieve a dough-like consistency that holds its shape when pressed together. You can test this by squeezing a handful; if it sticks together without being overly sticky or greasy, it’s ready. Add more frosting, one tablespoon at a time, only if necessary. Over-saturating the cake with frosting can cause the cake pops to be too soft and fall off the sticks.
Step 2: Shape and Chill the Eggs
With your cake mixture ready, it’s time to shape the eggs. Using a cookie scoop for uniform size, take a portion of the mixture and roll it between your palms into a ball. Then, gently taper one end to create a classic egg shape. Place each formed egg onto your parchment-lined baking sheet. Once all the eggs are shaped, transfer the baking sheet to the refrigerator to chill for at least 30-60 minutes, or into the freezer for about 15-20 minutes. This step is absolutely critical, as it helps the cake pops firm up, which will prevent them from falling apart during the dipping process. Do not skip the chilling.
Step 3: Apply the Base Coat
While the cake eggs are chilling, you can prepare your white candy melts. Place them in a deep, microwave-safe bowl and heat them in 30-second intervals, stirring in between, until they are completely melted and smooth. If the consistency is too thick, add a teaspoon of shortening or coconut oil and stir until smooth. Now, take your chilled cake eggs out. Dip the tip of a lollipop stick about half an inch into the melted white candy and then insert it into the bottom of a cake egg, pushing it about halfway through. This candy “glue” helps secure the cake to the stick. Immediately dip the entire cake pop into the white candy melts, ensuring it is fully covered. Gently tap the stick against the rim of the bowl to allow any excess candy to drip off. Finally, place the finished pop upright in your cake pop stand to dry completely.
Step 4: Create the Crackle Effect
Once the white base coat on all your cake pops is completely firm to the touch, you can create the signature crackle. Melt your chosen pastel-colored candy melts in a separate bowl, again thinning with shortening if needed. Next, add a tiny drop of your contrasting gel food coloring (like gold or brown) into the melted color. Using a toothpick, gently swirl the color through the melts just once or twice. You want to create veins of color, not mix it in completely. Now, take a white-coated cake pop and quickly dip it into the swirled color, twisting it as you pull it out. The swirled color will transfer onto the white base, creating a stunning cracked egg effect. This technique is similar to the one used for these fun Easter Egg Oreo Balls. Place the pop back in the stand to set. Repeat with the remaining cake pops, adding more swirls of color as needed.
Tips and Tricks for Flawless Cake Pops
Making cake pops can sometimes be tricky, but with a few expert tips, you can avoid common pitfalls and ensure your Cracked Easter Egg Cake Pops turn out perfectly every time. Following these suggestions will undoubtedly help you achieve professional-looking results.
Preventing Cake Pops from Falling Off the Stick
This is one of the most common issues when making cake pops. To prevent this, first, ensure your cake ball mixture isn’t too moist. Too much frosting will make them heavy and unstable. Second, always chill the shaped eggs thoroughly before dipping. A firm, cold cake pop is much less likely to slide off. Lastly, do not forget the crucial step of dipping the stick in melted candy before inserting it into the cake ball. This creates a strong anchor.
Achieving the Perfect Candy Melt Consistency
The texture of your melted candy is key to a smooth, beautiful coating. Always melt your candy melts slowly to avoid scorching them. If they seem too thick for dipping, stir in a small amount of vegetable shortening or coconut oil until you reach a fluid, smooth consistency. Never add water or any water-based liquids, as this will cause the candy to seize up and become unusable. For another delightful Easter treat that uses a similar coating, consider trying these Strawberry Shortcake Easter Egg Bombs.
Storing Your Creations Safely
Your finished Cracked Easter Egg Cake Pops can be stored in an airtight container at room temperature for up to three days. If you need to keep them fresh for longer, you can store them in the refrigerator for up to a week. If refrigerating, let them sit at room temperature for about 20 minutes before serving to allow the coating to soften slightly. For detailed guidance on food safety, reputable sources like the Mayo Clinic provide excellent information on proper food handling.
Why You’ll Absolutely Love This Recipe
There are so many reasons to fall in love with making and sharing these adorable treats. Besides being delicious, they offer a unique and rewarding baking experience that is perfect for the Easter season.
- They Are Visually Stunning: The unique cracked-shell design is incredibly eye-catching and looks far more complicated to make than it actually is. Your friends and family will be thoroughly impressed.
- It’s a Fun Family Activity: From crumbling the cake to rolling the eggs and dipping them in colorful coatings, this is a fantastic recipe to get the whole family involved, especially kids. In fact, baking together can be a wonderful bonding and educational experience, as highlighted by health resources like Healthline.
- Completely Customizable: You have total creative freedom. Experiment with different cake and frosting flavors like red velvet with cream cheese or lemon cake with lemon frosting. Moreover, you can use any color palette you desire to match your Easter decor.
- The Perfect Homemade Gift: Instead of buying candy, why not gift something made with love? You can wrap these Cracked Easter Egg Cake Pops individually in cellophane bags tied with a festive ribbon for a beautiful and personal homemade Easter gift.
Conclusion

In conclusion, creating Cracked Easter Egg Cake Pops is a delightful way to add a personal and creative touch to your holiday celebration. This recipe transforms simple ingredients into an edible work of art that is as fun to make as it is to eat. By following the detailed steps for preparing the cake, shaping the eggs, and mastering the special crackle-coating technique, you can easily produce a batch of impressive treats. Remember to be patient, especially with the chilling and drying times, as these steps are crucial for success. Ultimately, these cake pops are a fantastic project for bakers of all skill levels and a perfect way to make this Easter extra sweet and memorable for everyone.
Frequently Asked Questions
Why did my candy coating crack after drying?
A true crack in the candy shell (not the decorative effect) usually happens when the cake ball is too cold when dipped into the warm candy. The drastic temperature change can cause the shell to crack as it sets. To avoid this, let your chilled cake pops sit at room temperature for just a few minutes before dipping to take the intense chill off.
Can I use regular chocolate instead of candy melts?
You can, but it’s a bit more challenging. Regular chocolate chips or baking chocolate require tempering to set properly with a nice snap and shine. Candy melts are designed to melt easily and set hard without tempering, which makes them much more beginner-friendly for projects like this.
How far in advance can I make these Cracked Easter Egg Cake Pops?
You can make them up to a week in advance if you store them properly. Keep them in a single layer in an airtight container in the refrigerator. For the best taste and texture, allow them to come to room temperature for about 20-30 minutes before serving.