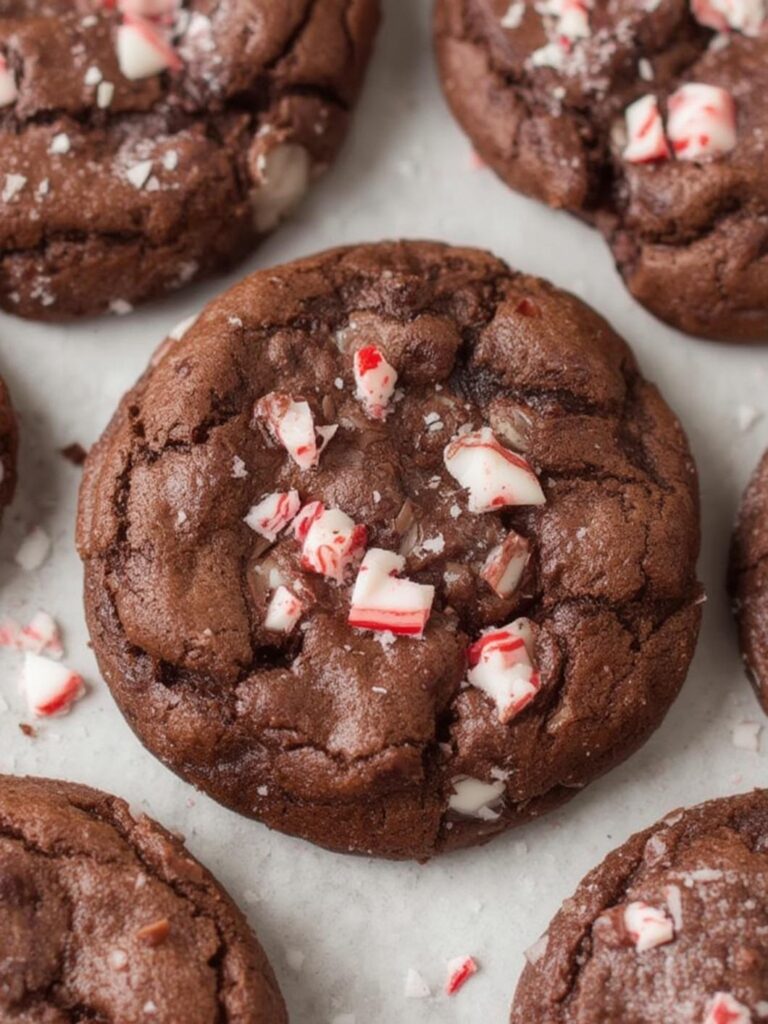
Welcome to the ultimate guide for creating the most decadent and festive treat of the season! If you’re searching for a dessert that perfectly combines the rich, fudgy goodness of a brownie with the refreshing zing of peppermint, then you’ve come to the right place. These Chocolate Peppermint Brownie Cookies are everything you could want in a holiday cookie. In fact, they are chewy on the inside, slightly crisp on the outside, and packed with a deep chocolate flavor that is beautifully complemented by cool peppermint. Consequently, they are a guaranteed crowd-pleaser for holiday parties, cookie exchanges, or simply a cozy night in. This recipe will guide you through every simple step, ensuring you get perfect, crinkle-topped cookies every single time. So, let’s preheat those ovens and get ready to bake some holiday magic!
Why You’ll Absolutely Love Chocolate Peppermint Brownie Cookies
There are countless reasons why these cookies will quickly become a new holiday tradition in your home. Beyond their incredible taste, they offer a unique and satisfying baking experience. Here are just a few reasons this recipe stands out:
- The Perfect Texture: First and foremost, these cookies master the coveted brownie texture. They boast a fudgy, dense center and delicate, crinkly tops, offering a truly melt-in-your-mouth experience that is different from a standard chocolate cookie.
- Classic Holiday Flavor: The combination of rich chocolate and cool peppermint is the quintessential taste of the holiday season. Furthermore, the crushed candy canes on top add a delightful crunch and an extra burst of minty freshness.
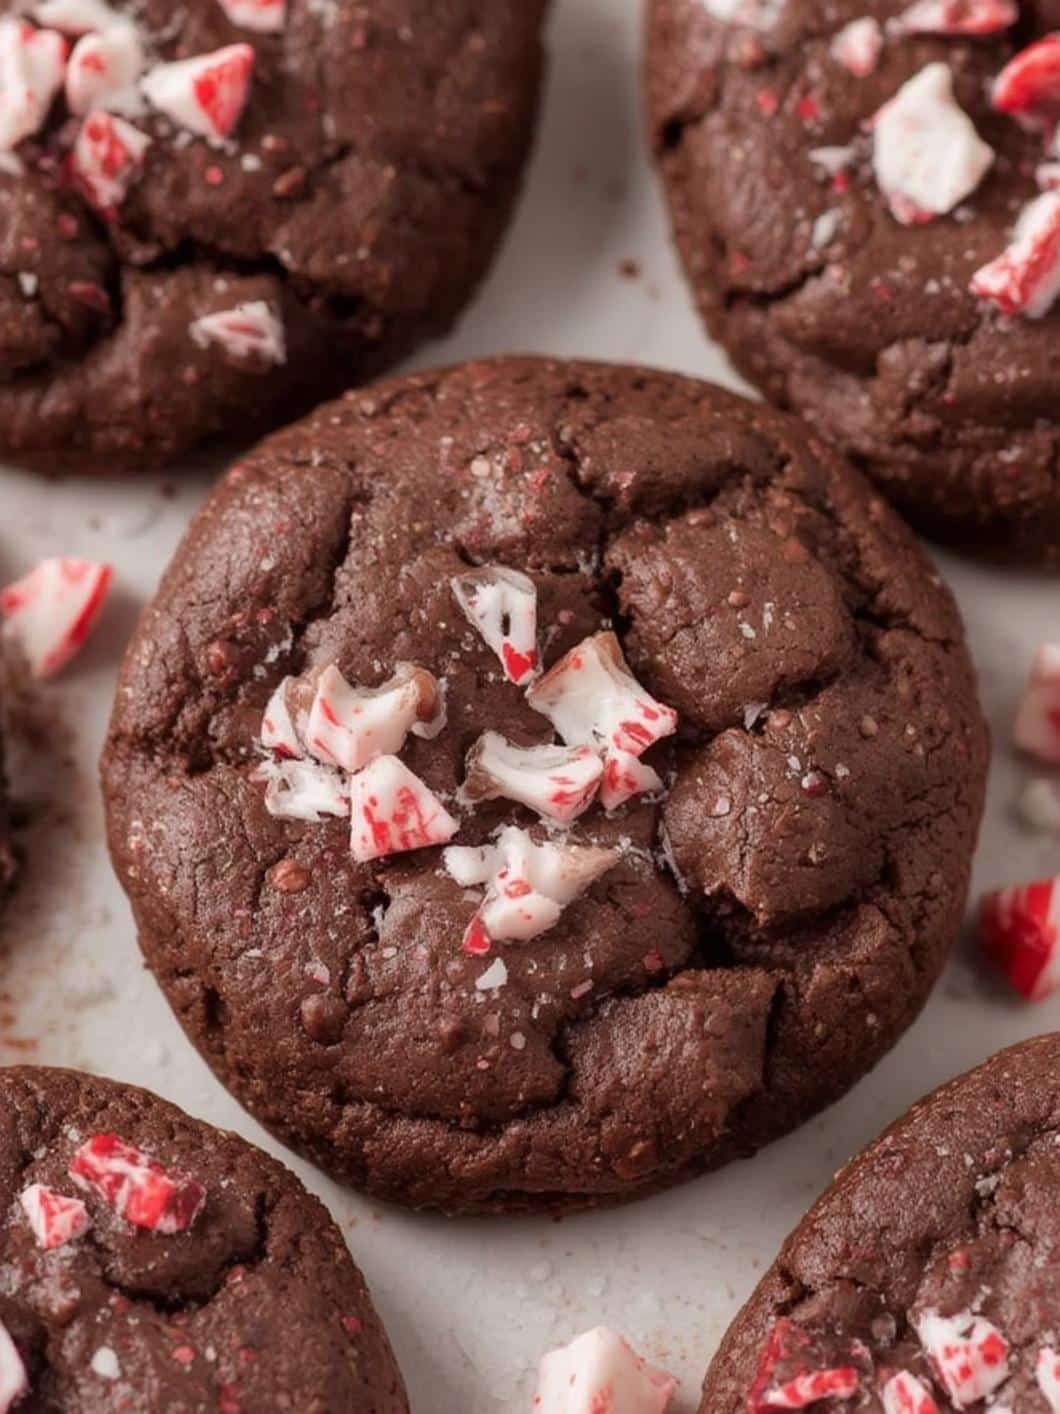
- Visually Stunning: With their dark, glossy surface and sparkling red and white peppermint pieces, these cookies are as beautiful as they are delicious. As a result, they look absolutely stunning on a holiday dessert platter.
- Surprisingly Simple: Although they look and taste like they came from a gourmet bakery, this recipe is straightforward and uses common pantry ingredients. Therefore, even novice bakers can achieve spectacular results.
Chocolate Peppermint Brownie Cookies: The 12 Ultimate Steps to Festive Perfection
Rich, fudgy brownie-style cookies infused with peppermint and topped with crushed candy canes — the perfect festive treat for chocolate lovers during the holiday season.
- Total Time: 1 hour
- Yield: 24 cookies 1x
Ingredients
For the Cookie Dough:
1/2 cup unsalted butter
1 1/2 cups semi-sweet chocolate chips
3/4 cup granulated sugar
1/4 cup light brown sugar
2 large eggs
1 teaspoon peppermint extract
3/4 cup all-purpose flour
1/4 cup unsweetened cocoa powder
1/2 teaspoon baking powder
1/4 teaspoon salt
For the Topping:
1/2 cup crushed candy canes or peppermint candies
Instructions
1. Preheat the oven to 350°F (175°C) and line two baking sheets with parchment paper.
2. In a microwave-safe bowl, melt the butter and chocolate chips in 30-second intervals, stirring until smooth. Set aside to cool slightly.
3. In a large bowl, whisk together the eggs, granulated sugar, and brown sugar for 2–3 minutes until thick and pale.
4. Gradually add the slightly cooled chocolate mixture into the egg mixture, whisking until fully combined.
5. Stir in the peppermint extract.
6. In a separate bowl, sift together the flour, cocoa powder, baking powder, and salt.
7. Gently fold the dry ingredients into the wet mixture until just combined. Do not overmix.
8. Cover and chill the dough for at least 30 minutes to help the cookies hold their shape.
9. Using a cookie scoop, drop 1.5-tablespoon portions of dough onto the prepared baking sheets, spaced about 2 inches apart.
10. Sprinkle the tops with crushed candy canes.
11. Bake for 10–12 minutes, until the edges are set but the centers are still soft.
12. Cool the cookies on the baking sheet for 5–10 minutes before transferring to a wire rack.
13. Allow cookies to cool completely before storing or serving.
Notes
For best results, use high-quality chocolate and pure peppermint extract.
Whisking the eggs and sugar thoroughly is key to achieving glossy, crinkle-topped cookies.
Do not overbake — cookies should appear slightly underdone in the center when removed from the oven.
Chilling the dough helps control spreading and enhances the flavor.
Store in an airtight container for up to 5 days or freeze for up to 3 months.
- Prep Time: 20 minutes
- Cook Time: 12 minutes
- Category: Dessert
- Method: Baking
- Cuisine: American
- Diet: Vegetarian
Nutrition
- Serving Size: 1 cookie
- Calories: 180
- Sugar: 18g
- Sodium: 85mg
- Fat: 10g
- Saturated Fat: 6g
- Unsaturated Fat: 3g
- Trans Fat: 0g
- Carbohydrates: 22g
- Fiber: 1g
- Protein: 2g
- Cholesterol: 30mg
Essential Ingredients You’ll Need For Chocolate Peppermint Brownie Cookies
To create the best chocolate peppermint brownie cookies, it’s important to start with high-quality ingredients. Each component plays a crucial role in achieving that perfect fudgy texture and rich flavor. For this reason, gathering everything before you begin will make the process much smoother.
For the Cookie Dough
- Unsalted Butter: This provides the essential fat content for a rich, tender cookie. Using unsalted butter allows you to control the overall saltiness of the recipe.
- Semi-Sweet Chocolate Chips: The star of the show! Melting these into the butter creates the intensely chocolatey base. For a deeper flavor, you could even explore using dark chocolate, which, according to Healthline, may have several health benefits.
- Granulated Sugar & Brown Sugar: A combination of both sugars is key. Granulated sugar helps create those coveted crinkly tops, while brown sugar adds moisture and a slight caramel note, which results in a chewier cookie.
- Eggs: These act as a binder, holding all the ingredients together. In addition, they contribute to the cookies’ rich and chewy structure.
- All-Purpose Flour: This provides the structure for the cookies. Be sure to measure it correctly to avoid a dry or dense result.
- Unsweetened Cocoa Powder: This ingredient deepens the chocolate flavor, making the cookies extra rich and decadent.
- Baking Powder: A leavening agent that gives the cookies a slight lift, preventing them from being overly dense.
- Salt: A small amount of salt is crucial for balancing the sweetness and enhancing the overall chocolate flavor.
- Peppermint Extract: This infuses the dough with a cool, minty flavor that pairs perfectly with the chocolate. Be careful, as a little goes a long way!
For the Topping
- Crushed Candy Canes or Peppermint Candies: Sprinkled on top before baking, these melt slightly to create a beautiful, crunchy, and festive topping.
Step-by-Step Instructions for Chocolate Peppermint Brownie Cookies
Now, let’s get to the fun part! Following these detailed steps will ensure your cookies turn out perfectly. Take your time and enjoy the process of creating these wonderful holiday treats.
- Prepare Your Pans and Oven: First, preheat your oven to 350°F (175°C). Next, line two large baking sheets with parchment paper to prevent sticking and ensure easy cleanup.
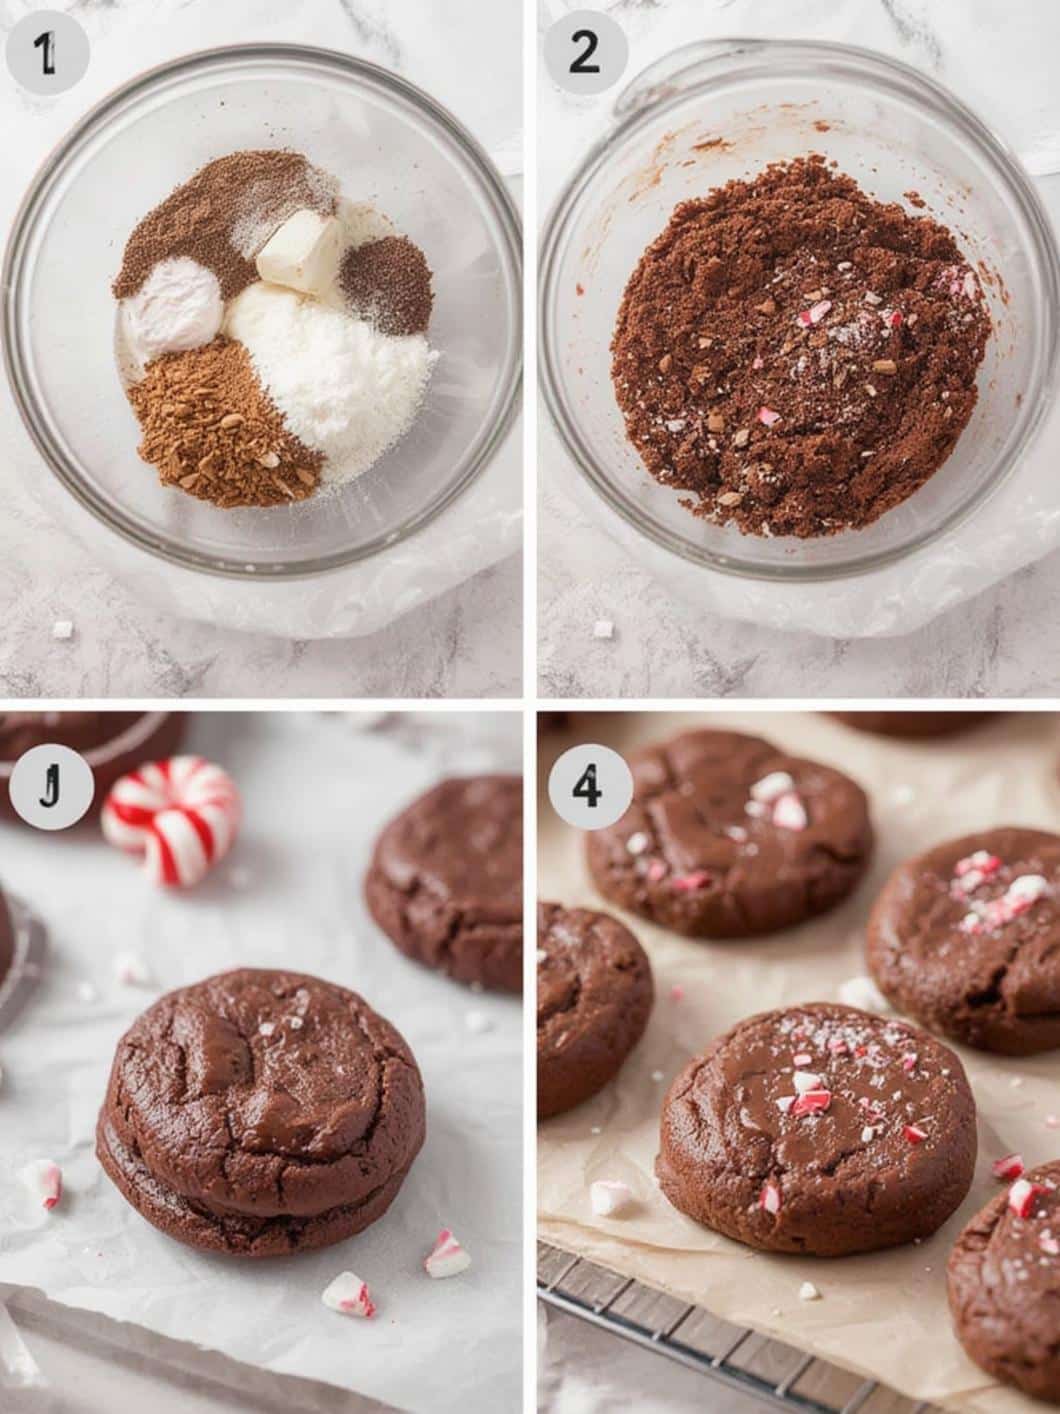
- Melt the Chocolate and Butter: In a medium microwave-safe bowl, combine the butter and semi-sweet chocolate chips. Microwave in 30-second intervals, stirring in between, until the mixture is completely melted and smooth. Then, set it aside to cool slightly.
- Whisk the Eggs and Sugars: In a separate large bowl, whisk together the eggs, granulated sugar, and brown sugar. Continue to whisk vigorously for about 2-3 minutes until the mixture is pale, thick, and airy. This step is crucial for achieving those signature crinkly tops.
- Combine Wet Ingredients: Gradually pour the slightly cooled chocolate-butter mixture into the egg and sugar mixture. Whisk until everything is well combined. After that, stir in the peppermint extract.
- Sift the Dry Ingredients: In another bowl, sift together the all-purpose flour, unsweetened cocoa powder, baking powder, and salt. Sifting helps to remove any lumps and aerates the ingredients, which leads to a more tender cookie.
- Combine Wet and Dry: Gently fold the dry ingredients into the wet ingredients using a rubber spatula. Mix only until just combined; be very careful not to overmix, as this can result in tough cookies.
- Chill the Dough (Optional but Recommended): For best results, cover the bowl with plastic wrap and chill the dough in the refrigerator for at least 30 minutes. This step helps the cookies hold their shape and deepens the flavor.
- Scoop the Dough: Using a medium cookie scoop (about 1.5 tablespoons), drop rounded balls of dough onto the prepared baking sheets. Make sure to leave about 2 inches of space between each cookie, as they will spread while baking.
- Add the Peppermint Topping: Generously sprinkle the tops of the cookie dough balls with the crushed candy canes. This adds a wonderful crunch and festive flair.
- Bake to Perfection: Place the baking sheets in the preheated oven and bake for 10-12 minutes. The edges should be set, but the centers should still be soft and fudgy.
- Cool on the Pan: Once baked, remove the cookies from the oven and let them cool on the baking sheet for about 5-10 minutes. This allows them to set up properly before you move them.
- Transfer to a Cooling Rack: Finally, carefully transfer the cookies to a wire rack to cool completely. They will continue to firm up as they cool.
Pro Tips for the Best Holiday Cookies
Want to take your chocolate peppermint brownie cookies from great to absolutely unforgettable? Here are a few expert tips and tricks that can make all the difference and ensure your baking is a sweet success.
Don’t Overmix the Dough
This is perhaps the most important tip for any brownie or cookie recipe. Once you add the dry ingredients to the wet, mix only until the flour streaks disappear. Overmixing develops the gluten in the flour, which can lead to a tough, cakey texture instead of a fudgy one. Consequently, a gentle hand is key.
Use High-Quality Ingredients
Since chocolate is the primary flavor, using a good quality brand of chocolate chips and cocoa powder will significantly impact the final taste. Similarly, pure peppermint extract will provide a much cleaner, more authentic flavor than an imitation version. These small upgrades truly elevate the final product.
Perfecting the Crinkle Top
The secret to that beautiful, shiny, crinkly top lies in whisking the eggs and sugar thoroughly. You want to whip enough air into the mixture so that it becomes pale and thick. This process helps create a meringue-like layer on top of the cookie that cracks during baking. For more festive baking inspiration, you might also enjoy these classic candy cane cookies.
Fun Variations and Proper Storage
While this classic recipe for Chocolate Peppermint Brownie Cookies is fantastic on its own, there’s always room for a little creativity. Moreover, knowing how to store them properly will keep them fresh and delicious for days.
Creative Variations to Try
- White Chocolate Drizzle: After the cookies have cooled completely, melt some white chocolate and drizzle it over the top for an elegant and tasty finishing touch.
- Add Chocolate Chunks: For an even more intense chocolate experience, fold in a cup of dark or semi-sweet chocolate chunks into the batter along with the dry ingredients.
- Espresso Powder: A teaspoon of instant espresso powder added with the cocoa powder will not make the cookies taste like coffee; instead, it will deepen and enhance the chocolate flavor. It’s a secret weapon for many bakers!
- Holiday Mix-Ins: If you’re feeling adventurous, consider adding other holiday favorites. For ideas on what to include, check out these Christmas kitchen sink cookies for inspiration.
Storing Your Cookies for Freshness
Proper storage is essential to maintain that perfect fudgy texture. To begin, allow the cookies to cool completely before storing them. Then, place them in an airtight container at room temperature. They will stay fresh for up to 5 days. For longer storage, you can freeze the baked cookies in a freezer-safe bag or container for up to 3 months. Simply let them thaw at room temperature before enjoying.
Conclusion About Chocolate Peppermint Brownie Cookies
In conclusion, this recipe for Chocolate Peppermint Brownie Cookies is a true holiday champion, offering the best of both worlds with its fudgy brownie core and festive minty crunch. By following the simple steps and tips outlined above, you can confidently create a batch of cookies that are sure to impress your friends and family. The rich chocolate flavor, combined with the cool peppermint and delightful texture, makes for an unforgettable treat. Ultimately, baking these cookies is a wonderful way to spread joy and get into the holiday spirit. We hope you enjoy every last bite of your homemade chocolate peppermint brownie cookies!
Frequently Asked Questions About Chocolate Peppermint Brownie Cookies
Can I use a boxed brownie mix for Chocolate Peppermint Brownie Cookies?
While this recipe is designed from scratch for a specific texture, you could potentially adapt a boxed brownie mix. However, you would likely need to adjust the ingredients to achieve a cookie consistency, perhaps by adding a bit more flour. For the best, most reliable results, we highly recommend following the from-scratch recipe.
Why didn’t my cookies get a crinkly top?
The key to the crinkly top is whipping enough air into the egg and sugar mixture at the beginning. Make sure you whisk it for at least 2-3 minutes until it’s visibly lighter in color and thicker. Additionally, ensuring your melted chocolate and butter mixture isn’t too hot when you add it can also help preserve the structure you created.
Can I make these cookies gluten-free?
Yes, you can likely make a gluten-free version of these cookies. You would need to substitute the all-purpose flour with a high-quality, 1-to-1 gluten-free baking flour blend that contains xanthan gum. The texture might be slightly different, but they should still be delicious. Always check the labels on your other ingredients, such as cocoa powder, to ensure they are certified gluten-free, as some may have cross-contamination risks.