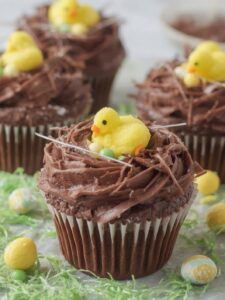
Spring is in the air, and with it comes the joy of Easter celebrations, family gatherings, and of course, delightful treats. If you’re looking for a baking project that’s as fun to make as it is to eat, you’ve come to the right place. These adorable Chocolate Nest Cupcakes with Candy Chicks are the perfect centerpiece for any spring-themed event. Combining a rich, moist chocolate cupcake with creamy frosting and a whimsical, crunchy nest, this recipe is a guaranteed crowd-pleaser for all ages. Furthermore, it’s a wonderfully creative activity to share with kids, allowing them to help decorate and bring these sweet little birds to life.
Why You’ll Love These Chocolate Nest Cupcakes with Candy Chicks
There are countless reasons to fall in love with this festive dessert. First and foremost, they are incredibly charming. The detailed little nests, complete with colorful candy eggs and a cheerful chick, capture the essence of spring and rebirth. Consequently, they make a stunning addition to any dessert table, sparking joy before anyone even takes a bite. Beyond their looks, these cupcakes offer a fantastic combination of flavors and textures. You begin with a deep, satisfying chocolate cupcake, which serves as the perfect foundation. This is then topped with a smooth chocolate buttercream that is both rich and decadent. Finally, the crunchy chow mein noodle nest provides a surprising and delightful textural contrast that elevates the entire experience.
In addition to their taste and appearance, these cupcakes are remarkably versatile. You can easily use your favorite from-scratch chocolate cupcake recipe or even a high-quality boxed mix if you’re short on time. Similarly, the decorating process is highly adaptable, allowing for plenty of creativity. This recipe is not just about the final product; it’s about the fun of creating something special. Therefore, it’s an ideal project for a weekend afternoon with the family, a school bake sale, or as a homemade gift for friends and neighbors during the Easter season.
Print
Chocolate Nest Cupcakes with Candy Chicks
Adorable and rich chocolate cupcakes topped with creamy chocolate frosting and a whimsical, crunchy chocolate nest, perfect for Easter and spring celebrations.
- Total Time: 1 hour 30 minutes
- Yield: 12 cupcakes
Ingredients
All-purpose flour
Granulated sugar
Unsweetened cocoa powder
Baking soda
Baking powder
Salt
Large eggs, at room temperature
Whole milk or buttermilk
Vegetable oil
Vanilla extract
Boiling water or hot coffee
Unsalted butter, softened
Powdered sugar
Semi-sweet chocolate chips
Chow mein noodles or thin pretzel sticks
Candy-coated chocolate eggs
Small candy chicks
Instructions
1. Preheat oven to 350°F (175°C) and line a 12-cup muffin tin.
2. In a large bowl, whisk together flour, sugar, cocoa powder, baking soda, baking powder, and salt.
3. In a separate bowl, whisk together eggs, milk, oil, and vanilla extract.
4. Pour the wet ingredients into the dry and mix until just combined, then stir in the boiling water until the batter is smooth.
5. Fill cupcake liners two-thirds full and bake for 18-22 minutes, then let cool completely on a wire rack.
6. To make the frosting, beat softened butter until creamy, then gradually mix in sifted powdered sugar and cocoa powder.
7. Add vanilla and milk to the frosting, then beat for 3-5 minutes until light and fluffy.
8. To make the nests, melt chocolate chips, stir in chow mein noodles until coated, and form small nest shapes on parchment paper.
9. Let the nests harden at room temperature or in the refrigerator for about 15-20 minutes.
10. Frost the cooled cupcakes, gently press a chocolate nest into the center of each, and decorate with candy eggs and a chick.
Notes
Use room temperature ingredients for a smoother batter. Hot coffee can be used in place of water to deepen the chocolate flavor. Ensure cupcakes are completely cool before frosting to prevent melting.
- Prep Time: 25 minutes
- Cook Time: 22 minutes
- Category: Dessert
- Method: Baking
- Cuisine: American
Nutrition
- Serving Size: 1 cupcake
- Calories: 420
- Sugar: 45g
- Sodium: 250mg
- Fat: 22g
- Saturated Fat: 12g
- Unsaturated Fat: 10g
- Trans Fat: 0g
- Carbohydrates: 55g
- Fiber: 3g
- Protein: 4g
- Cholesterol: 65mg
Essential Ingredients and Tools
Before you begin your baking adventure, it’s important to gather all your supplies. Having everything ready will make the process smooth and enjoyable. Consequently, you can focus on the fun parts, like decorating. Most of these ingredients are pantry staples, but you may need to pick up a few seasonal items.
For the Chocolate Cupcakes:
- All-purpose flour
- Granulated sugar
- Unsweetened cocoa powder
- Baking soda and baking powder
- Salt
- Large eggs, at room temperature
- Whole milk or buttermilk
- Vegetable oil
- Vanilla extract
- Boiling water or hot coffee
For the Frosting and Nest Topping:
- Unsalted butter, softened
- Powdered sugar
- Unsweetened cocoa powder
- Milk or heavy cream
- Vanilla extract
- Semi-sweet chocolate chips
- Chow mein noodles or thin pretzel sticks
- Candy-coated chocolate eggs (like Cadbury Mini Eggs)
- Small candy chicks
Necessary Kitchen Tools:
- 12-cup muffin tin
- Paper cupcake liners
- Large and medium mixing bowls
- Whisk and spatula
- Measuring cups and spoons
- Electric mixer (stand or handheld)
- Piping bag with a round or star tip (optional)
- Microwave-safe bowl
- Parchment paper
- Wire cooling rack
Step-by-Step Instructions
Now that you have your ingredients and tools, let’s get started on creating these delightful Chocolate Nest Cupcakes with Candy Chicks. Follow these steps carefully for a perfect result every time. Remember, baking should be fun, so take your time and enjoy the process.
Step 1: Bake the Chocolate Cupcakes
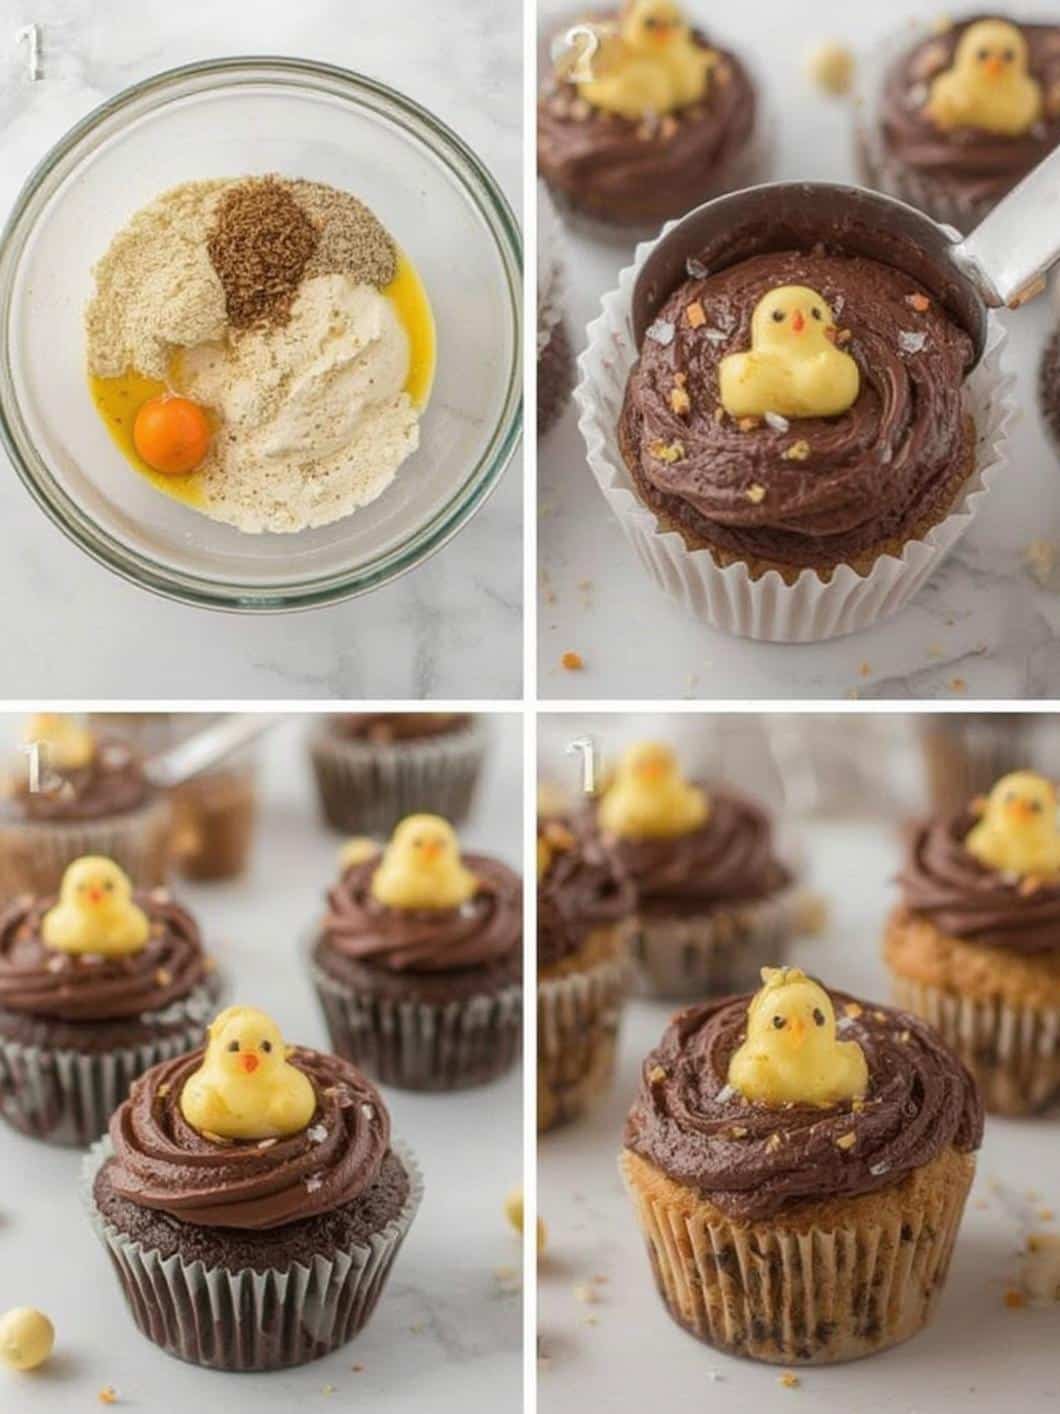
First, preheat your oven to 350°F (175°C) and line a 12-cup muffin tin with paper liners. In a large bowl, whisk together the flour, granulated sugar, cocoa powder, baking soda, baking powder, and salt. In a separate medium bowl, whisk the eggs, milk, oil, and vanilla extract until well combined. Next, pour the wet ingredients into the dry ingredients and mix until just combined; be careful not to overmix the batter. Finally, carefully pour the boiling water or hot coffee into the batter and whisk until smooth. The batter will be thin, which is exactly what you want for a moist cupcake. Fill each cupcake liner about two-thirds full and bake for 18-22 minutes, or until a wooden toothpick inserted into the center comes out clean. Let the cupcakes cool in the tin for a few minutes before transferring them to a wire rack to cool completely.
Step 2: Prepare the Chocolate Buttercream Frosting
While the cupcakes are cooling, you can prepare the delicious chocolate frosting. In the bowl of a stand mixer fitted with the paddle attachment, or in a large bowl with a handheld mixer, beat the softened butter on medium speed until it’s creamy and smooth. Sift the powdered sugar and cocoa powder together to remove any lumps. With the mixer on low speed, gradually add the sifted sugar and cocoa mixture to the butter. Once it’s mostly incorporated, increase the speed to medium and beat for another 2 minutes. Add the vanilla extract and 2 tablespoons of milk or cream. Continue to beat for another 3-5 minutes until the frosting is light and fluffy. If the frosting is too thick, add more milk one teaspoon at a time. Conversely, if it’s too thin, add more powdered sugar.
Step 3: Create the Chocolate Nests
This is where the magic really begins. Line a baking sheet with parchment paper. Place the semi-sweet chocolate chips in a microwave-safe bowl and heat them in 30-second intervals, stirring between each interval, until the chocolate is melted and smooth. Add the chow mein noodles or broken pretzel sticks to the melted chocolate and stir gently with a spatula until they are fully coated. Using two forks or your fingers, spoon small clumps of the chocolate-coated noodles onto the parchment paper. Shape them into small, nest-like circles, creating a slight indent in the center. Let the nests sit at room temperature or in the refrigerator for about 15-20 minutes, or until the chocolate has fully hardened.
Step 4: Assemble Your Cupcakes
Once the cupcakes are completely cool and the nests are firm, it’s time to assemble your creations. You can either spread the chocolate frosting onto each cupcake with an offset spatula or use a piping bag for a more decorative look. A simple swirl is all you need. Next, gently press one chocolate nest onto the center of each frosted cupcake. Finally, place 2-3 candy eggs inside the nest and top it off with an adorable candy chick. Your Chocolate Nest Cupcakes with Candy Chicks are now ready to be admired and enjoyed!
Tips and Tricks for Success
To ensure your cupcakes turn out perfectly, here are a few expert tips. For instance, using room temperature ingredients like eggs and milk helps the batter mix together more evenly, resulting in a smoother, more uniform texture. When making the cupcake batter, using hot coffee instead of boiling water can deepen the chocolate flavor, a trick many professional bakers use. For another delicious chocolate Easter treat, you could also try these Bunny Ear Chocolate Tartlets.
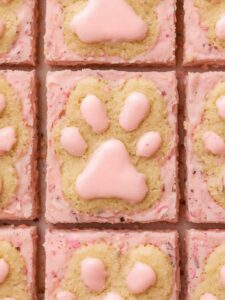
When it comes to frosting, patience is key. You must wait until the cupcakes are 100% cool before you even think about frosting them. Otherwise, the warmth from the cupcakes will melt the butter in the frosting, creating a soupy mess. For the nests, if you find the chocolate is setting too quickly, you can briefly reheat it in the microwave. If you’re looking for another fun, nest-themed dessert, these Marshmallow Peep Nest Brownies are a fantastic alternative.
Fun Variations and Dietary Swaps
This recipe is a wonderful starting point, but feel free to get creative with it. For example, you can add a pinch of espresso powder to both the cupcake batter and the frosting to enhance the chocolate flavor. Alternatively, you could toast some shredded coconut and dye it green with food coloring to use as “grass” under the nests for an extra pop of color. For a different flavor profile altogether, try a peanut butter frosting instead of chocolate.
For those with dietary restrictions, this recipe can be easily adapted. To make gluten-free Chocolate Nest Cupcakes with Candy Chicks, simply substitute the all-purpose flour with a high-quality 1-to-1 gluten-free baking flour blend. For a dairy-free version, use a plant-based butter substitute, dairy-free milk like almond or soy milk, and ensure your chocolate chips are dairy-free. Speaking of chocolate, dark chocolate often contains beneficial antioxidants, as noted by researchers on sites like Healthline. Therefore, using high-quality dark chocolate for your nests can add a little health boost to your treat.
Storing Your Adorable Creations
Proper storage is essential to keep your cupcakes fresh and looking their best. Once assembled, these cupcakes should be stored in an airtight container. They can be kept at room temperature for up to two days, provided your home isn’t too warm. If you need them to last longer, you can store them in the refrigerator for up to four days. However, it’s best to bring them back to room temperature before serving, as this allows the cake and frosting to soften for the best texture.
If you want to prepare parts of the recipe in advance, you certainly can. The chocolate cupcakes can be baked, cooled, and stored in an airtight container at room temperature for up to two days. Likewise, the chocolate nests can be made ahead of time and kept in an airtight container. Then, all you need to do on the day of serving is make the frosting and assemble everything. Adhering to proper food storage techniques is crucial for safety, a topic often covered by health authorities such as the Mayo Clinic.
Conclusion

Baking these Chocolate Nest Cupcakes with Candy Chicks is a wonderfully rewarding experience that brings the cheerful spirit of spring right into your kitchen. From the rich chocolate base to the creative and crunchy nest topping, every element of this dessert is designed to delight. This recipe offers a fantastic opportunity to create lasting memories with family and friends, particularly with children who will love decorating their own little nests. As a result, you are left not only with a delicious treat but also with the joy of the creative process. So, this Easter, embrace the fun and whip up a batch of these unforgettable cupcakes to share with your loved ones.
Frequently Asked Questions
Can I use a boxed cake mix for this recipe?
Absolutely! If you’re short on time or simply prefer the convenience, a high-quality chocolate cake mix is a great substitute. Prepare the cupcakes according to the package directions, let them cool completely, and then proceed with the frosting and decorating steps as outlined.
What can I use instead of chow mein noodles for the nests?
If you can’t find chow mein noodles or want to try something different, there are several great alternatives. Thin pretzel sticks broken into small pieces work very well. You can also use shredded wheat cereal (like Frosted Mini-Wheats, crushed) or toasted, unsweetened shredded coconut for a different texture.
Where can I find the candy chicks and mini eggs?
Candy chicks, often made of marshmallow or sugar, and candy-coated mini eggs are seasonal items. You can typically find them in the Easter or seasonal aisle of most major grocery stores, drugstores, and big-box retailers in the weeks leading up to the holiday. If you love chick-themed treats, check out these Chubby Chick Lemon Cupcakes as well.
How far in advance can I make these cupcakes?
For the freshest taste and best texture, it’s ideal to assemble the cupcakes the day you plan to serve them. However, you can make the components ahead of time. The cupcakes can be baked up to two days in advance and stored in an airtight container. The chocolate nests can also be made two days ahead. Simply store them separately at room temperature and assemble with fresh frosting just before your event.