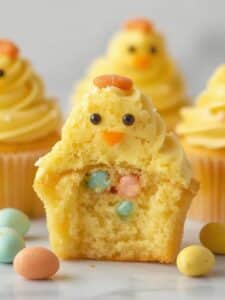
Easter is a time for celebration, family, and of course, delicious treats that capture the joy of spring. While classic desserts are always a hit, there’s something truly special about a treat with a surprise. Consequently, this recipe for Chick-Inside Easter Cupcakes is destined to become your new holiday favorite. These aren’t just ordinary cupcakes; they are an interactive and delightful experience for both kids and adults. Imagine biting into a moist, delicious cupcake to discover an adorable little candy chick hiding inside. As a result, this simple yet clever idea transforms a simple dessert into a memorable centerpiece for your Easter festivities.
Furthermore, creating these cupcakes is a fantastic activity to share with family. The process is straightforward, allowing even the youngest bakers to help with decorating. Whether you’re hosting an Easter brunch, contributing to a potluck, or just looking for a fun baking project, these Chick-Inside Easter Cupcakes deliver on both flavor and fun. In this guide, we will walk you through every step, from gathering your ingredients to decorating the final, perfect nest on top. Therefore, get ready to bring smiles to everyone’s faces with this irresistibly cute and tasty Easter surprise.
What Makes These Chick-Inside Easter Cupcakes So Special?
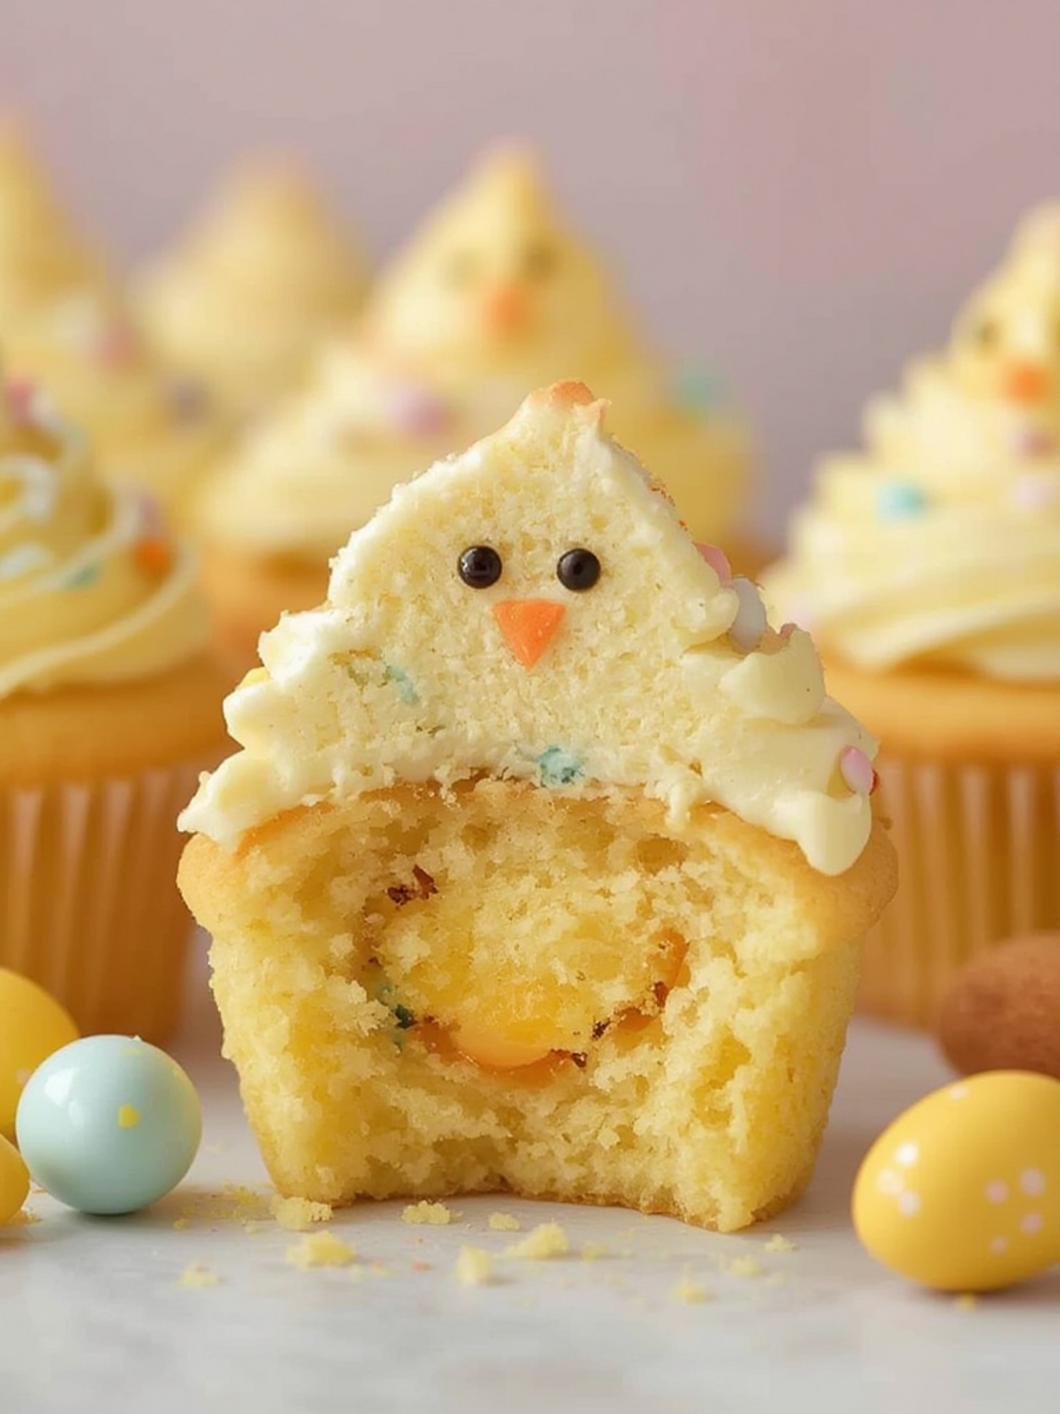
The magic of these cupcakes lies in the element of surprise. Unlike a standard decorated cupcake where all the artistry is on the surface, the true charm of the Chick-Inside Easter Cupcakes is hidden until the first bite. This reveal creates a moment of wonder and delight that is simply unmatched. Consequently, they become more than just a dessert; they are a conversation starter and a source of joy. The hidden chick turns a simple treat into an exciting discovery, making them particularly popular with children who love the treasure-hunt aspect.
In addition to the surprise, the visual appeal is undeniable. The top of each cupcake is frosted to look like a tiny, green grass nest, often complete with a few candy eggs. This design is not only festive but also hints at the secret held within. The combination of a moist, yellow-tinted cake (resembling an egg yolk), the sweet candy chick, and the creamy buttercream frosting creates a perfect balance of textures and flavors. Ultimately, these cupcakes are special because they engage multiple senses, from the sight of the charming nest to the delightful surprise of finding the chick inside.
Print
Chick-Inside Easter Cupcakes
These delightful Easter cupcakes feature a moist, yellow-tinted cake with a surprise candy chick hidden inside, all topped with green frosting to look like a tiny grass nest.
- Total Time: 1 hour 15 minutes
- Yield: 12 cupcakes
Ingredients
All-purpose flour
Granulated sugar
Unsalted butter, softened
Large eggs, room temperature
Whole milk
Vanilla extract
Baking powder
Salt
Yellow gel food coloring
Small candy chicks
Powdered sugar
Heavy cream or milk
Green gel food coloring
Optional: Toasted shredded coconut or chocolate sprinkles
Optional: Small candy eggs for decoration
Instructions
1. Preheat oven to 350°F (175°C) and line a 12-cup muffin tin.
2. Cream together butter and sugar, then beat in eggs and vanilla. In a separate bowl, whisk together flour, baking powder, and salt.
3. Alternate adding the dry ingredients and milk to the wet mixture until just combined, then mix in yellow food coloring.
4. Fill cupcake liners two-thirds full and bake for 18-22 minutes, or until a toothpick comes out clean. Let cool completely on a wire rack.
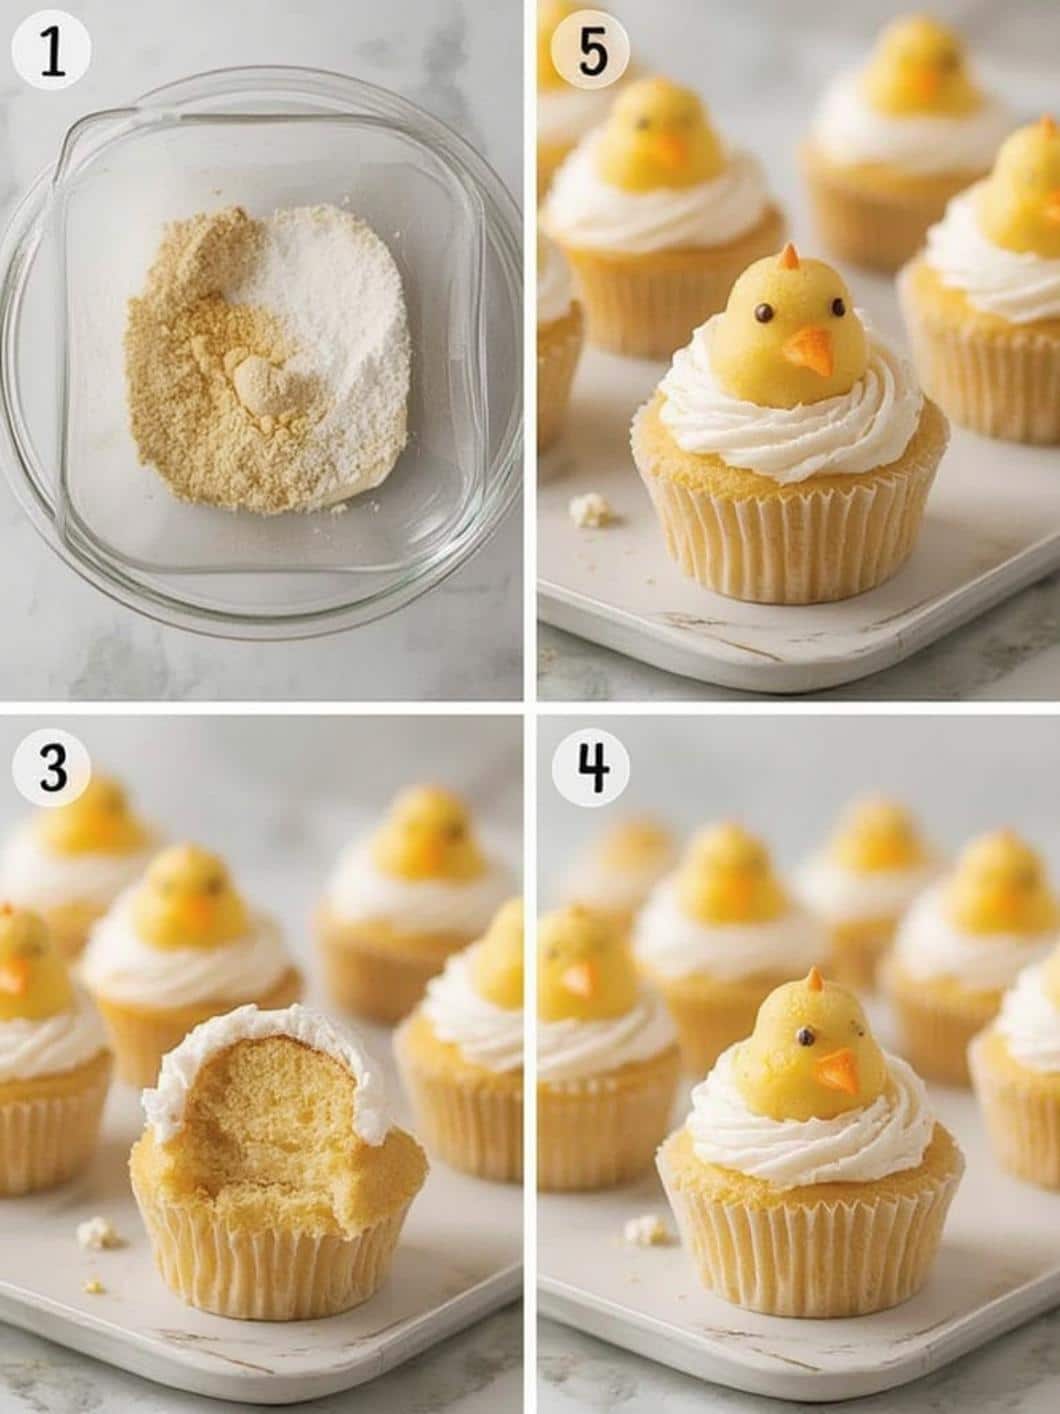
5. Once cool, use an apple corer or small knife to cut a small hole in the center of each cupcake.
6. Place one small candy chick inside each hollowed-out cupcake.
7. To make the frosting, beat softened butter until creamy, then gradually mix in powdered sugar, vanilla, and a tablespoon or two of milk until smooth.
8. Stir in green food coloring until the desired shade is reached.
9. Using a grass piping tip, pipe frosting over each cupcake to create a nest. Decorate with toasted coconut and candy eggs if desired.
Notes
Use gel food coloring for a more vibrant color. If you don’t have a grass piping tip, you can spread the frosting and use a fork to create a textured, nest-like surface. A boxed cake mix works as a great time-saver.
- Prep Time: 25 minutes
- Cook Time: 22 minutes
- Category: Dessert
- Method: Baking
- Cuisine: American
Nutrition
- Serving Size: 1 cupcake
- Calories: 360 kcal
- Sugar: 35g
- Sodium: 190mg
- Fat: 18g
- Saturated Fat: 11g
- Unsaturated Fat: 6g
- Trans Fat: 0g
- Carbohydrates: 48g
- Fiber: 1g
- Protein: 4g
- Cholesterol: 75mg
Gathering Your Ingredients and Tools
Before you begin your baking adventure, it’s essential to gather all the necessary ingredients and tools. Being prepared ensures a smooth and enjoyable process from start to finish. Therefore, take a moment to check your pantry and drawers. For this recipe, we’ll be making a classic vanilla cupcake with a vibrant twist, a simple yet delicious buttercream frosting, and of course, the secret chick center.
For the Cupcakes
The foundation of this treat is a light and fluffy vanilla cupcake. To give it that special “egg” effect, we will add a touch of yellow food coloring. You can certainly use your favorite from-scratch recipe or a high-quality boxed mix to save time.
- All-purpose flour
- Granulated sugar
- Unsalted butter, softened
- Large eggs, room temperature
- Whole milk
- Vanilla extract
- Baking powder
- Salt
- Yellow gel food coloring
For the Surprise Chick and Frosting
This is where the magic happens. The hidden chick and the decorative nest frosting bring the theme to life. For a healthier approach to holiday treats, it’s important to be mindful of sugar content, a point often emphasized by health resources like the Mayo Clinic.
- Small candy chicks (such as Peeps, but smaller candy versions work best)
- Unsalted butter, softened
- Powdered sugar
- Vanilla extract
- Heavy cream or milk
- Green gel food coloring
- Optional: Toasted shredded coconut or chocolate sprinkles for the nest
- Optional: Small candy eggs for decoration
Essential Baking Tools
Having the right tools on hand will make the assembly process much easier. While some items are essential, others, like the piping tip, have simple alternatives if you don’t have one.
- 12-cup muffin tin
- Cupcake liners
- Electric mixer (stand or handheld)
- Mixing bowls
- Measuring cups and spoons
- An apple corer or a small paring knife
- Piping bag
- Grass piping tip (e.g., Wilton #233)
- Wire cooling rack
Step-by-Step Instructions
Now that you have everything ready, it’s time to create these adorable Chick-Inside Easter Cupcakes. Follow these steps carefully for a perfect result that will impress your guests. Remember, baking should be fun, so enjoy the process!
First, preheat your oven to 350°F (175°C) and line your muffin tin with cupcake liners. In a large bowl, cream together the softened butter and granulated sugar until light and fluffy. Next, beat in the eggs one at a time, followed by the vanilla extract. In a separate bowl, whisk together the flour, baking powder, and salt. Then, gradually add the dry ingredients to the wet ingredients, alternating with the milk, until just combined. Finally, add a few drops of yellow food coloring and mix until the batter is a uniform, sunny yellow color.
Next, fill each cupcake liner about two-thirds full with the yellow batter. Bake for 18-22 minutes, or until a toothpick inserted into the center comes out clean. Once baked, transfer the cupcakes to a wire rack to cool completely. This step is crucial; attempting to core or frost warm cupcakes will result in a crumbly mess. Patience is key for a clean final product.
Once the cupcakes are completely cool, it’s time to create the cavity for the surprise. Using an apple corer, press down into the center of each cupcake and pull out a small core of cake. Alternatively, you can use a small paring knife to carefully cut a cone-shaped piece from the center. Be sure not to go all the way to the bottom. After that, gently place one small candy chick into each hollowed-out cupcake. It should fit snugly inside.
Now, prepare the frosting. In a large bowl, beat the softened butter until creamy. Gradually add the powdered sugar, mixing on low speed until combined, then increase the speed and beat until smooth. Add the vanilla extract and a tablespoon or two of milk or cream to reach a smooth, pipeable consistency. Subsequently, add green food coloring until you achieve your desired shade of grass green. For a more varied look, you can try different shades.
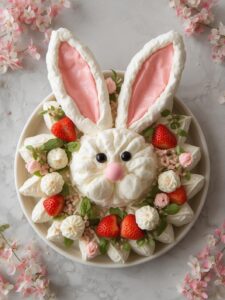
Finally, it’s time to decorate. Transfer the green frosting to a piping bag fitted with a grass tip. Pipe the frosting over the top of each cupcake, starting from the outside and working your way in to cover the hole completely. Create a small dip in the center to form a nest shape. To complete the look, you can sprinkle some toasted coconut or chocolate sprinkles into the nest. Additionally, place a few small candy eggs in the center for an extra festive touch. If you’re looking for more cupcake ideas, these Fluffy Bunny Butt Cupcakes are another hilarious and adorable option for your Easter celebration.
Tips and Tricks for Flawless Cupcakes
To ensure your Chick-Inside Easter Cupcakes turn out perfectly every time, here are a few professional tips and tricks. These small adjustments can make a big difference in the final appearance and taste of your festive treats. For instance, the choice of candy and the technique for frosting can elevate your cupcakes from good to great.
Choosing the Right Candy Chick
The size of your candy chick is very important. You need one that is small enough to fit inside the cored cupcake without being crushed. Many brands sell miniature marshmallow chicks around Easter, which are ideal. However, if you can only find larger ones, you may need to trim them slightly to fit. Ensure the candy is firm enough to hold its shape inside the cupcake.
Achieving the Perfect “Yolk” Color
When adding yellow food coloring to the batter, it’s best to use a gel-based color. Gels are more concentrated than liquid food colorings, so you’ll need less to achieve a vibrant hue without altering the consistency of the batter. Start with just a drop or two, mix thoroughly, and then add more if needed until you reach a bright, sunny yellow that resembles an egg yolk.
Frosting Like a Pro
The grass piping tip is what creates the signature nest look. To use it effectively, hold the piping bag straight up, gently squeeze to release some frosting, and then pull straight up quickly. Repeat this motion all over the cupcake to create “blades” of grass. If you don’t have a grass tip, don’t worry. You can spread a layer of green frosting on the cupcake and then gently press the tines of a fork into it to create a textured, nest-like surface. After frosting, adding toasted coconut not only adds to the nest aesthetic but also provides a delightful flavor and crunch.
Storage and Make-Ahead Advice
These cupcakes can be prepared in stages to make your holiday baking less stressful. The cupcakes can be baked, cooled, and stored in an airtight container at room temperature for up to two days before you core and fill them. However, it’s best to frost them on the day you plan to serve them for the freshest taste and appearance. Once fully assembled, store the cupcakes in a single layer in an airtight container in the refrigerator. For more make-ahead Easter ideas, you might also enjoy these beautiful Speckled Easter Egg Sugar Cookies.
Conclusion
These Chick-Inside Easter Cupcakes are more than just a dessert; they are a delightful experience that brings an extra layer of joy and surprise to your holiday celebration. By following this simple guide, you can create a memorable treat that looks as amazing as it tastes. The combination of moist, yellow-tinted cake and a hidden candy chick is a surefire way to charm guests of all ages. Furthermore, the creative process itself offers a wonderful opportunity for family bonding. Ultimately, making these Chick-Inside Easter Cupcakes is a fantastic way to add a personal, homemade touch to your Easter festivities. We hope this recipe inspires you to get creative in the kitchen and make this Easter the sweetest one yet.
Frequently Asked Questions
Can I make these cupcakes ahead of time?
Yes, you can definitely prepare parts of this recipe in advance. The cupcakes can be baked and stored in an airtight container at room temperature for up to two days. However, for the best results, it is recommended that you wait to core, fill, and frost them on the day you plan to serve them to ensure the frosting is fresh and the cake is moist.
What if I don’t have a grass piping tip?
No problem at all! If you don’t have a grass piping tip, you can still create a beautiful nest effect. Simply frost the cupcakes with a spatula or knife, and then use a fork to gently pull up the frosting, creating a textured look. Another great option is to frost the cupcake smoothly and then generously cover it with toasted coconut dyed green to mimic grass.
Can I use a boxed cake mix for this recipe?
Absolutely! A boxed cake mix is a great time-saver. Just prepare the batter according to the package directions and add the yellow food coloring as instructed in the recipe. The most important parts are the surprise inside and the nest decoration, which work perfectly with any cupcake base.
My candy chick is too big for the hole. What should I do?
If your candy chick is slightly too large, you have a couple of options. You can use a slightly larger coring tool or knife to make the hole a bit wider. Alternatively, if the candy is soft like a marshmallow, you can gently squeeze it to fit. If it’s a hard candy, you might need to find a smaller alternative or carefully trim the candy chick if possible. When baking with children, always ensure proper supervision, especially when using knives, a key food safety tip recommended by experts at WebMD.