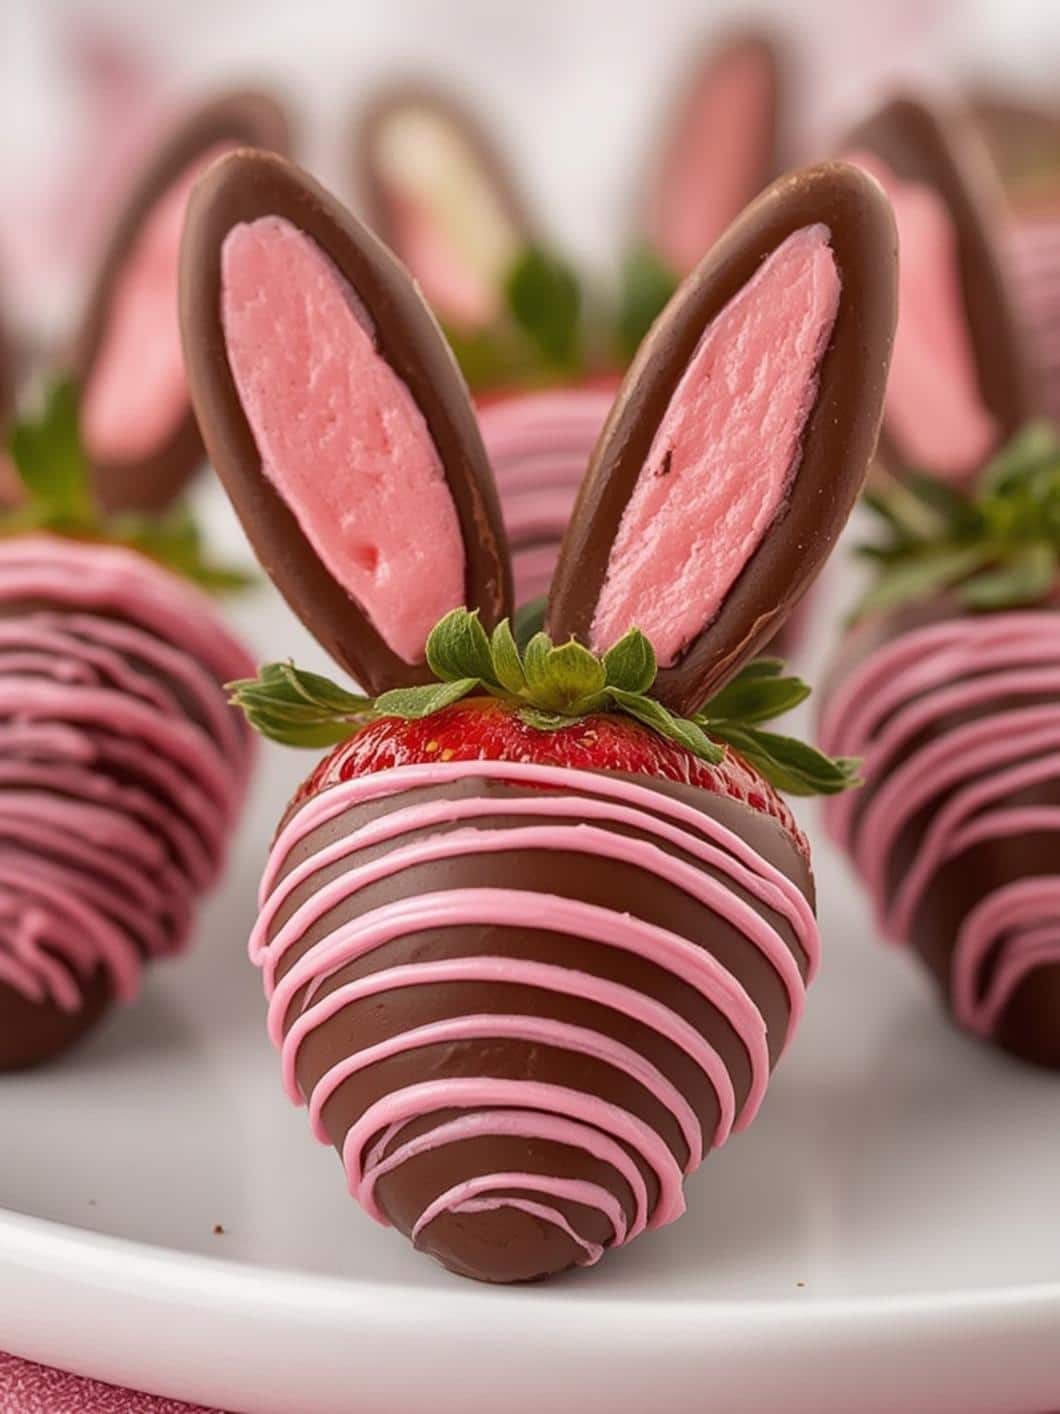
Get ready to hop into spring with the most adorable and delicious treat you’ll see all season! These Bunny Ear Chocolate-Dipped Strawberries are the perfect combination of fresh, juicy fruit and sweet, creamy chocolate. Not only are they incredibly cute, but they are also surprisingly simple to make. Consequently, they are an ideal project for a fun family activity or a show-stopping addition to your Easter dessert table. Whether you’re a seasoned baker or just looking for a festive and easy recipe, these charming bunny strawberries are guaranteed to bring a smile to everyone’s face. In addition, they require no baking, which makes them a fantastic choice for a quick yet impressive dessert.
Why You’ll Absolutely Love This Recipe
There are countless reasons to fall in love with these delightful treats, but their charm goes far beyond their cute appearance. First and foremost, they offer a perfect balance of flavors. The natural sweetness and slight tartness of a ripe strawberry pair wonderfully with rich, smooth white chocolate. Furthermore, this recipe is incredibly versatile. You can easily customize it with different types of chocolate or add your own creative flair with sprinkles and other decorations. For example, you can create a whole family of bunnies using milk, dark, and white chocolate.
Another major benefit is that this is a no-bake dessert. As a result, you don’t need to turn on your oven, which is especially welcome as the weather gets warmer. This also makes it a fantastic recipe for getting kids involved in the kitchen. They can help with dipping the strawberries and adding the little bunny faces, making for a memorable and fun family activity. Ultimately, these Bunny Ear Chocolate-Dipped Strawberries are more than just a dessert; they’re a centerpiece, a conversation starter, and a sweet way to celebrate the season.
Print
Bunny Ear Chocolate-Dipped Strawberries
Adorable and delicious bunny ear chocolate-dipped strawberries, a perfect no-bake treat for spring and Easter celebrations. This simple recipe combines fresh, juicy strawberries with creamy white chocolate.
- Total Time: 50 minutes
- Yield: 12 strawberries
Ingredients
Fresh, large strawberries
White chocolate melting wafers
Pink candy melts
Black decorating icing or mini chocolate chips
Instructions
1. Line baking sheets with parchment paper, then wash and completely dry strawberries.
2. Melt small amounts of white and pink chocolates separately and transfer to piping bags.
3. On parchment paper, pipe white chocolate ovals for ears, add a pink line in the center, and refrigerate for 10-15 minutes until firm.
4. Melt the remaining white chocolate, dip each strawberry three-quarters of the way, and place on the prepared baking sheet.
5. Before the chocolate on the strawberries sets, gently press two hardened ears into the top of each strawberry.
6. Use the pink chocolate to pipe a tiny dot for a nose and add two eyes using black icing or mini chocolate chips.
7. Let the decorated strawberries set completely at room temperature or in the refrigerator for 15-20 minutes.
Notes
Ensure strawberries are completely dry before dipping to prevent the chocolate from seizing. If using chocolate chips instead of wafers, add a teaspoon of coconut oil for a smoother consistency. They are best enjoyed within 48 hours.
- Prep Time: 20 minutes
- Cook Time: 30 minutes
- Category: Dessert
- Method: No-Bake
- Cuisine: American
Nutrition
- Serving Size: 1 strawberry
- Calories: 65
- Sugar: 7g
- Sodium: 5mg
- Fat: 4g
- Saturated Fat: 2.5g
- Unsaturated Fat: 1.5g
- Trans Fat: 0g
- Carbohydrates: 8g
- Fiber: 0.5g
- Protein: 0.5g
- Cholesterol: 2mg
Essential Ingredients and Tools for Your Bunny Berries
Before you begin creating your adorable strawberry bunnies, it’s important to gather all your supplies. Having everything ready to go makes the process smooth and enjoyable. Thankfully, the list is short and features simple items you can find at any grocery store.
Key Ingredients
The quality of your ingredients will directly impact the final taste, so it’s best to choose fresh and high-quality options. Here is what you will need:
- Fresh Strawberries: Look for large, uniformly shaped strawberries with bright green leaves. The size and shape are important for creating a nice canvas for the bunny face and ears.
- White Chocolate Melting Wafers: These are highly recommended because they are designed to melt smoothly and set up firmly with a nice shine. They make the dipping process much easier than using regular chocolate chips.
- Pink Candy Melts: These will be used for the inner part of the bunny ears and the cute little nose. Alternatively, you can use a small amount of the melted white chocolate mixed with a drop of oil-based pink food coloring.
- Black Decorating Icing or Mini Chocolate Chips: These are for the bunny’s eyes. A fine-tipped tube of black icing works perfectly, but mini chocolate chips pressed into the white chocolate before it sets also look great.
Necessary Tools
You don’t need any fancy equipment to make these treats. In fact, most of these tools are likely already in your kitchen.
- Baking Sheets: You’ll need one or two baking sheets to place the dipped strawberries and chocolate ears on while they set.
- Parchment Paper or Wax Paper: This is crucial for preventing the chocolate from sticking to the baking sheet.
- Microwave-Safe Bowls: You’ll need at least two small, deep bowls for melting the white and pink chocolate.
- Piping Bags or Small Plastic Baggies: These are essential for creating the delicate bunny ears and facial features. If you don’t have piping bags, a small zip-top bag with a tiny corner snipped off works just as well.
- Toothpicks or Skewers: These can be helpful for dipping the strawberries and for adding fine details like the eyes and nose.
Step-by-Step Instructions
Now for the fun part! Follow these simple steps to create your own batch of Bunny Ear Chocolate-Dipped Strawberries. Remember to take your time and enjoy the creative process.
Step 1: Prepare Your Workstation and Strawberries
First, line your baking sheets with parchment paper. Then, gently wash the strawberries under cool water and pat them completely dry with a paper towel. This step is extremely important; any moisture on the berries can cause the melted chocolate to seize and become lumpy. Therefore, ensure they are thoroughly dry before you proceed.
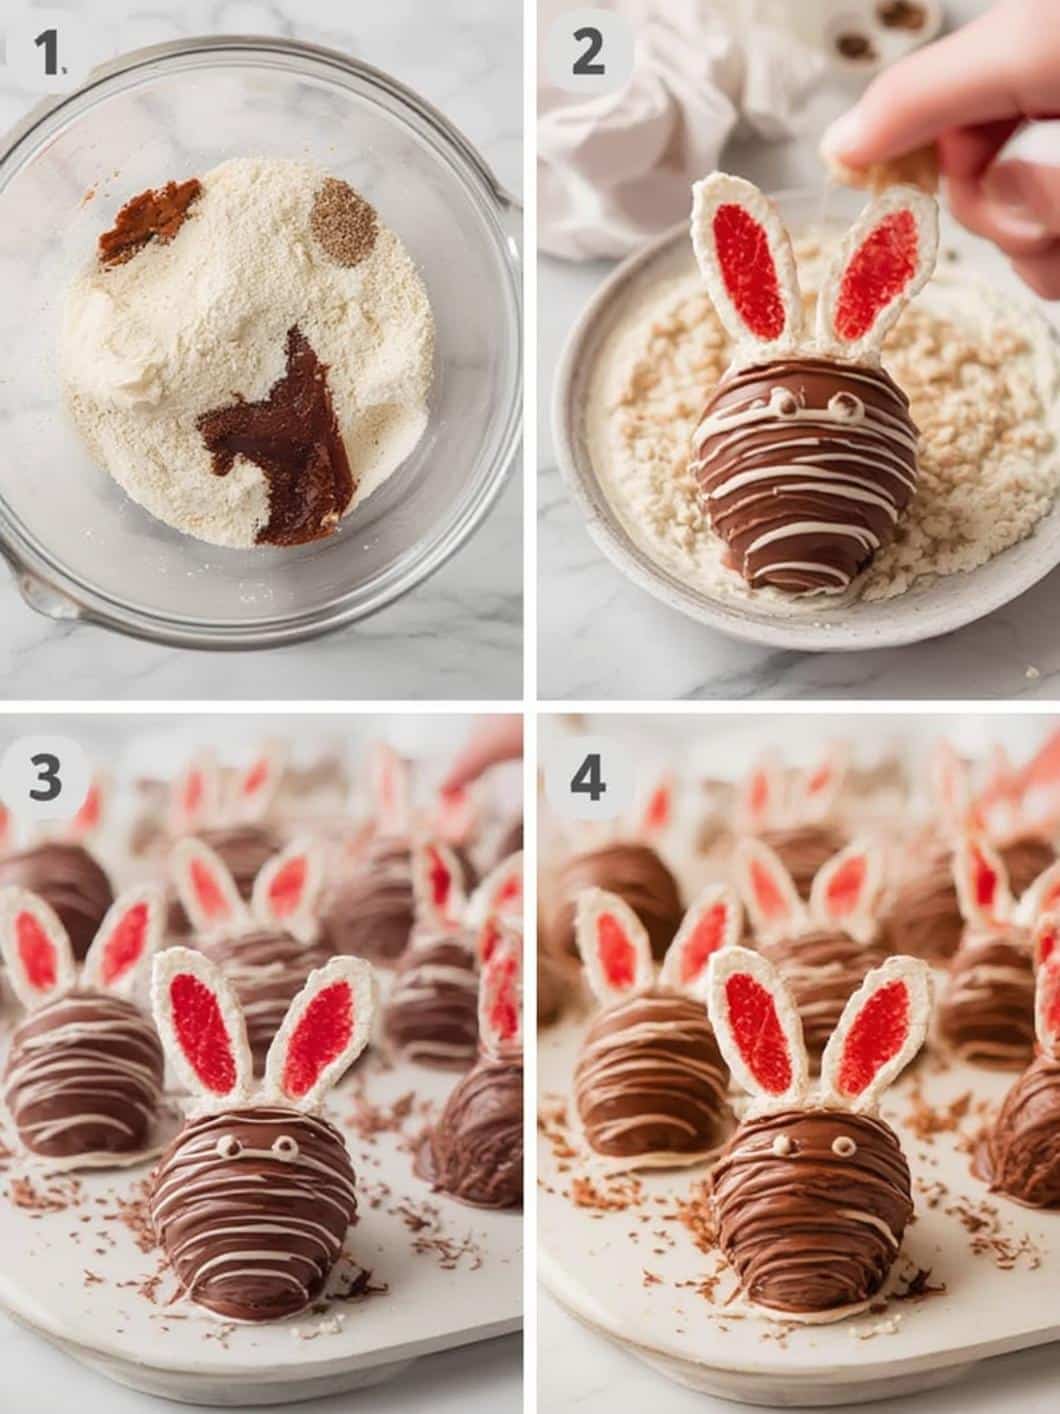
Step 2: Make the Bunny Ears
Next, melt a small amount of the white chocolate and the pink candy melts in separate microwave-safe bowls. Heat them in 30-second intervals, stirring in between, until they are smooth. Transfer the melted chocolates into their respective piping bags or plastic baggies. On a parchment-lined baking sheet, pipe out small, elongated ovals with the white chocolate to form the outer ear shape. Immediately after, pipe a smaller line of pink chocolate down the center of each white oval. Make at least two ears for every strawberry. Place the baking sheet in the refrigerator for about 10-15 minutes, or until the ears are completely firm.
Step 3: Melt the Chocolate and Dip the Strawberries
While the ears are chilling, melt the remaining white chocolate wafers in a microwave-safe bowl using the same 30-second interval method. Once the chocolate is completely smooth, hold a strawberry by its green leaves and dip it into the melted white chocolate, coating it about three-quarters of the way up. Gently shake off any excess chocolate and place the strawberry on the parchment-lined baking sheet. Repeat this process for all your strawberries.
Step 4: Attach the Ears and Add the Face
Before the white chocolate on the strawberries sets completely, carefully peel the hardened bunny ears off the parchment paper. Gently press two ears into the top of each strawberry, positioning them to look like a bunny. Next, use the pink chocolate to pipe a tiny dot for the nose. For the eyes, you can either use a toothpick dipped in a tiny bit of melted dark chocolate (if using), black icing, or gently press two mini chocolate chips into place. For an extra touch of cuteness, some people add a fluffy tail by attaching a piece of a mini marshmallow to the back with a dab of melted chocolate.
Step 5: Let Them Set
Finally, allow the finished Bunny Ear Chocolate-Dipped Strawberries to set completely. You can leave them at room temperature for about an hour, or for a faster result, place them in the refrigerator for 15-20 minutes. Once firm, they are ready to be served and admired!
Expert Tips for Perfect Bunny Strawberries
To ensure your bunny berries are picture-perfect every time, keep these professional tips in mind. A few small adjustments can make a big difference in the final outcome.
Choosing and Prepping Your Berries
The foundation of this recipe is the strawberry itself. Consequently, selecting the right ones is key. Opt for large, firm berries as they are easier to dip and provide a larger surface for decorating. Furthermore, look for strawberries with long, healthy-looking green stems, which serve as a natural handle for dipping. As mentioned before, they must be completely dry. Even a single drop of water can ruin your chocolate, so be meticulous with this step.
Achieving the Perfect Chocolate Consistency
The secret to a beautifully smooth chocolate coating is the melting process. Melting wafers are specifically formulated for this purpose, but if you must use chocolate chips, consider adding a teaspoon of coconut oil or vegetable shortening to the chips. This will help them melt more smoothly and create a thinner consistency for dipping. Additionally, be very careful not to overheat the chocolate, as this can cause it to become thick and clumpy. Slow and steady wins the race here.
Creative Customizations and Variations
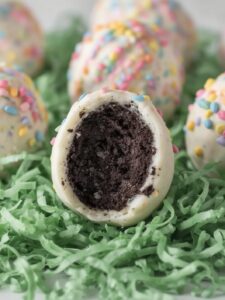
While the white chocolate bunny is a classic, don’t be afraid to get creative! You could make a whole patch of bunnies using different chocolates. For instance, dip some strawberries in milk chocolate and others in dark chocolate. You could also tint your white chocolate with other pastel, oil-based food colorings for a colorful display. For other festive and creative dessert ideas, you might also enjoy making these adorable Easter Egg Oreo Balls, which are another no-bake favorite.
The Sweet Health Benefits of This Treat
Indulging in a sweet treat doesn’t have to be a guilty pleasure, especially when it features fresh fruit. Strawberries are not only delicious but also packed with nutrients. According to the Mayo Clinic, fruits like strawberries are an excellent source of vitamins, fiber, and antioxidants. They are particularly high in vitamin C, which is essential for a healthy immune system.
Furthermore, if you choose to make a batch with dark chocolate, you’re adding even more health benefits. Dark chocolate with a high cocoa content is known for being rich in antioxidants and flavonoids, which can support heart health. Research highlighted by Healthline suggests that moderate consumption of dark chocolate may contribute to improved circulation and lower blood pressure. So, while these bunny strawberries are certainly a treat, they also offer some wholesome benefits. If you love strawberry-based desserts, consider trying these Strawberry Shortcake Easter Egg Bombs for another fruity and fun recipe.
Conclusion
In summary, creating these Bunny Ear Chocolate-Dipped Strawberries is a delightful way to add a personal and creative touch to your spring celebrations. With just a few simple ingredients and easy-to-follow steps, you can craft a treat that is as delicious as it is adorable. This recipe provides a wonderful opportunity to make lasting memories with family, especially when little ones help with the decorating. Ultimately, these bunnies are perfect for Easter brunches, spring parties, or simply as a special snack to brighten anyone’s day. Give this charming recipe a try and watch as these sweet little bunnies hop right off the plate and into the hearts of your guests.
Frequently Asked Questions
Can I use regular chocolate chips instead of melting wafers?
Yes, you can use regular chocolate chips, but the result might be slightly different. Melting wafers contain ingredients that help them melt smoothly and set to a harder finish. If you use chocolate chips, you may want to add about a teaspoon of coconut oil or shortening per cup of chips to help them thin out for easier dipping. Consequently, they may not set as firm as wafers.
How do I prevent my strawberries from “sweating” after being refrigerated?
Strawberries can release moisture after being dipped and refrigerated, which can make the chocolate shell a bit wet. To minimize this, ensure the strawberries are completely dry before dipping and try not to store them for too long. They are best enjoyed within 24 to 48 hours. Storing them in a single layer in an airtight container in the refrigerator can also help.
Why did my melted chocolate get thick and grainy?
This is a common issue called “seizing.” It typically happens when the chocolate comes into contact with a small amount of water or if it’s overheated. To prevent this, make sure all your bowls and utensils are perfectly dry and melt the chocolate slowly over low heat or in short intervals in the microwave, stirring frequently.